
Panart Gun Deck Section
1/23rd Scale


 Page Number
Oh all sorts of things, like...
Hammock Cranes, Netting, Gunport Lids
And A Quick & Dirty Ropewalk.
Whatcha gang!
Well then, today's little update sees yours truly
doing the usual fiddling about.
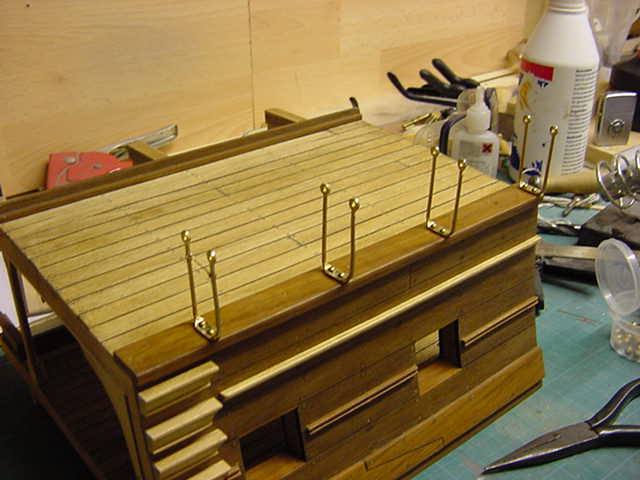
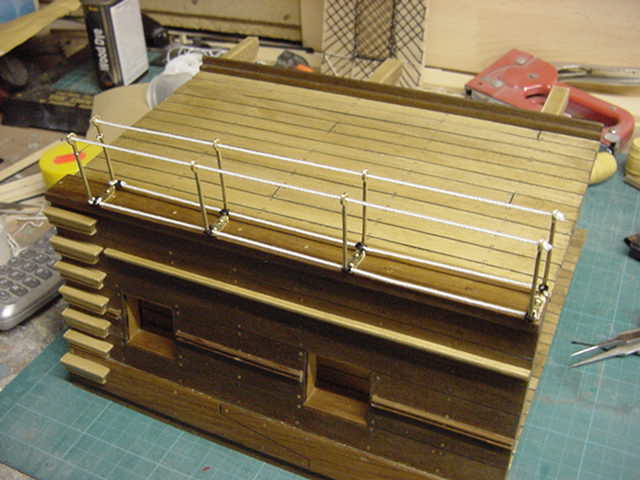
To begin with, the hammock cranes.
For those unfamiliar with such things,
these were 'U' shaped frames situated along the
planksheer of the ships sides.
idea was that with netting strung between them and the
resulting trough if you will,
was stuffed with rolled up hammocks.
Reason being to hopefully provide some protection to the crew on deck
from splinters thrown up from incoming cannon and small arms fire from opposing vessels.
Right, brief and none to exacting history lesson done, onward!
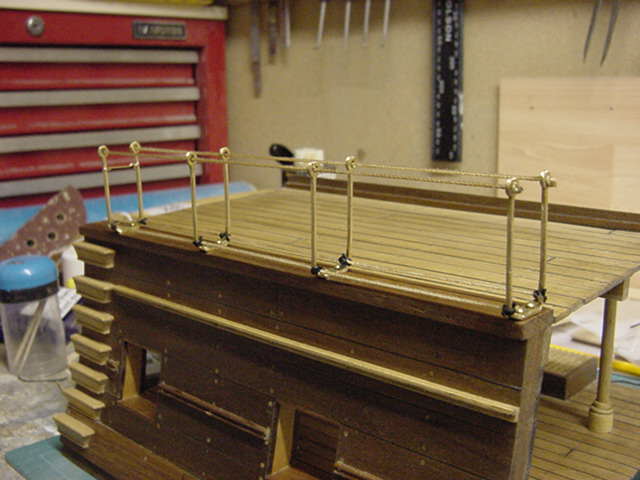
The brass castings supplied were cleaned up
and one had a hooking fitted as seems to be the case
on hammock cranes at the open end of the run.
After some wire bending and a dab of soldering here and there,
we got this.
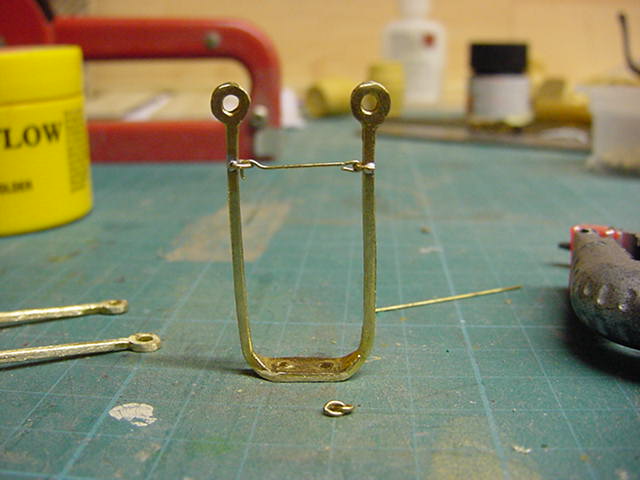
The rest were left open and after some hole drilling
and using the supplied nails,
the rest were placed as appropriate.
So now to the rope strung between the cranes to
which the netting will be lashed.
Now after a look through the supplied cordage and
a quick eyeball of me stock,
I found nothing of the right gauge for the task.
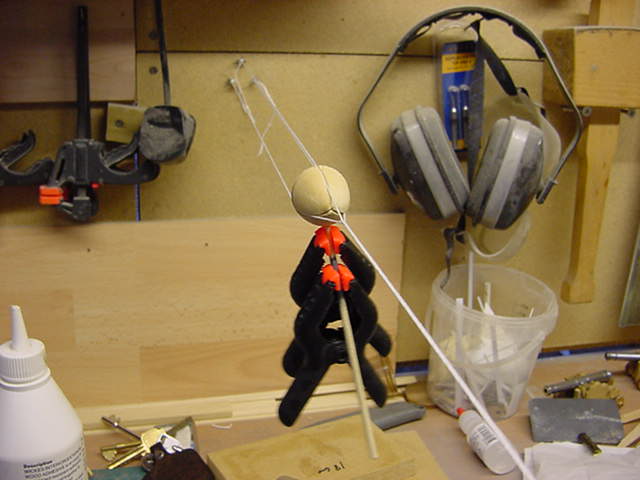
Well i'd been thinking about making a ropewalk...
that's a machine for winding your own scale rope
for those who don't know.
Same principle as the full size thing,
just google it if you are so inclined for full details,
here's my quick and dirty version which turned out
to be okedoke for this project.
So then, three strands of loose string purchased from
a local shop dealing in sewing stuff.
Always a new experience for shop staff when you get a
6'3" gorilla like me standing amongst a band of 5' nothing
grannies who just popped in to buy some wool
and have a natter.
Anyway...where was i?...oh yes.
Taking the thread and tying it to three hooks
duly screwed into a open patch of walling in the hellhole.
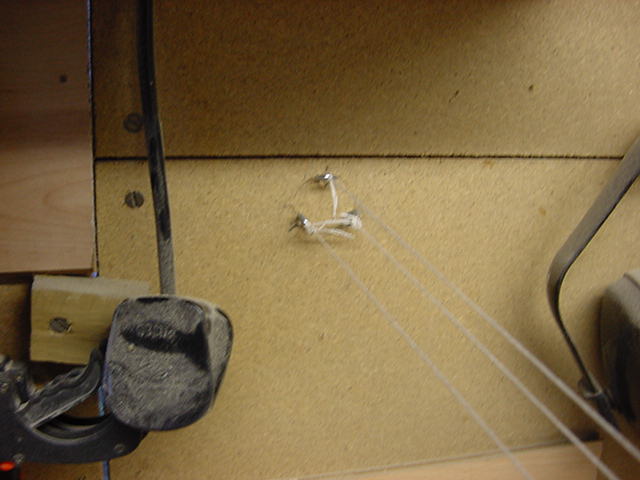
Then, in order to feed the thread along evenly,
A wood cone with three grooves in it.
Slapping a lump of broom handle in the
lathe and a bit of slicing work later we get this.
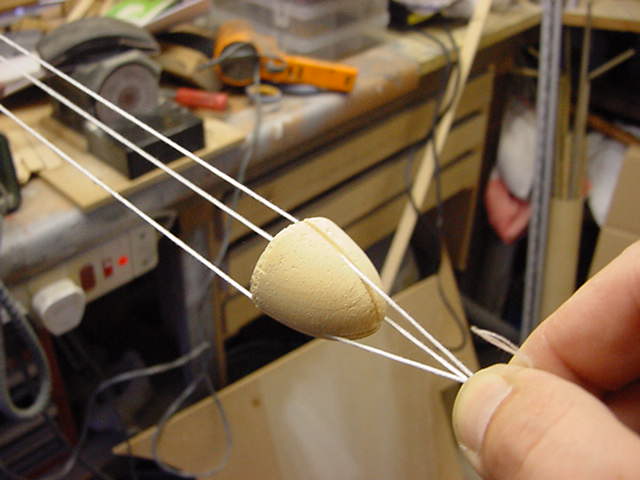
A small hole drilled in the bottom of said cone and a couple
of clamps for weight to stop it spinning.
Set tied off end into chuck of cordless drill,
commence slow tuning and let the cone slide it's way
along the thread.
Continue untill cone hits end and
let run for a bit more to tighten up.
Tie off both ends to prevent unraveling and
there you have it.
The winding bites into itself and prevents the
whole thing from unraveling completely.
Loose fiber to the left, three strand winding to the right.
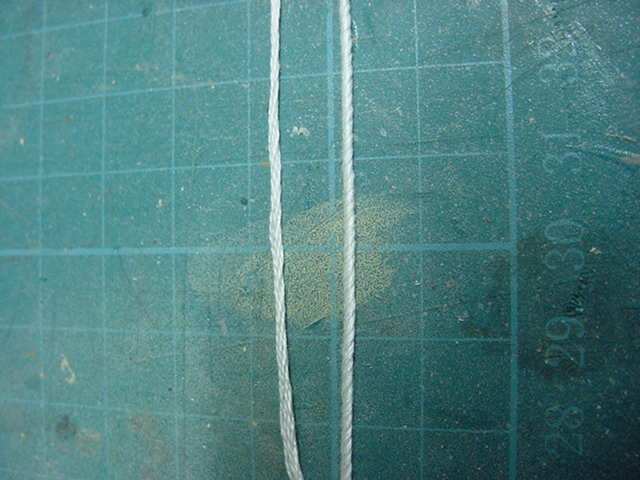
Tighter, neater, better!
it can be done much better with a proper ropewalk though.
I have plans for one tucked away somewhere and
i'll consider putting one together proper one day.
Not going to be today though.
So lashing freshly cooked ropes to hammock cranes
and a dab of wax to rid meself of excess thread fuzziness.
Not bad thus far.
So now to the netting.
The kit supplied one is a very fine weave plastic meshing,
way too fine for this wee turnout.
i'm talking holes of less that 0.5mm here.
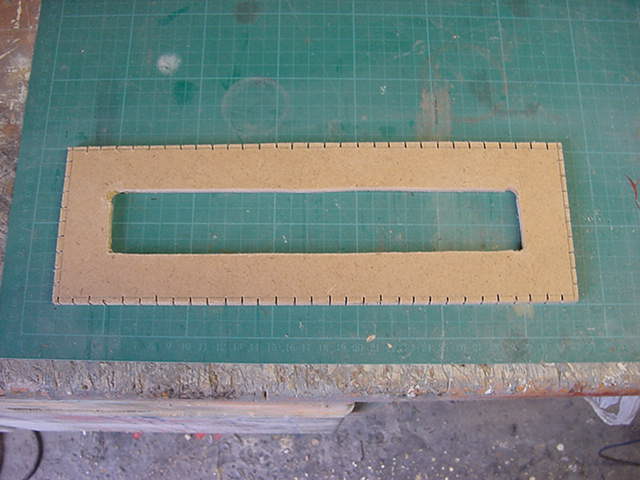
So, to business, first a frame from 6mm MDF with slotting
round the edge for winding the cord.
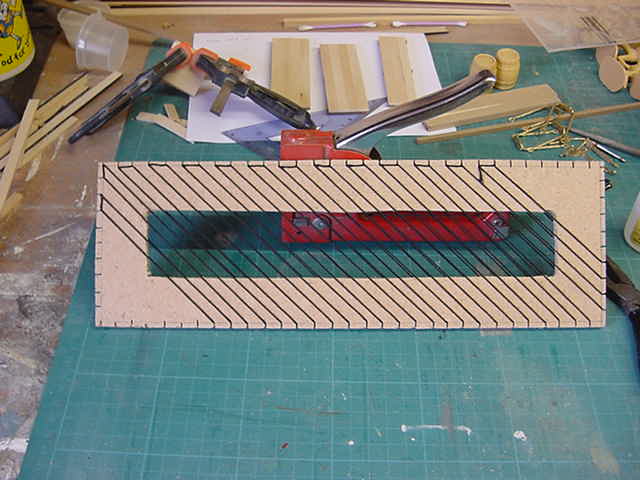
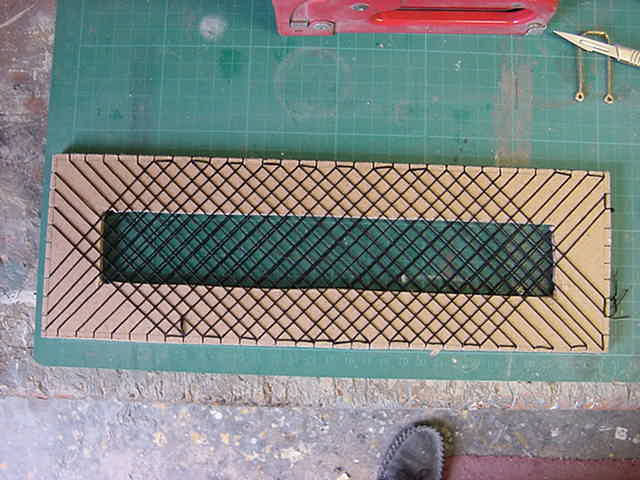
Taking some black twine, wind first one way...
then the other...
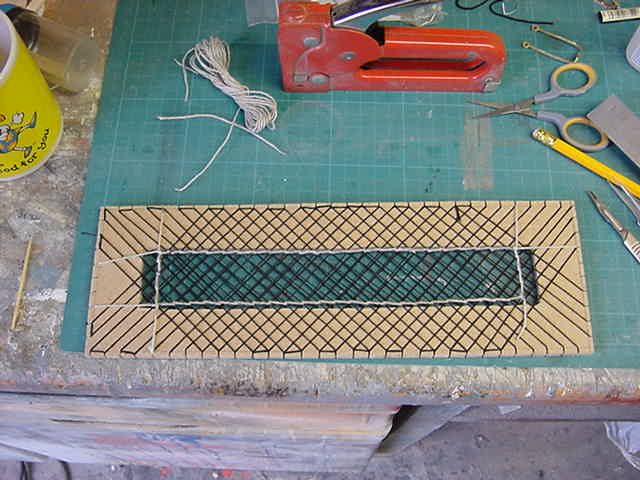
tie off a line around the edge...
liberally apply thinned PVA and convince said stuff to dry quick...
cut out...
trim...
plaster black semi-gloss acrylic all over...
and then drop into approximate position for a dry fit looksee.
Which in stages looks like this.
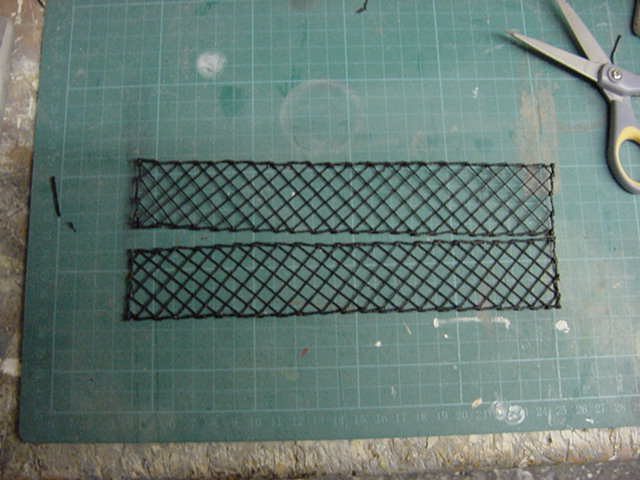
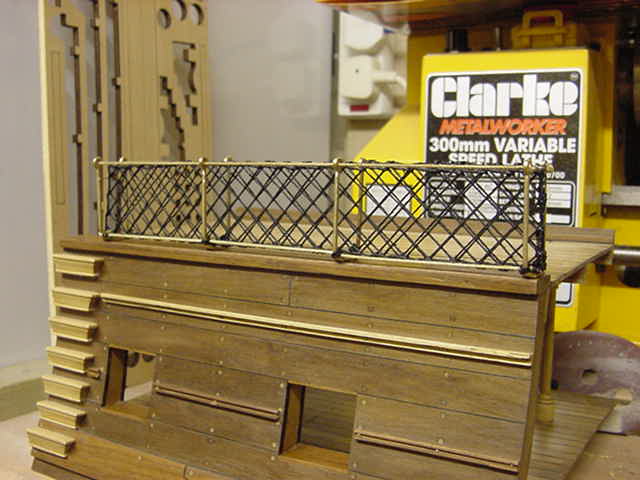
OK, not bad.
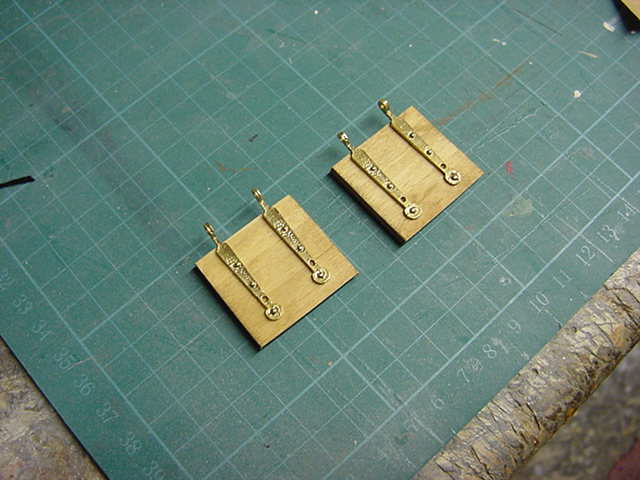
So to the gunport lids.
Simple enough deal, laminated three strips horizontal and three strips vertical.
Then sanded to size, test fitted, applied a coat of oak stain.
Then cleaned up the lid hinge plates and epoxy glued on.
Some loops and fittings to add and a coat of wax stain but it's a start.
And thus the work continues but that's enough for now methinks.
Untill next update time, you merry lot go easy.
Page Number