
Kit Kong's Model Mansion Armour Annie
Sculpted by David Whitford
1/8th Scale WWII Pin-Up Series


 Page Number
Lipstick, powder and paint.
And Some Woodwork While i'm About it!
Welcome back one and whoever else is reading this.
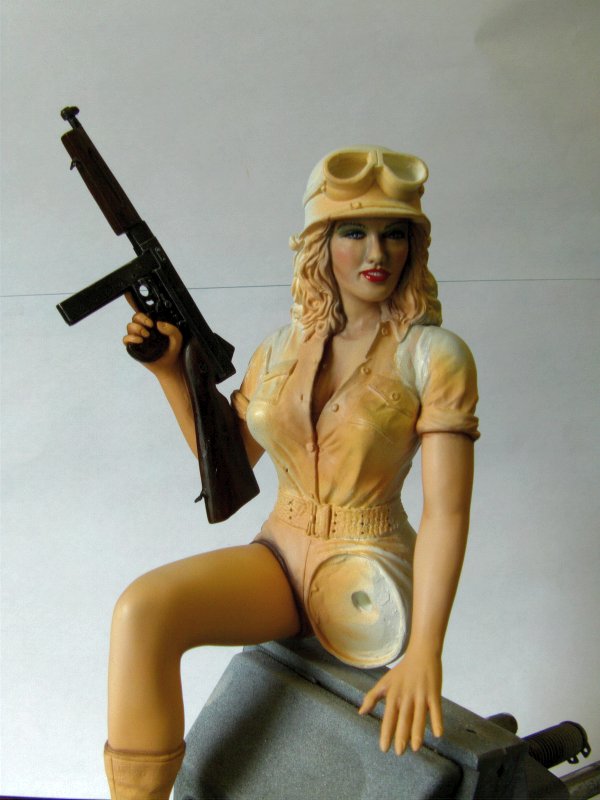
Right then gang, figure it's time I got to painting the figure so here we go.
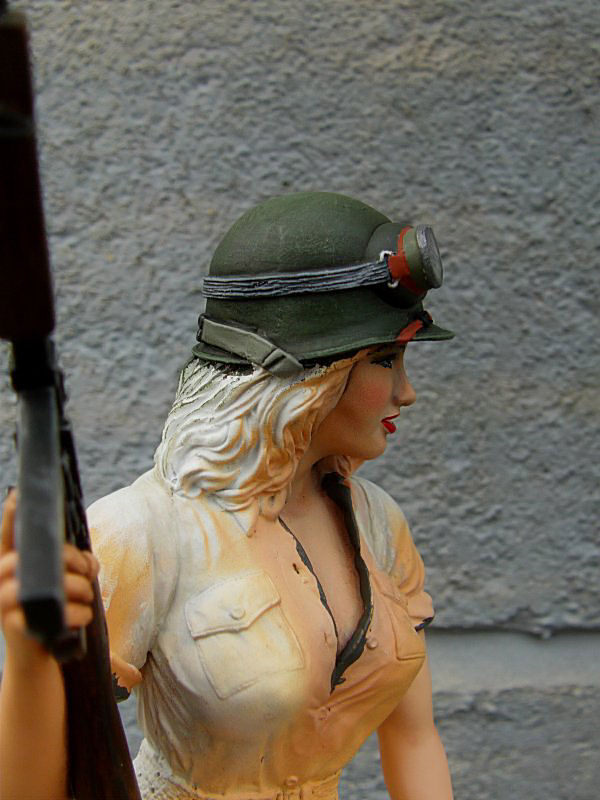
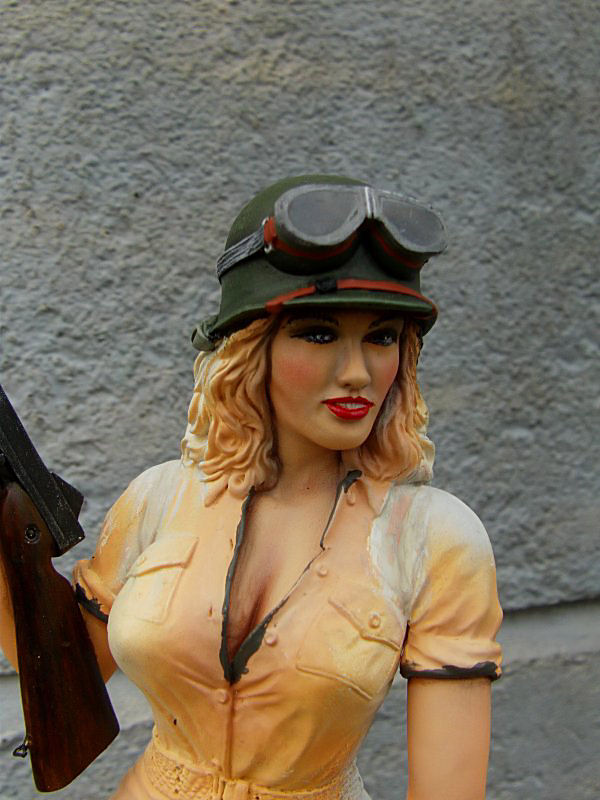
Airbrush at the ready, started with a couple of coats of Vallejo flat flesh.
And apologies in advance as sometimes the auto exposure is all over the place.
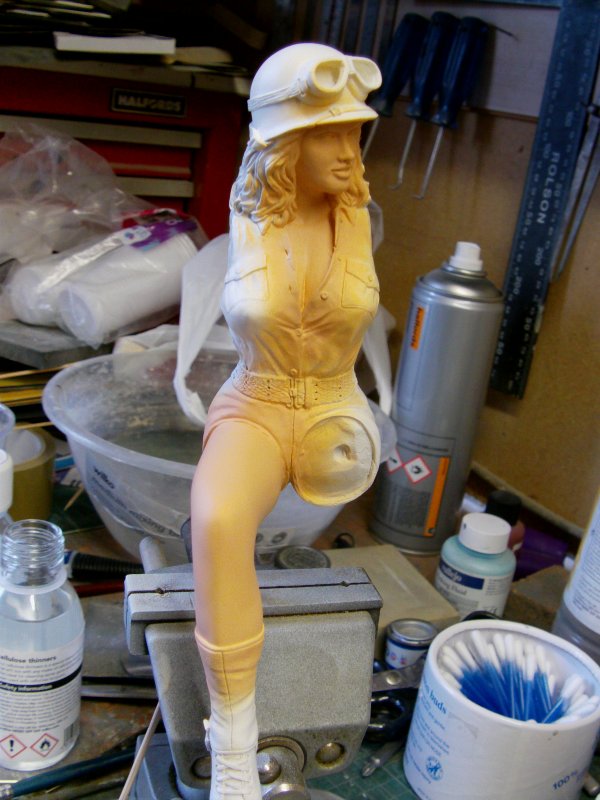
Now wanted to keep the shading subtle so just made do with a bit of flat flesh and pale flesh mixed.
After airbrushing on and leaving to cure fully, then came the ground pastel chalks.
All brush applied and after a blending brush,
they got sealed with some Vallejo matt varnish rattle can applied.
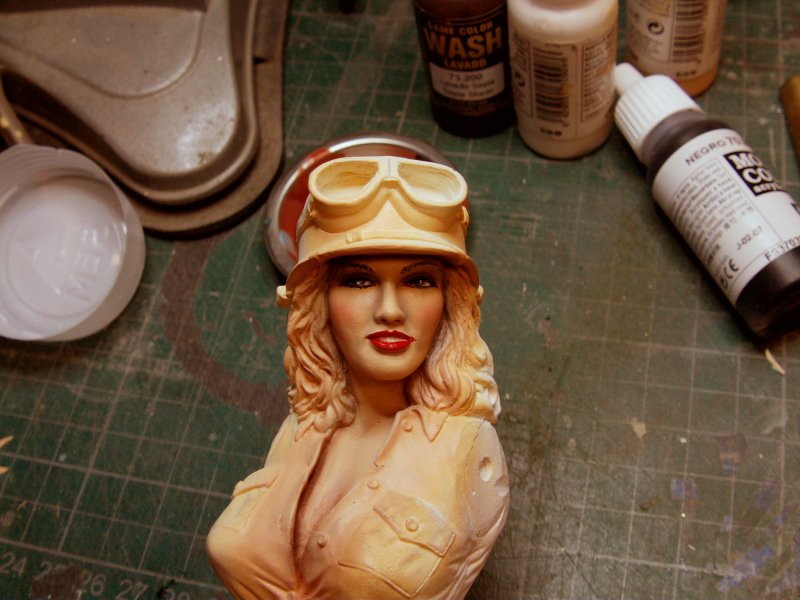
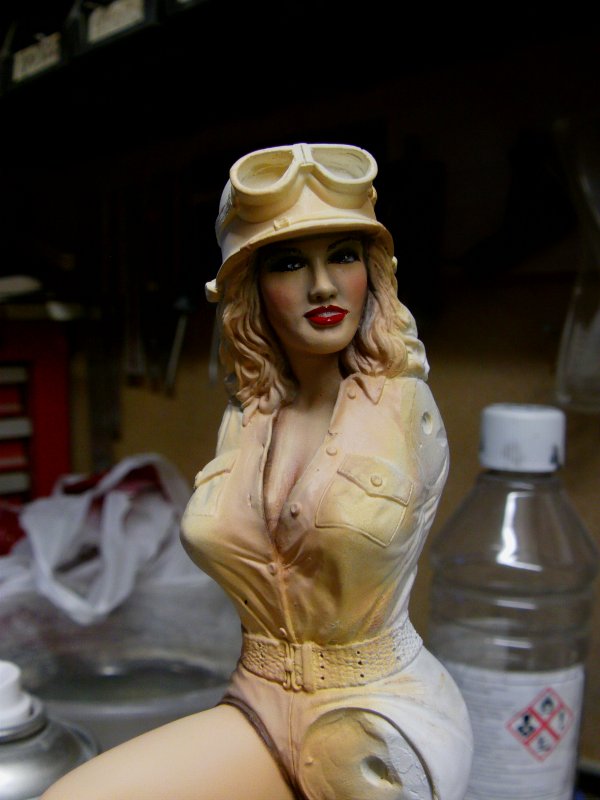
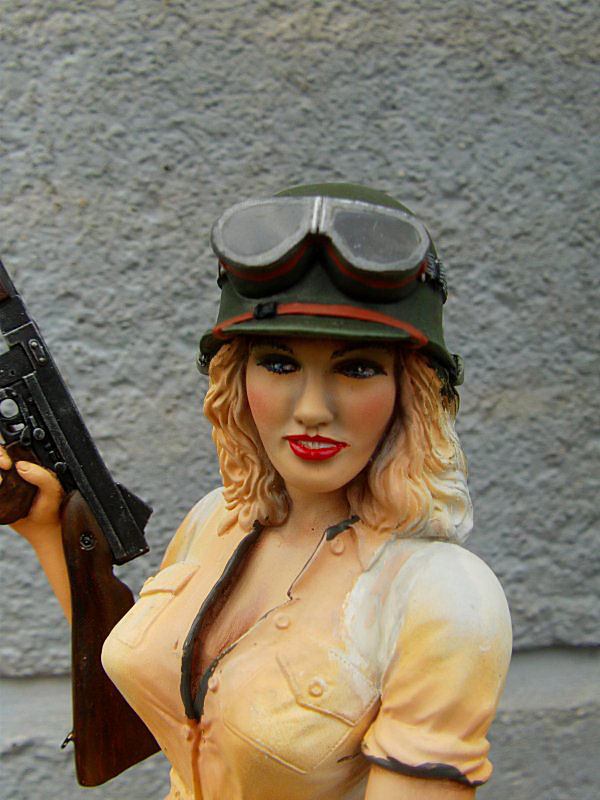
Now to the face paint.
Bloody long story for me after it taking two farking hours but won in the end.
For the purposes of this waffle, the short version...
Eyes of blue sorted via acrylics,
brows and the like also,
carmine red lippy and some pastel chalk blusher to finish all sealed with matt varnish.
After curing, the eyes and lips given a single lick of Tamiya clear gloss.

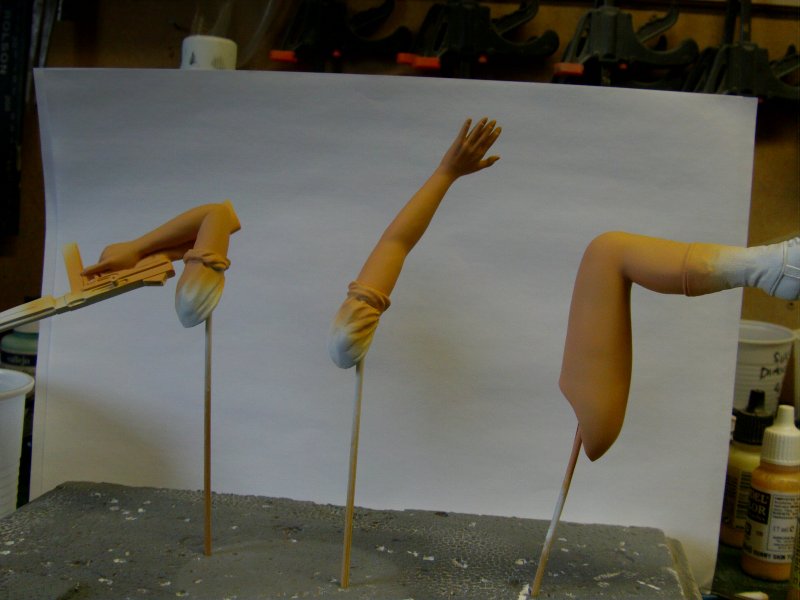
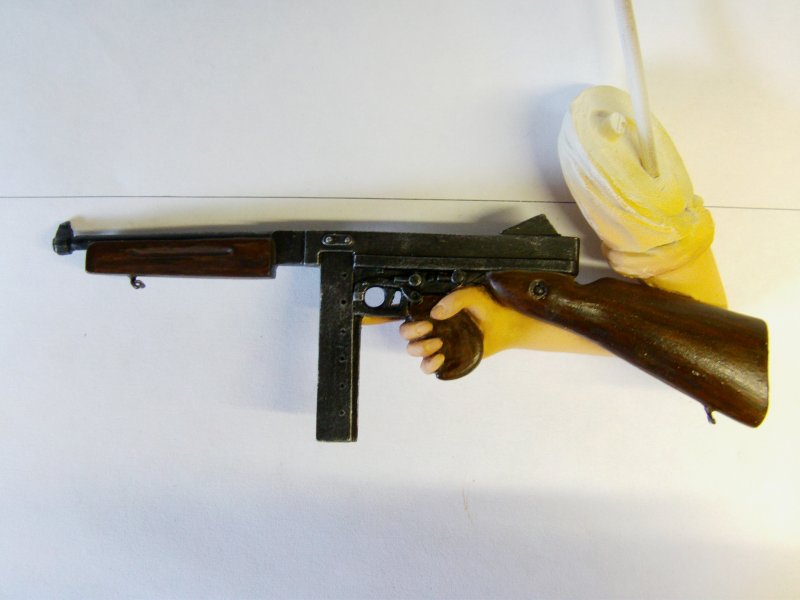
Next bit, sling attachments for the Thompson.
The ever helpful odds and sods bin tuned up a small container of LED leg off cuts.
Some bending and snipping later...
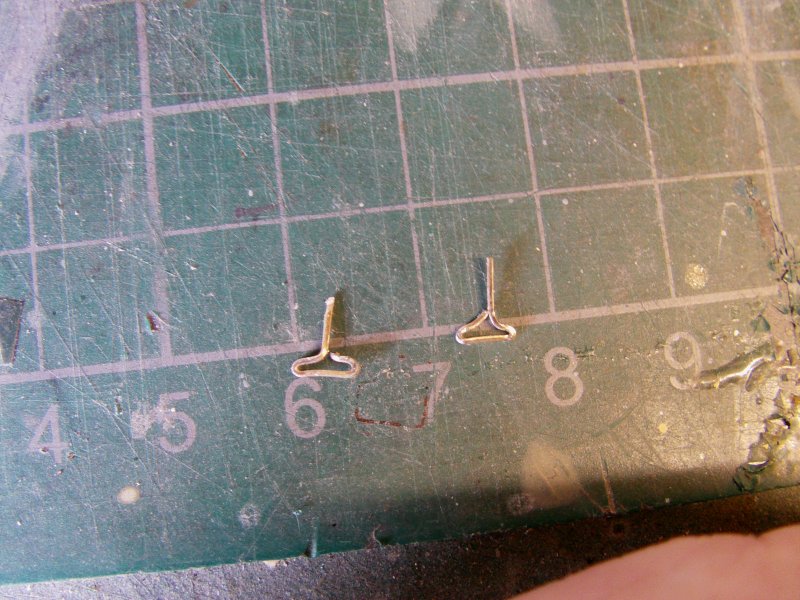
Perfect? Nope.
Will they do for this? Yep!
A couple of holes drilled, bits in with a drop of Loctite cyano so they don't wander off.
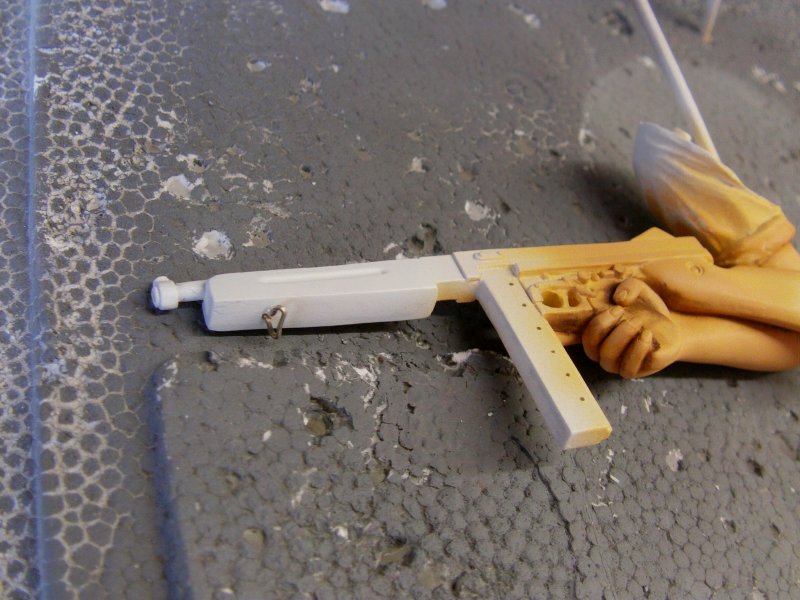
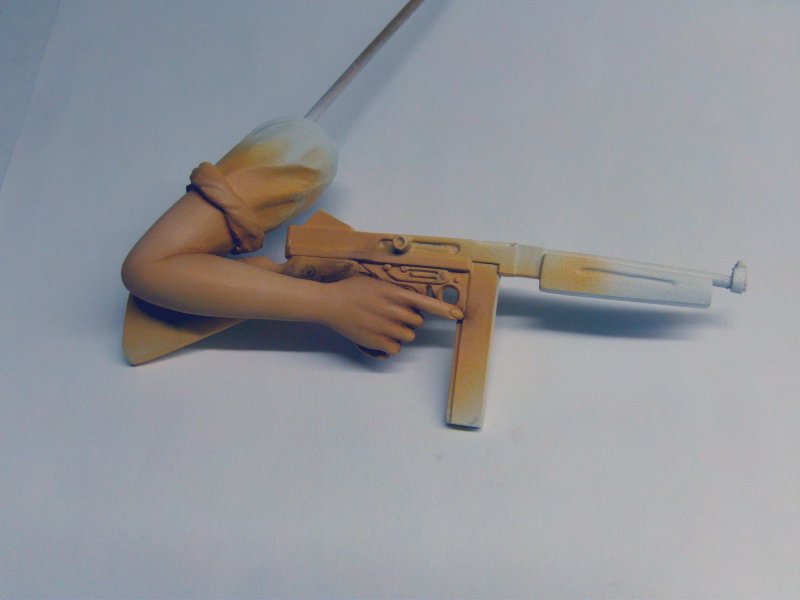
So long story short...again...
Main parts painted matt black with metallic grey drybrush
and a slight bit is silver scratching here and there.
Woodwork was a base of Vallejo burnt umber with streaks of flat earth and mahogany lightly applied.
Finishing to the furniture was a couple of coats of Vallejo sepia wash mixed with Tamiya clear orange.
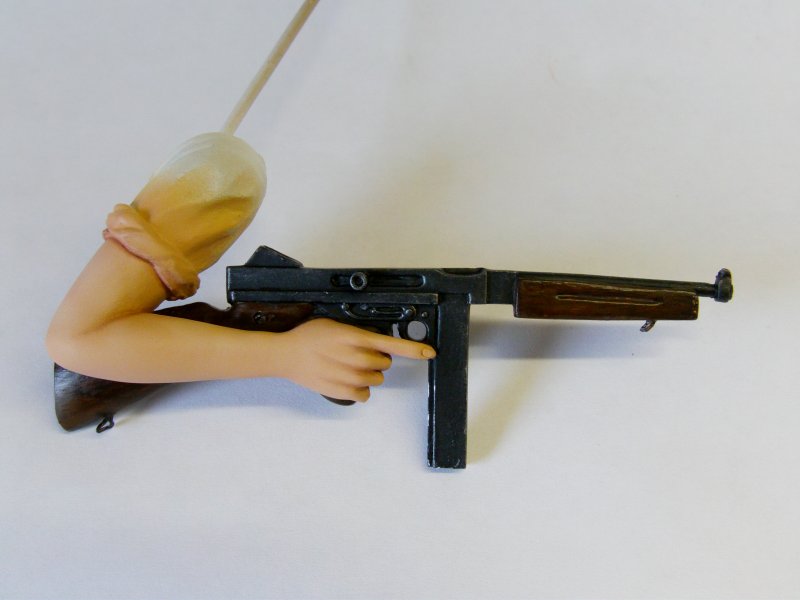
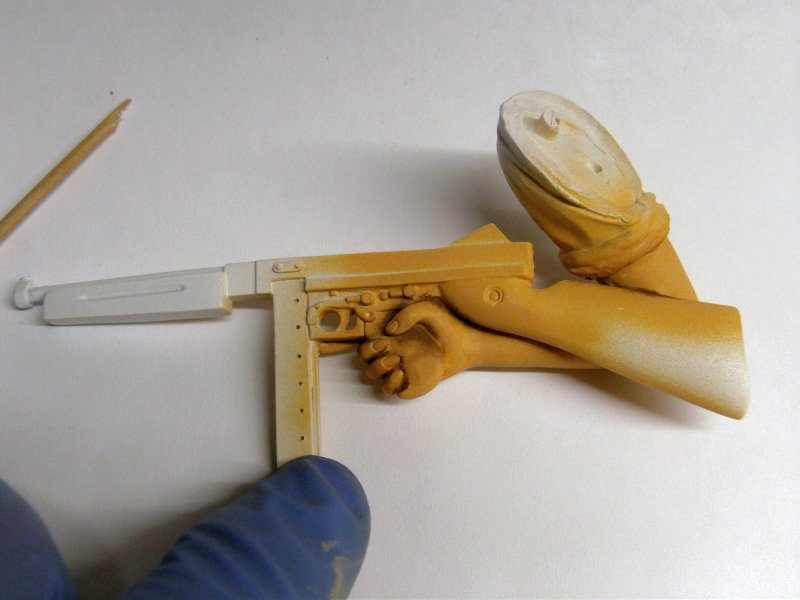
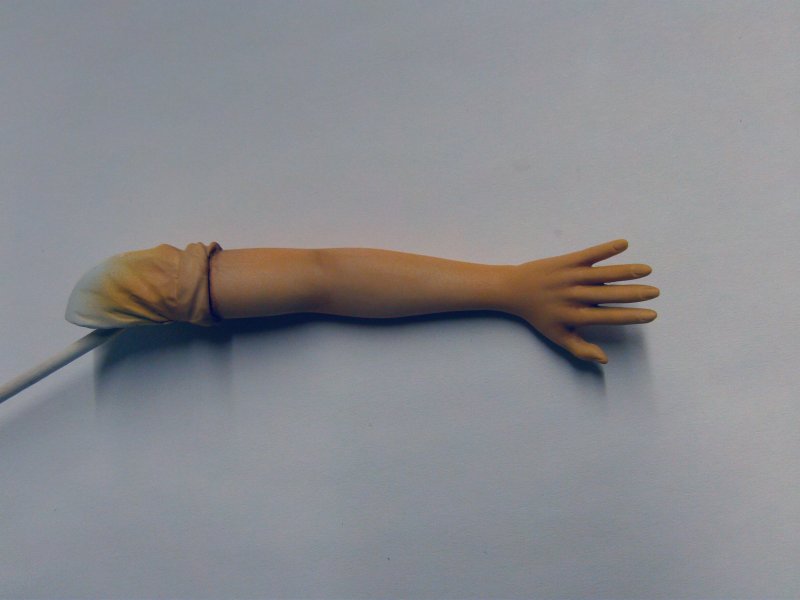
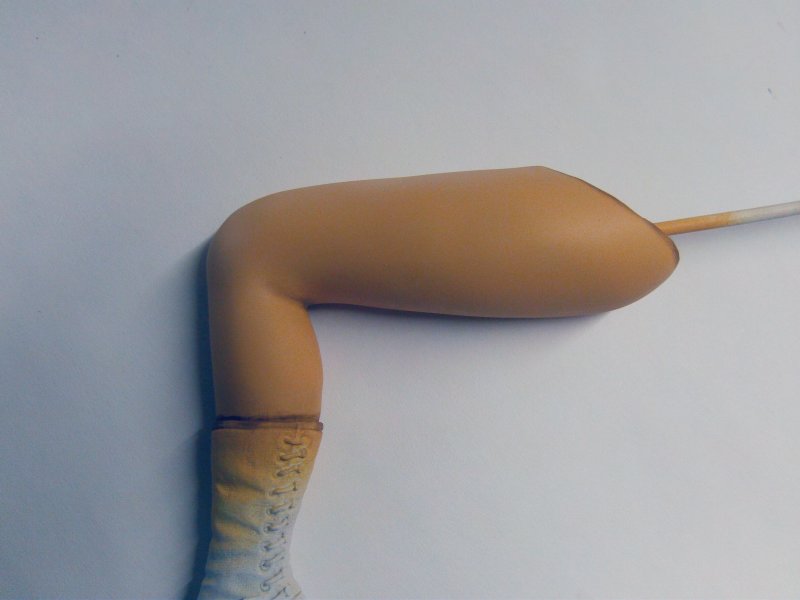
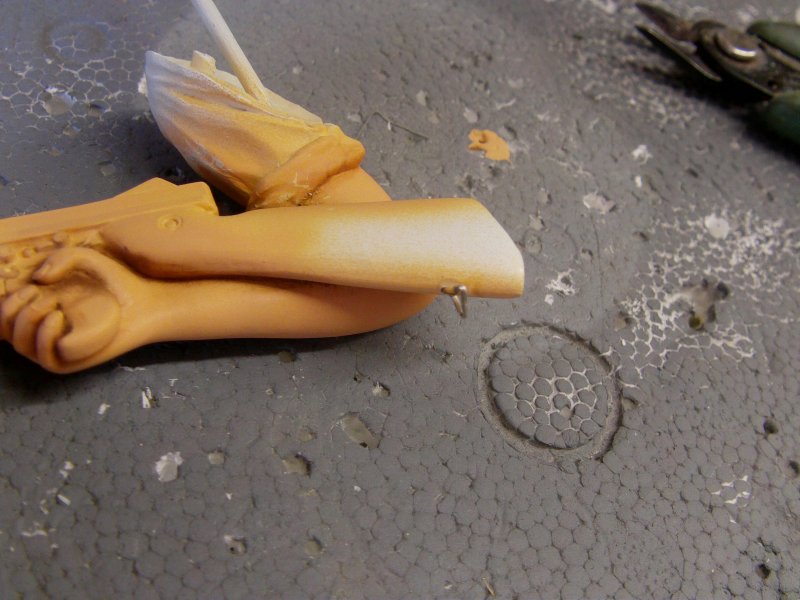
That little bundle of fun taken care of, brass pins cut from 2.5mm rod,
arm sockets and shoulder bits cleaned off,
holes drilled for the pins then a small dab or three of epoxy stay put ya bugger gunk applied,
arms attached with a small drop of cyano here and there to hold while the epoxy cured.
A tiny amount of filling in required but easily taken care of.
Some fast curing two part epoxy putty with a brush full of lacquer thinner to smooth.
Sorted!

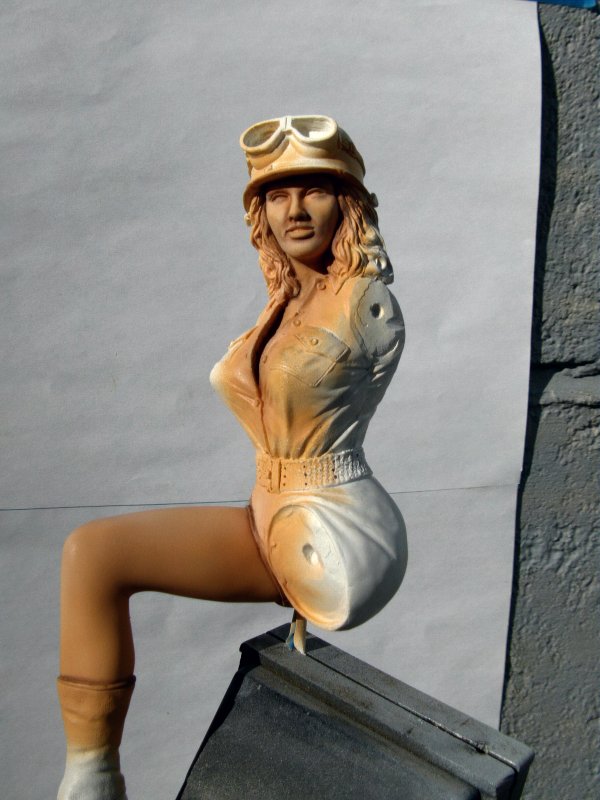
Me likey so far!
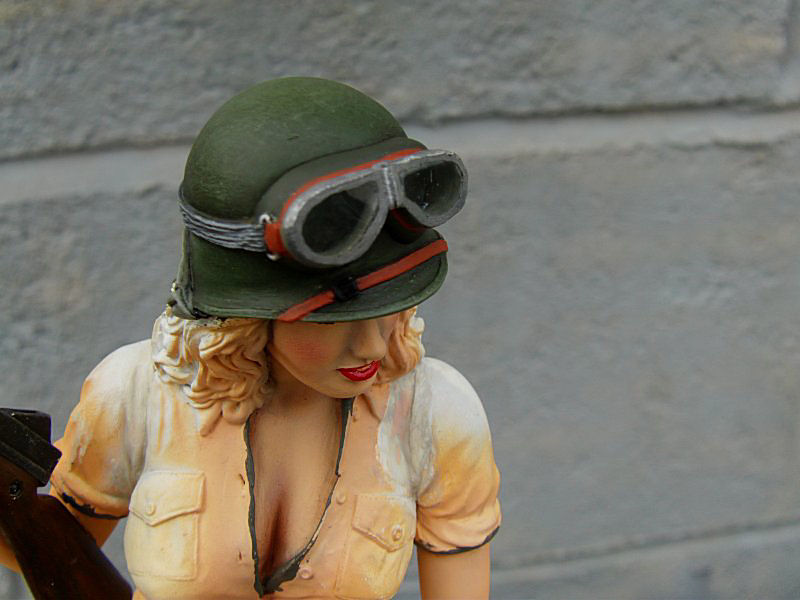
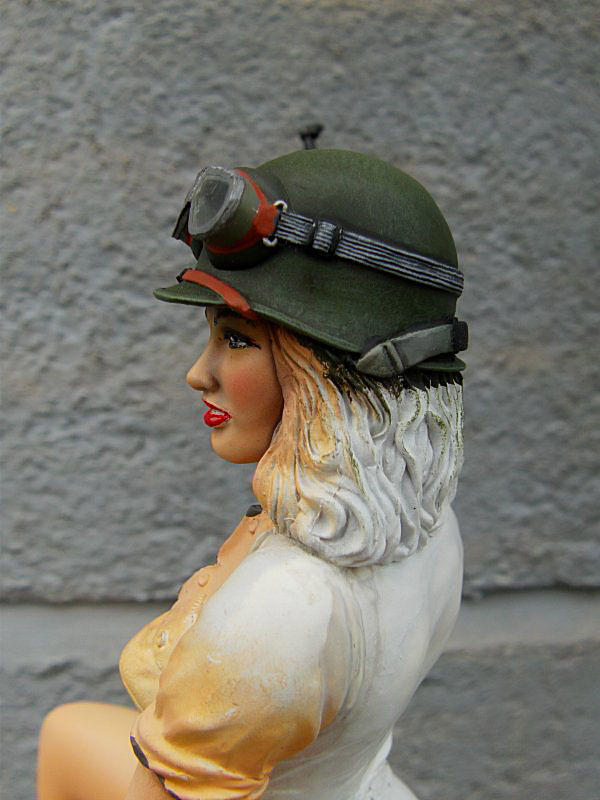
OK some edging in around where the clothing meets the skin then...
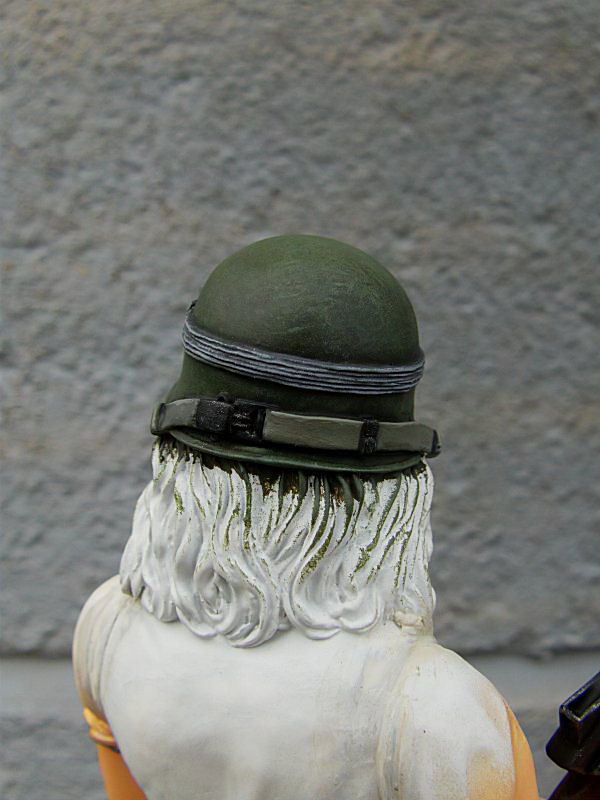
time to give her steel noggin cover a going over.
Tamiya XF-62 Olive Drab in two coats as a base then a drybrush coat of XF-74 O.D. with some Vallejo medium grey.
Second drybrush with a bit more grey and done with that bit.
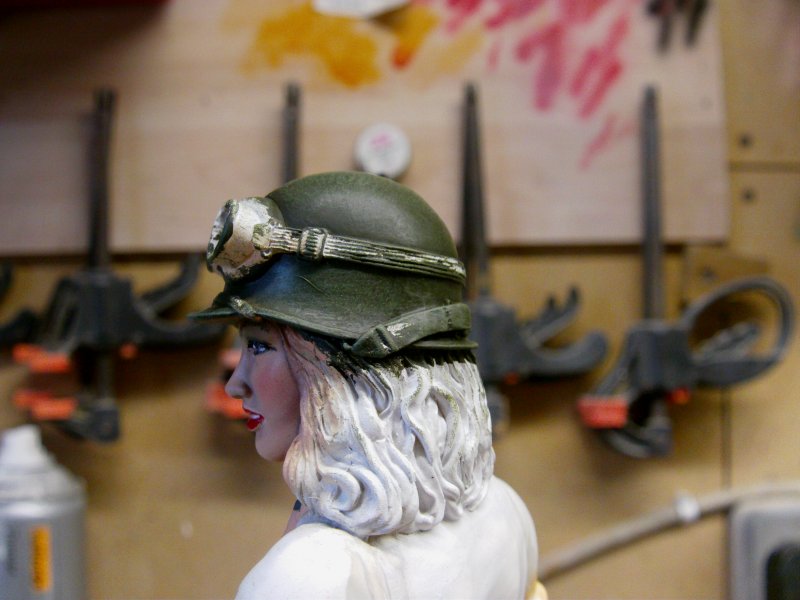
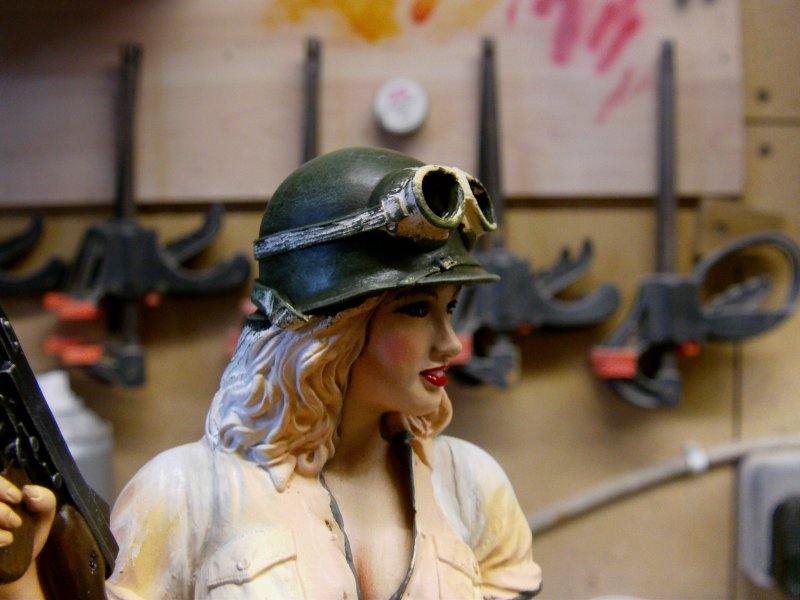
Helmet straps and goggles painted, then the lot hit with the matt varnish.
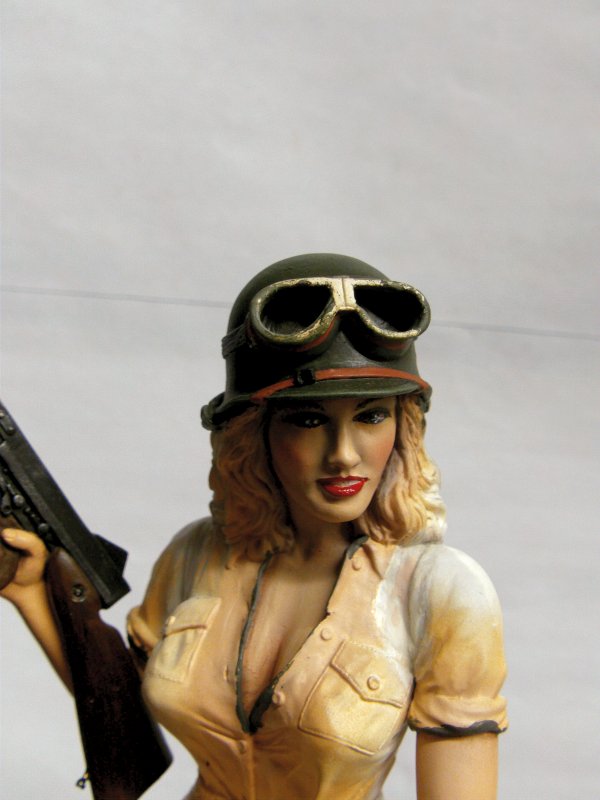

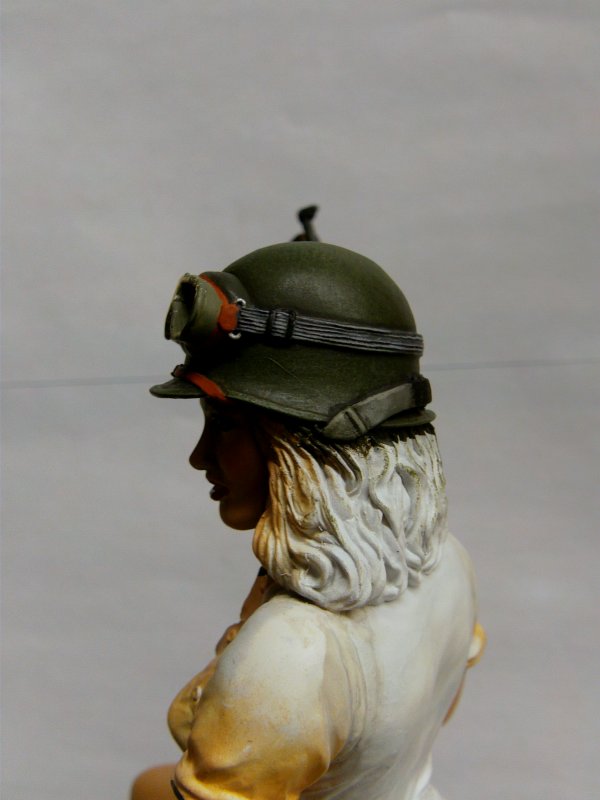
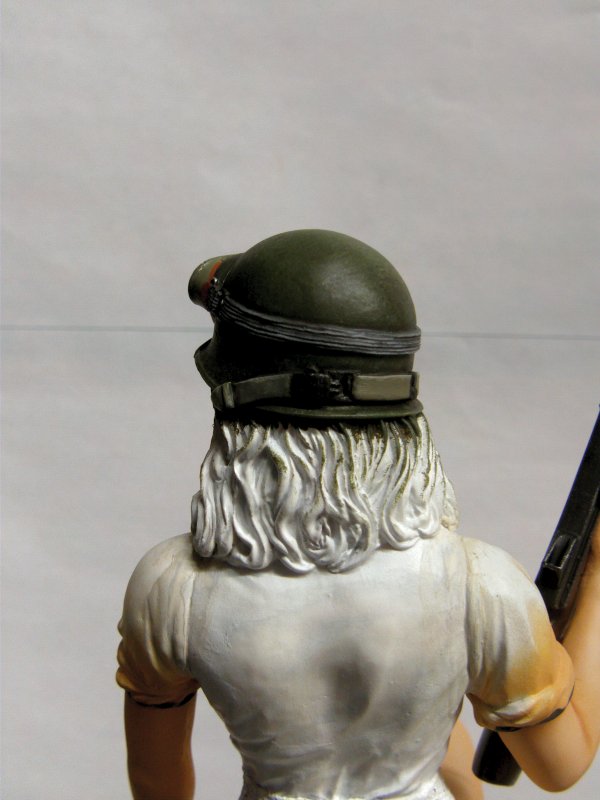
Clear styrene added, some metallic grey around the goggle frames and last clean up.
Pics taken in the best lighting of all, natural daylight!
That does it for the top end!
Next update we be getting on with the rest to the final finish.
Oh Yes!
You merry lot take care out there now.
Page Number