
Saltire Technologies X304-Class Deep Space Carrier
1/2500th Scale


 Page Number
Last push so...
It's A Paint And Tape Sorta Thing Like
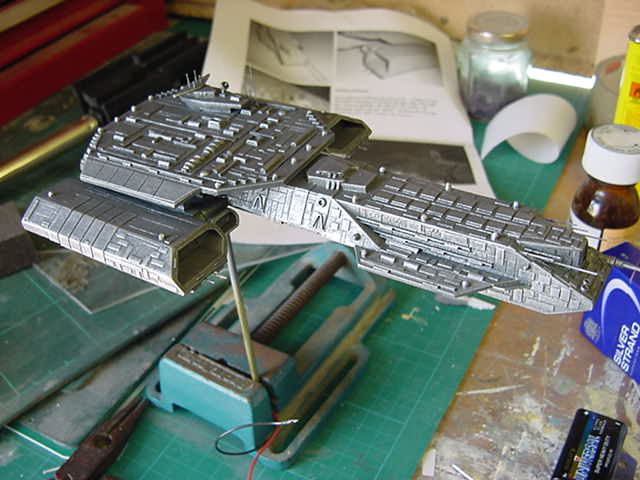
Rightyho then, last time we had just the primer on and a ready to go for the main paintwork.
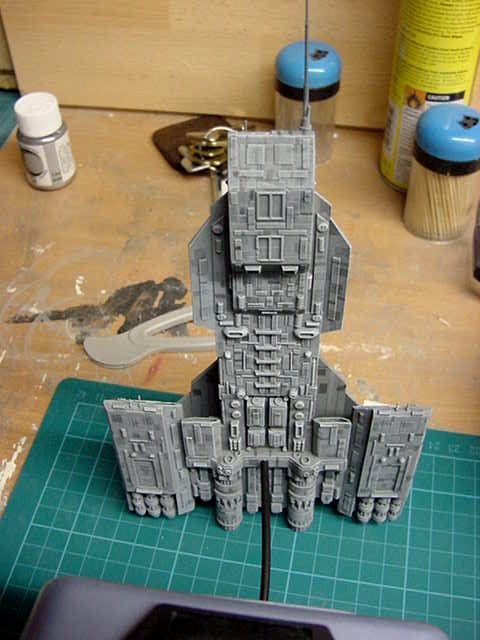
So as a base colour, standard enamel gunmetal.
So this thing is covered in slightly differing shades of grey...
why always bloody grey?...
or metallics, so to the masking thing.
For that, it was into the pile of masking tapes from Jammydog.com
and lay out varying widths, namely 3mm, 2mm, 1mm and 0.5mm.
Once laid out like so...

The strips were cut cross ways top to bottom so creating many little bits of tape...
you can see where this is leading I can tell...
Well it was a few stages of this...
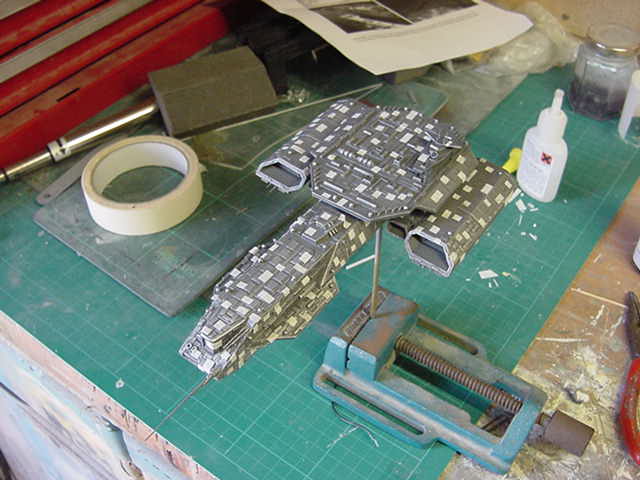
Followed by a few stages of different airbrushed shades of this...
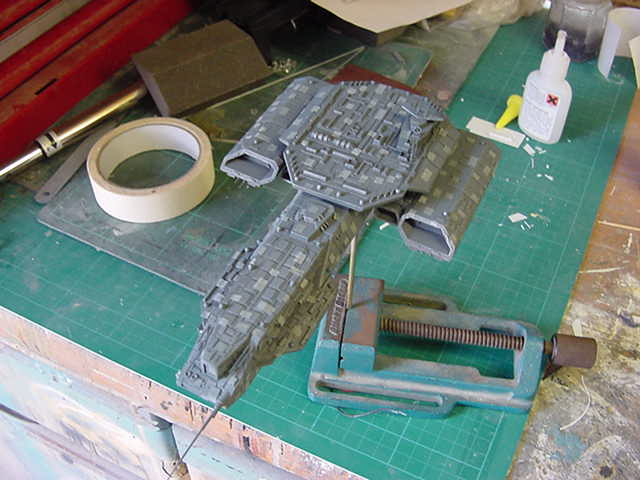
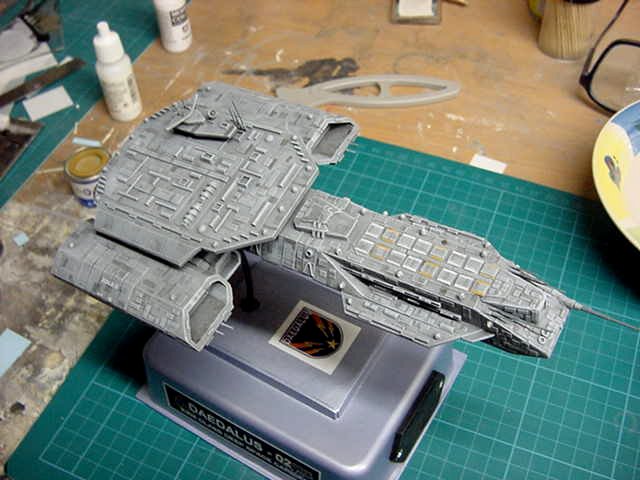
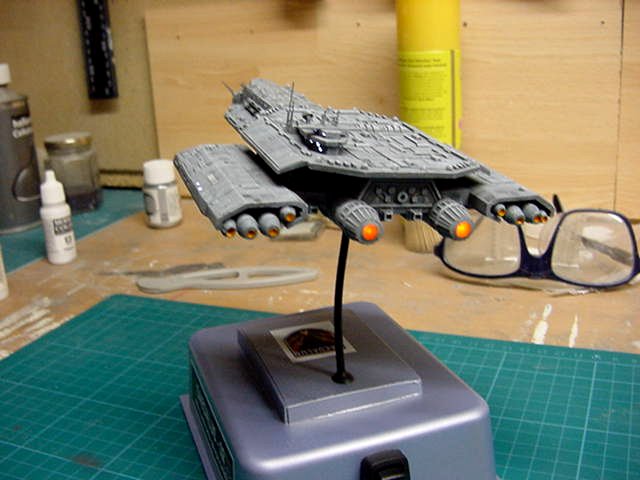
That, after some serious tape removal and a goodly bit of drybrushing, got us finally in the vicinity of this...
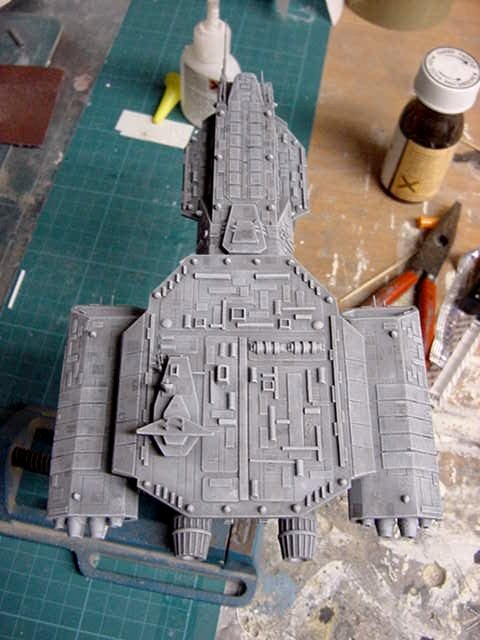

Getting there...getting there.
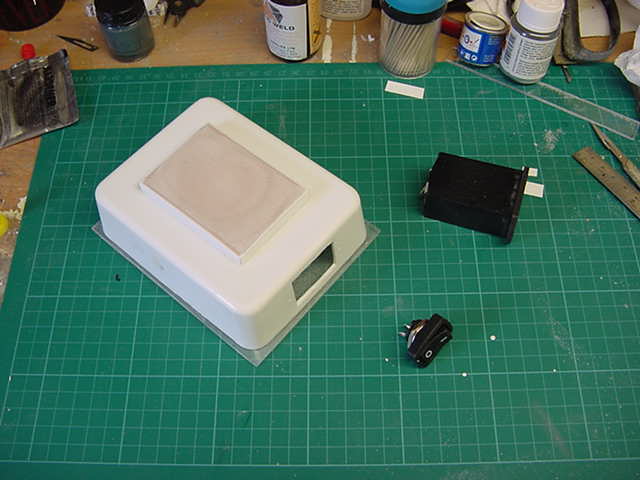
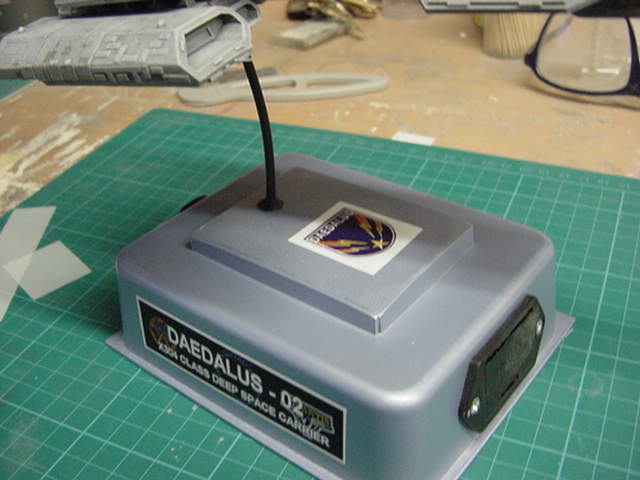
So then, time to turn my attention in how to hold this wee beastie up.
Well a stand base of sorts was called for and as usual,
my odds and sods box o' bits supplied what was needed.
In the shape of one of the small bowl like things you get with cheap kitchen scales.
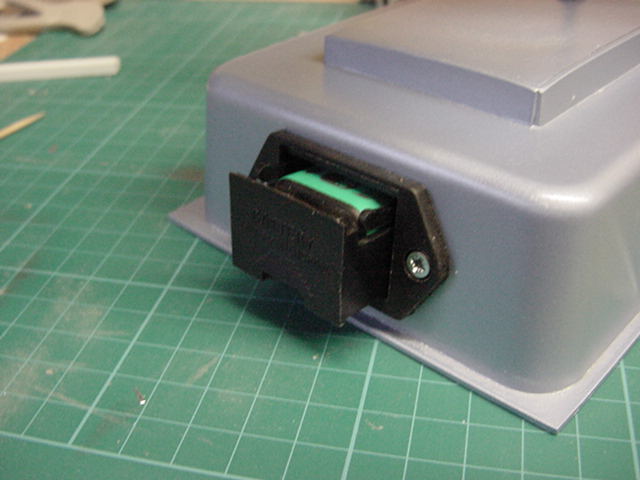
Duly chopped down in depth, holes for the battery box and switch and
the bracket that would normally fit it to the top of said cheap scale filled in.
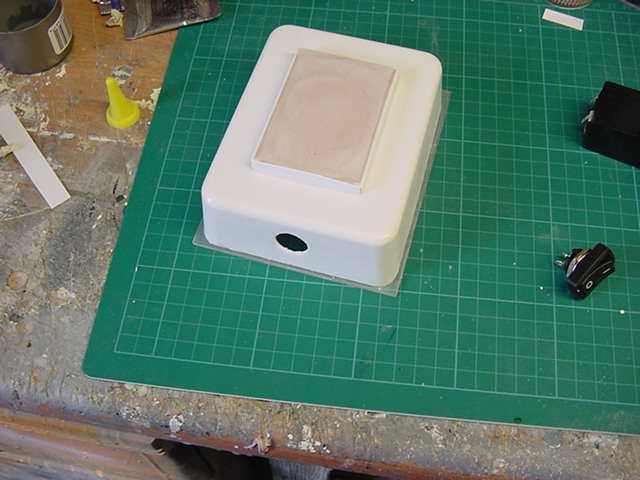
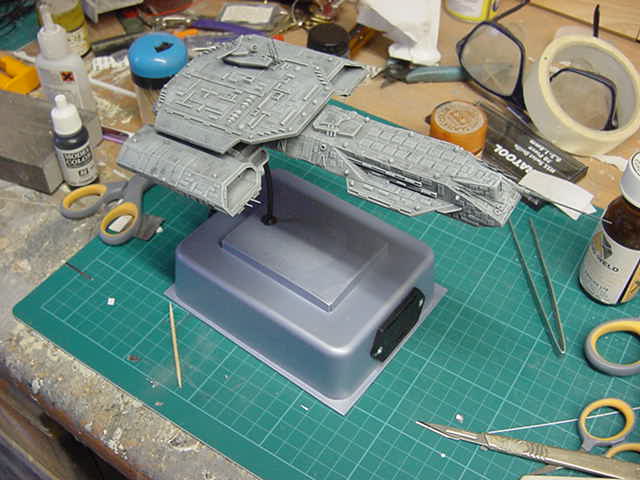
So the bottom was covered in with some 2mm clear styrene sheet with a hole for yours truly to solder up the wiring.
Hole for brass pole duly drilled, the whole thing given a lick of primer and blue pearl paint
,all I had on the shelf besides olive drab and grey,
then the bits duly assembled in their appropriate positions and stand pole curved slightly
to take away the dull straight and level model thing.
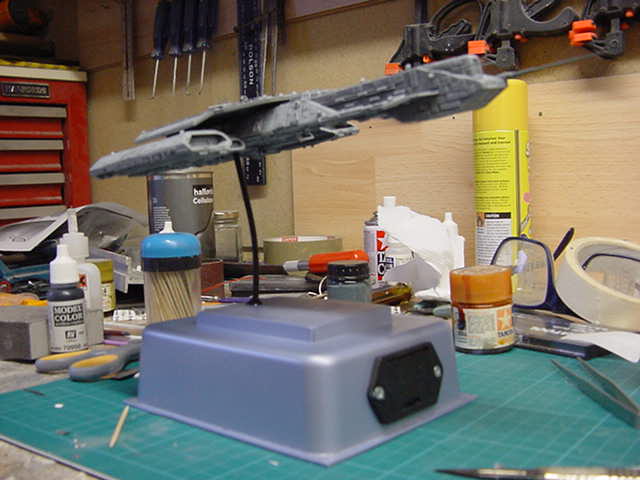
The 9v battery box is a rather neat drawer like thing that snaps in and carries the battery in it's own removable case.
Neat and clean, I use these a fair bit as they are decent and reliable,
also makes changing batteries so much easier.
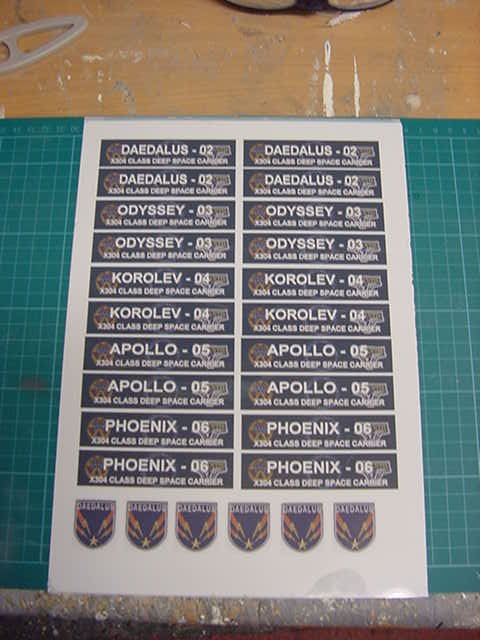
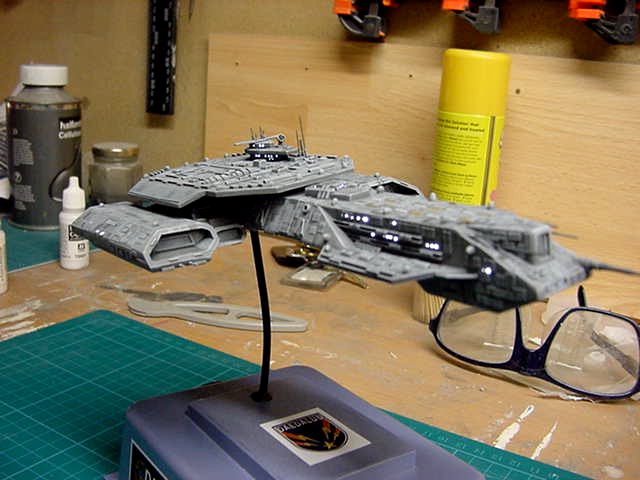
So a bit of stand decorating was in order and an excuse to give these home brew dry rubdown decal things a go.
Simple enough, run one sheet through the inkjet printer and knock out your design, reversed as per the instructions.
Wait an hour, get the double sided sticky sheet, comes in white or clear, peel paper and attach,
press hard or cheat like me and run it through a cold desktop laminator.
Wait another hour, cut, peel and stick...like I said, simple.
Nice.
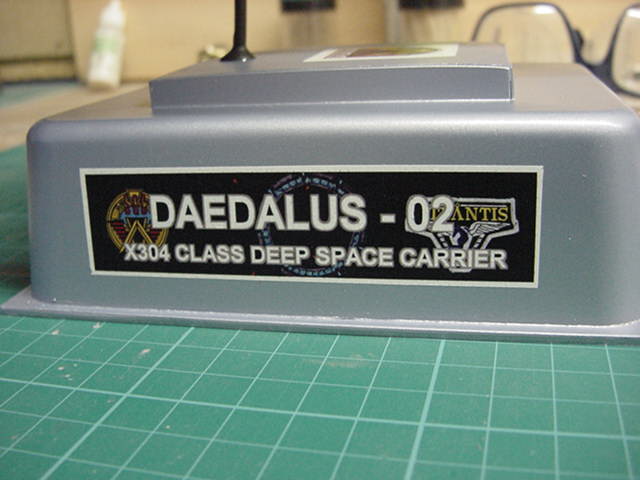
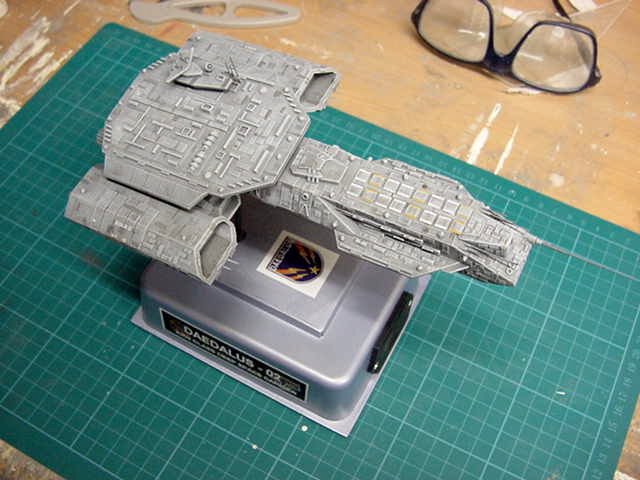
Last couple of little jobs, apply name and USAF decals,
mix up some satin acrylic varnish with some acrylic silver
and again with just a touch of black and go paint little squares, rectangles
and stripes over the whole damn thing.
Add a dab of grey and brown to appropriate areas going by photo ref.
Mix some clear epoxy with clear orange and dump down the lit engines.
Add white then over paint with clear yellow then clear orange for the unlit engines.
And finally a lump of paper backed green foam sheet to the stand base.
A done deal.
So, final thoughts time I do believe.
Overall, not a bad wee beastie it has to be said.
A few casting flaws but nothing that drastic that some filler and a bit of elbow grease couldn't sort out.
Fairly well detailed considering how small it is and I would
say a worthy addition to anyone's 1/2500th scale shelf built straight from the box.
So maybe not perfect but then again if your looking for that, i'd give up now if I were you.
Very decently priced too so all in all, no complaints and for what my opinion is worth do recommend this kit.
As to how I feel about my build?...
It'll do my merry lads and lasses, it'll do.
Finished gallery can be found by clicking the pic below...

And that's that for this little turnout, untill next time, you goodly lot go easy!!
Page Number