
Salzo Battlestar Galactica
TOS Viper Fighter.
1/12th Scale 31" long


 Page Number
Time to get my act together...
Time To Get This Here Viper Thing Together As Well.
Welcome back gang!
Well we going in to the final turn before the
home stretch now so let's be about it.
And yes, the pics are slightly larger resolution than usual.
Benefits of a relatively shiny new toy of the piccie taking variety.
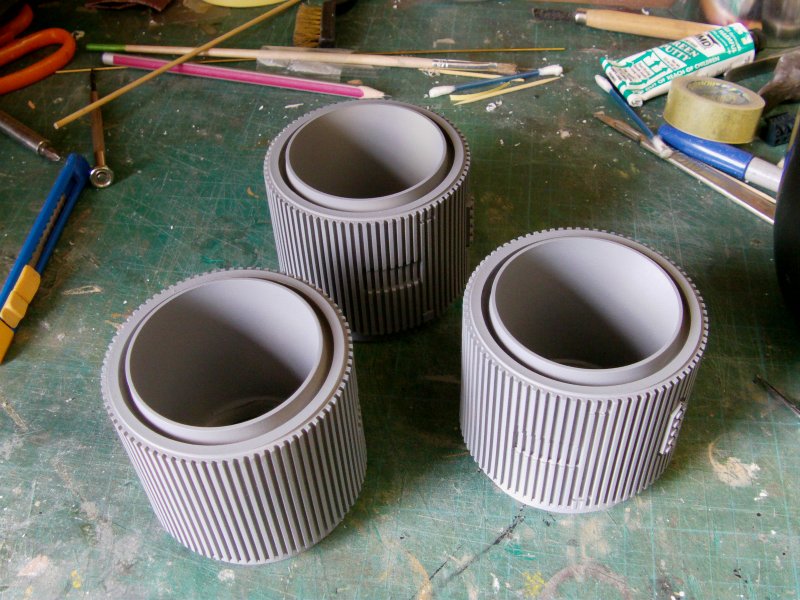
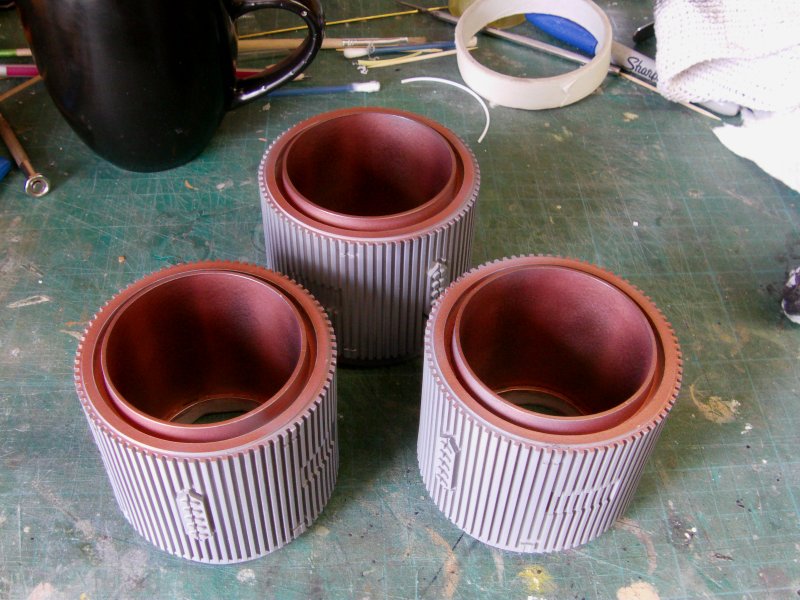
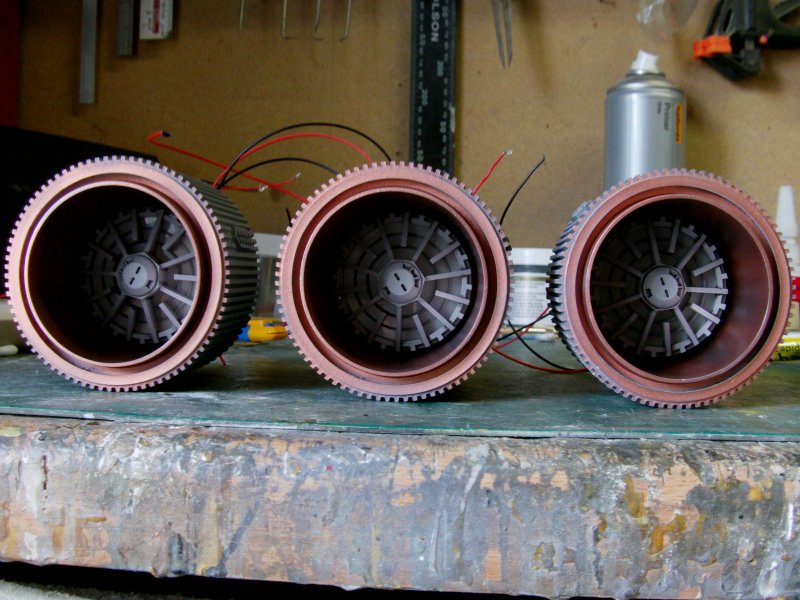
Anyway, some sub-assemblies to get sorted first.
The engine cans got a liberal going over with some primer grey.
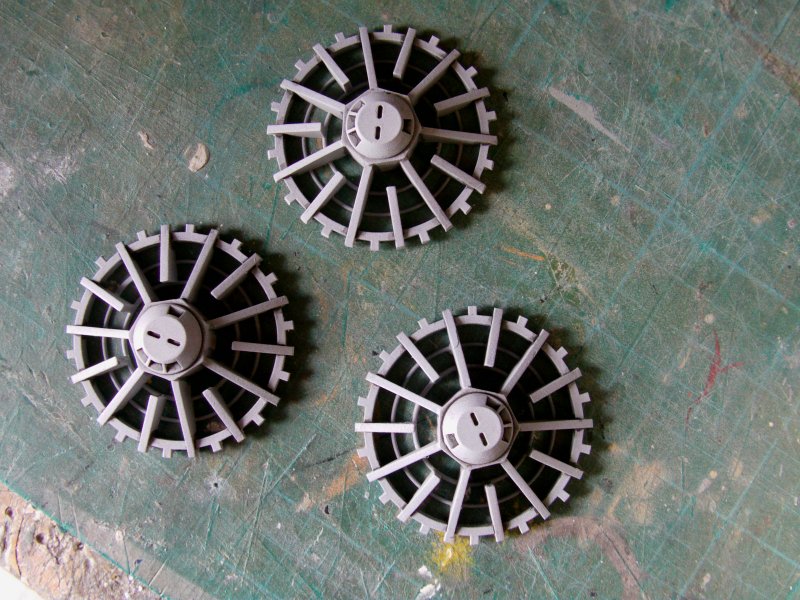
The engine rings brought out of hiding, a lick of dark dirt wash in the crevices,
a squirt of acrylic matt varnish and done.
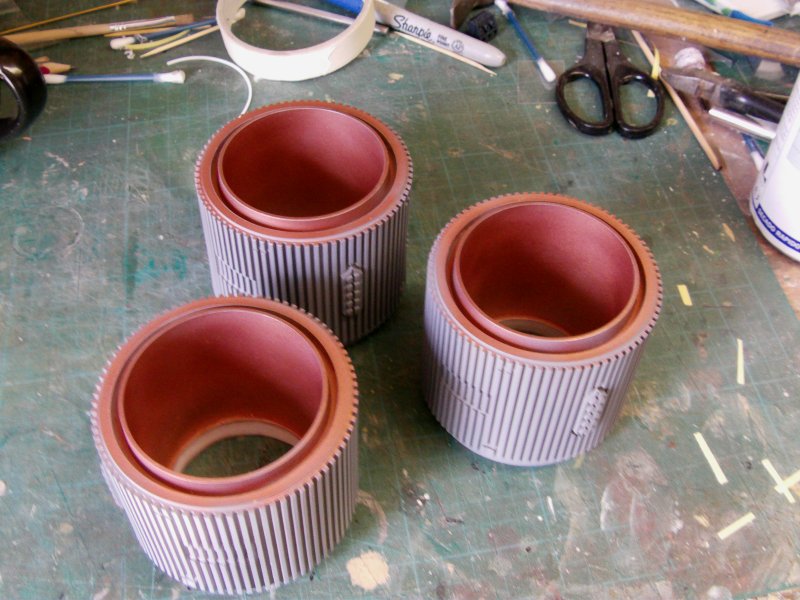
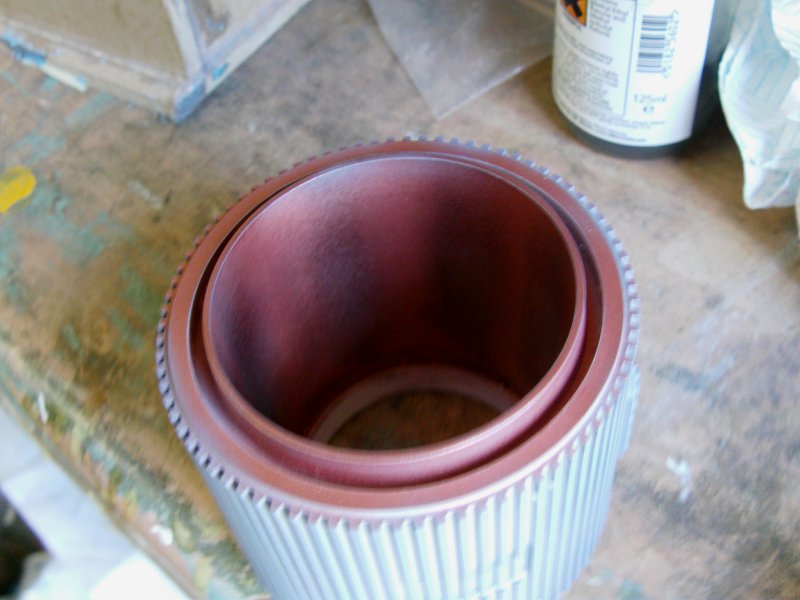
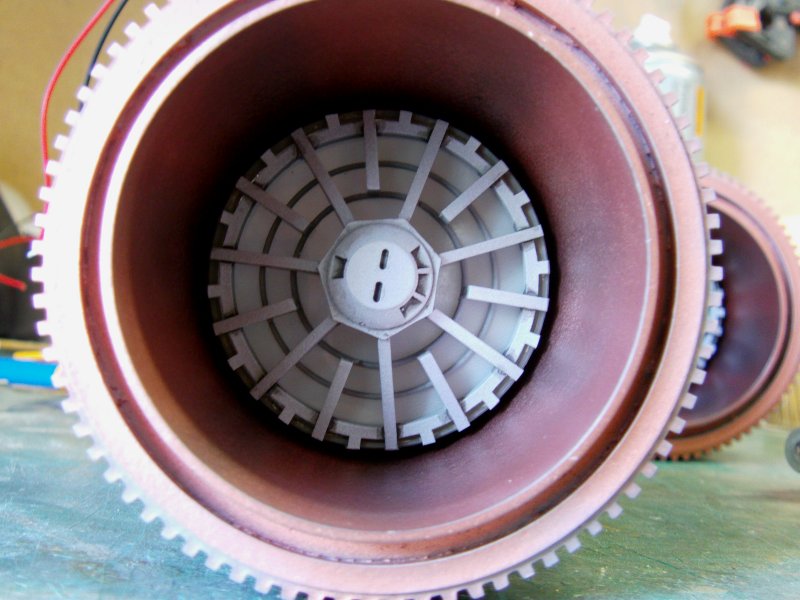
The inside and rear outer surfaces of the cans got some copper paint treatment.
This was worked over with some graphite powder for some scorch streaks.
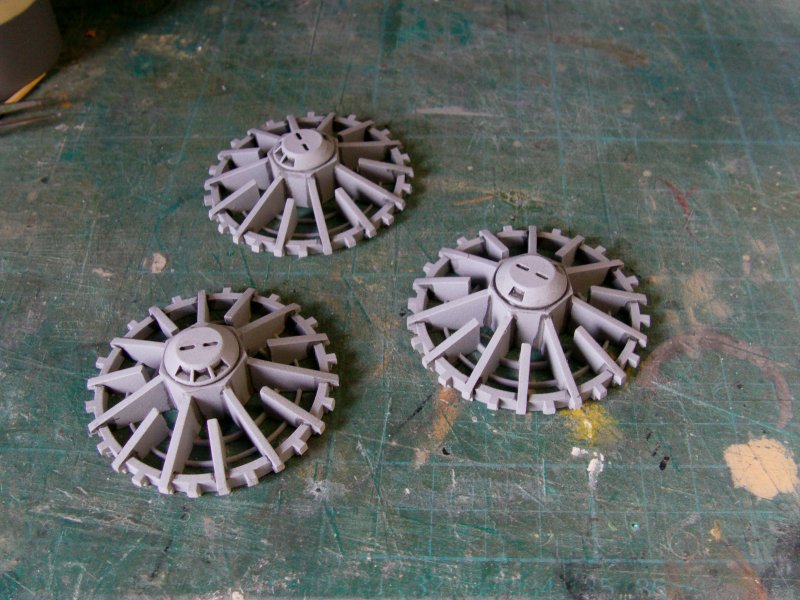
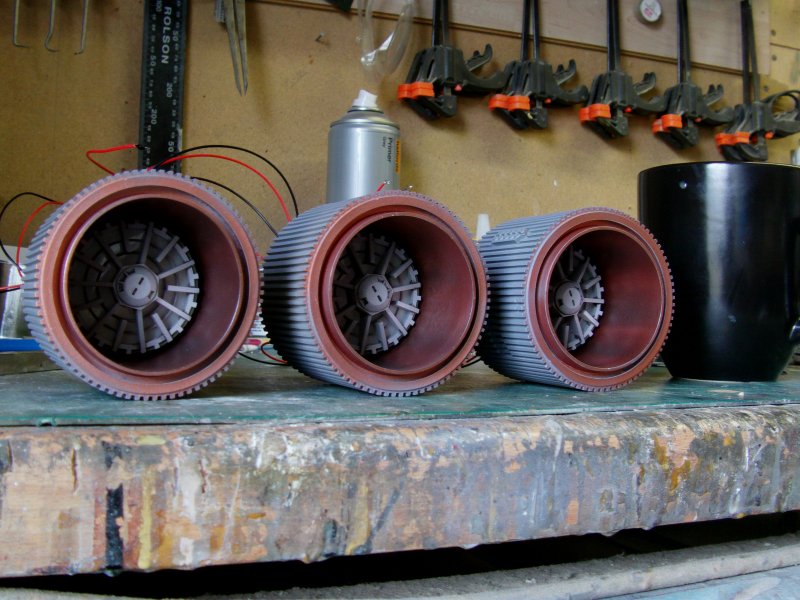
The lighting cups, foil cones, diffuser and engine rings assembled and
a little dab of grey paint to cover the raw resin still showing.
Then pushed in to place and a nice snug fit,
then came the black epoxy stay put gunk.
Just ordinary two part clear epoxy adhesive with just a drop
or two of enamel matt black paint mixed in.
A small amount doesn't affect the curing and helps you to see where it's going.
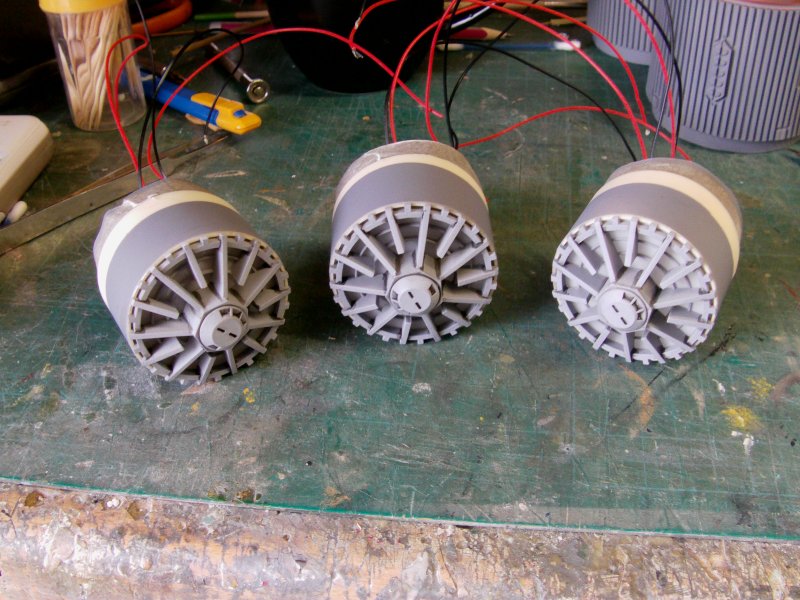
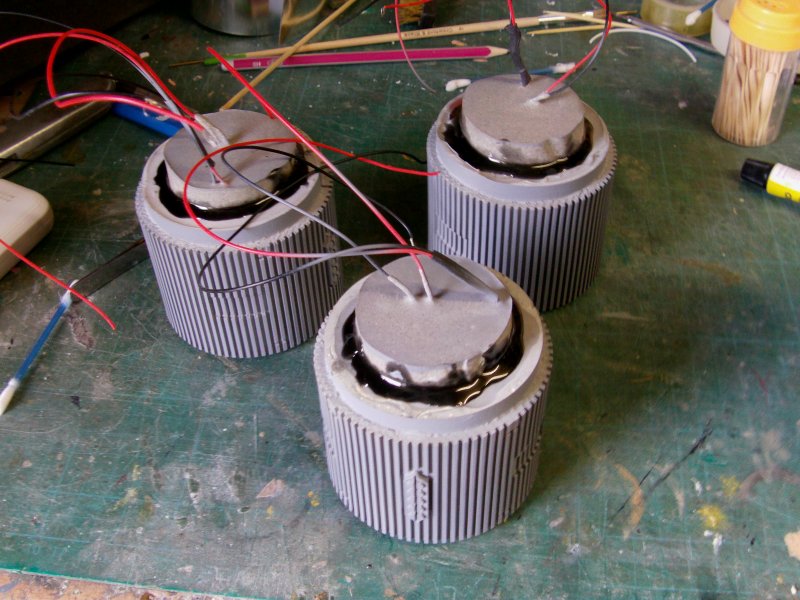
Sorted in short order and a look see round.
Slap a small block of 9 volts on to one for a see what we got thing.
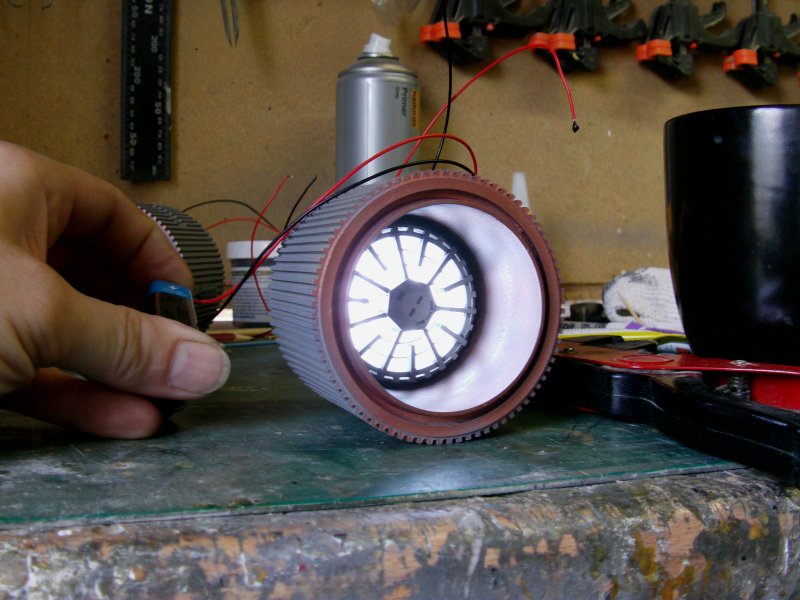
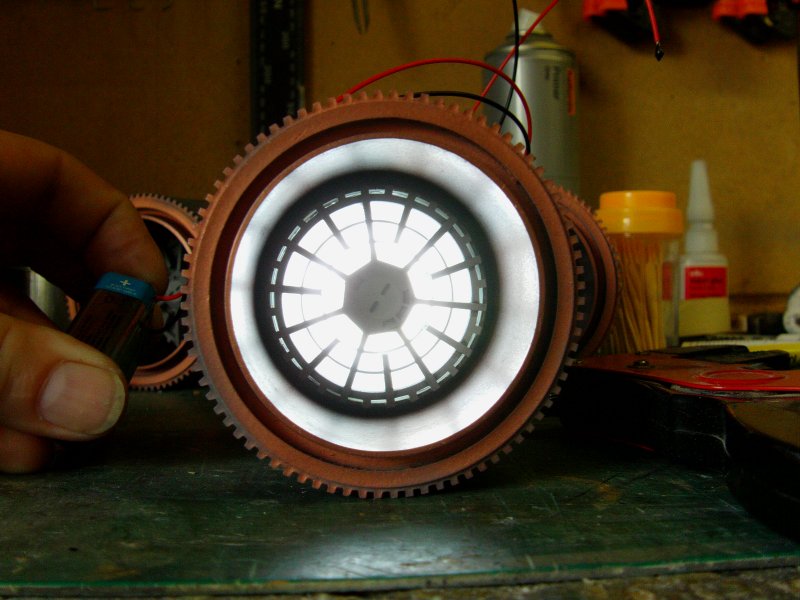
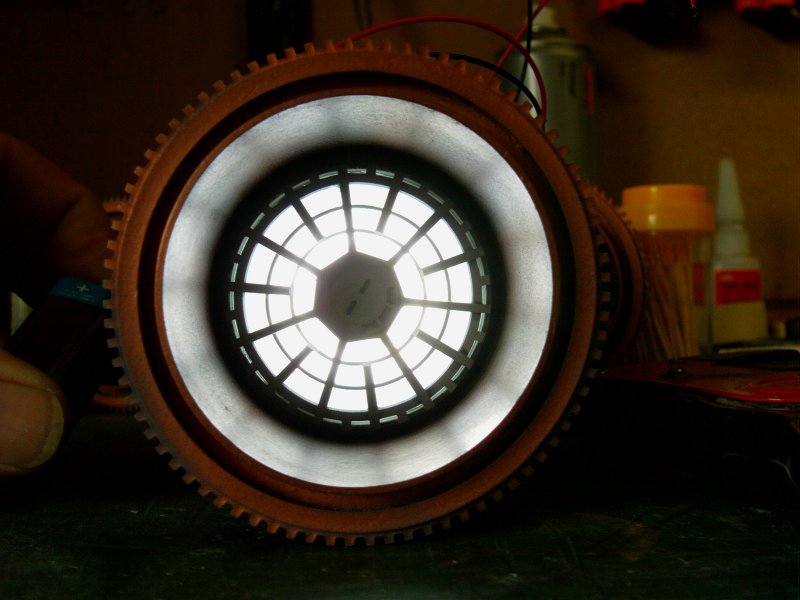
Sweet.
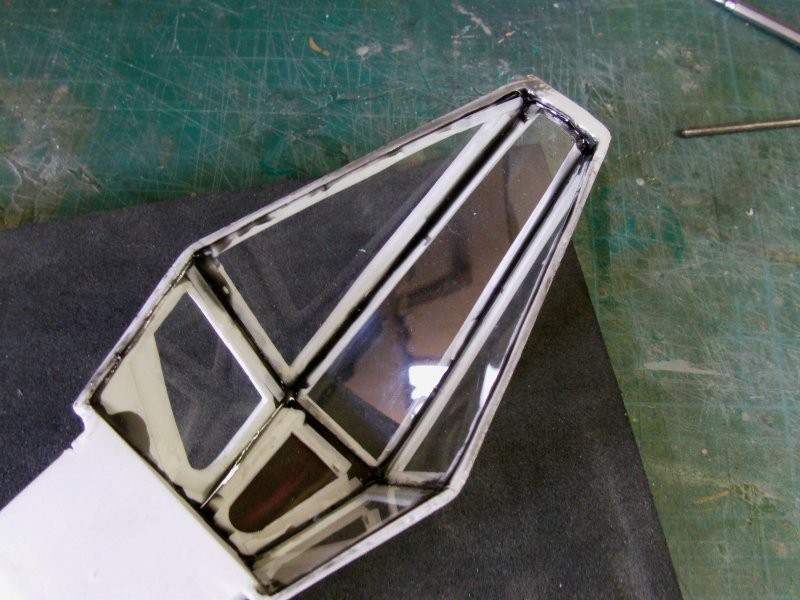
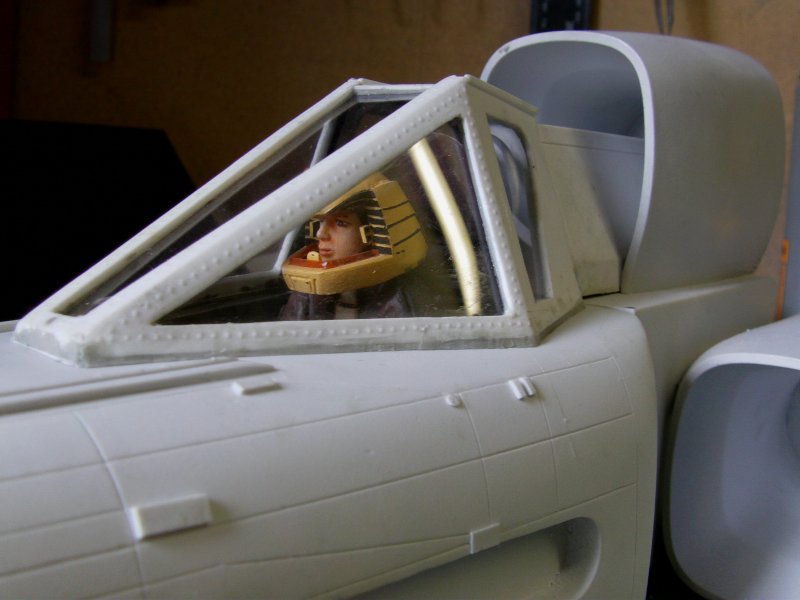
So them be a done deal, on to the canopy.
Oh dear...
Well i'll get back to the 'oh dear' bit in a tick.
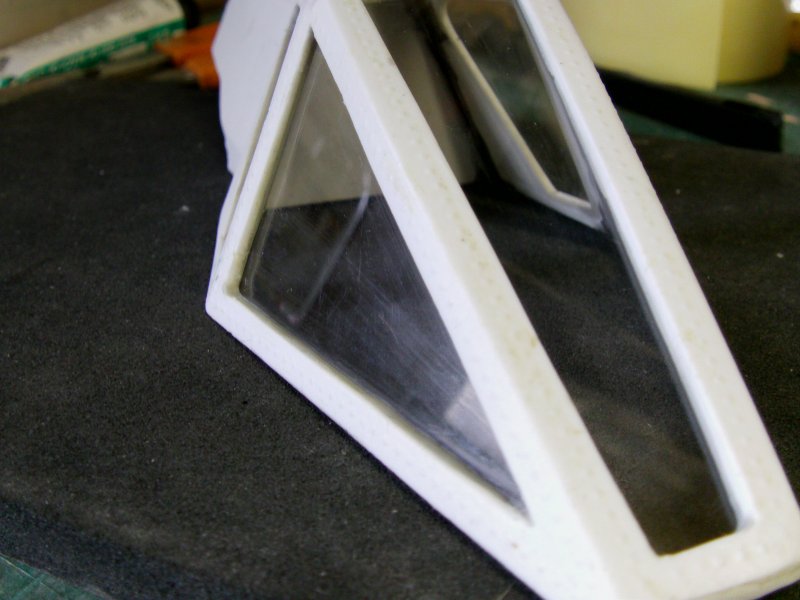
First things first, the clean up of the part then the glazing thing.
Some 20thou clear sheet sliced up and tacked
in to position with some thin strips of double sided tape.
Once all done, some black epoxy thinned ever so slightly
with cellulose thinners.
This was then just dripped (literally) at the start
of the joints and allowed to run.
Being on the slightly thin side it run under the
clear sheet just nicely to secure it a good 'un.
And as near to zero bleed though to the outside as makes no odds.
Sorted!
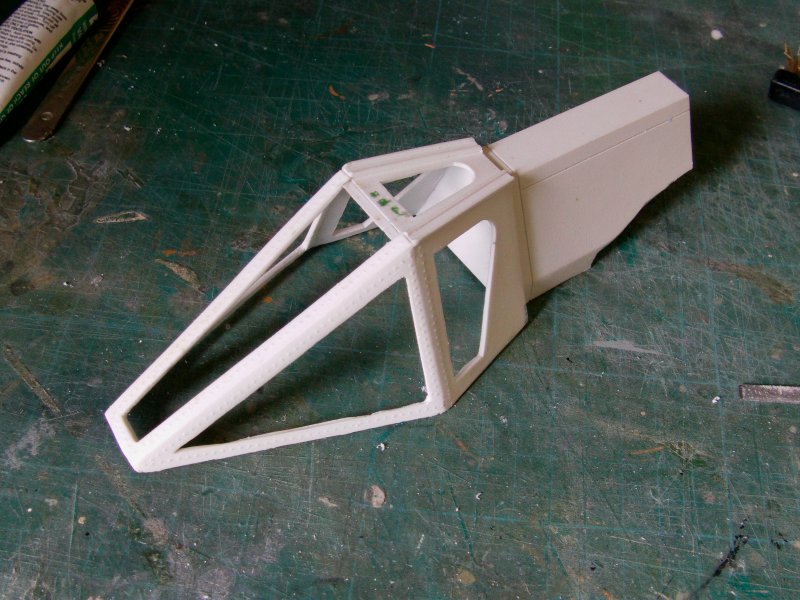
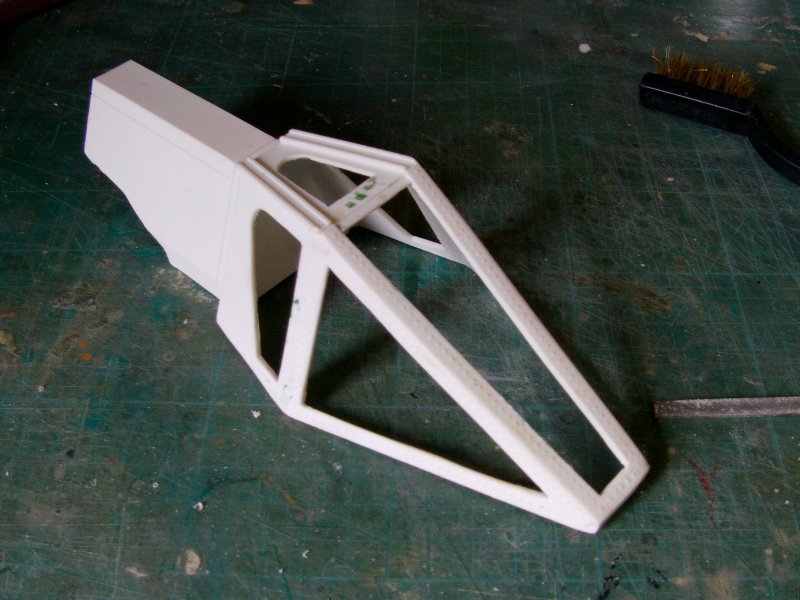
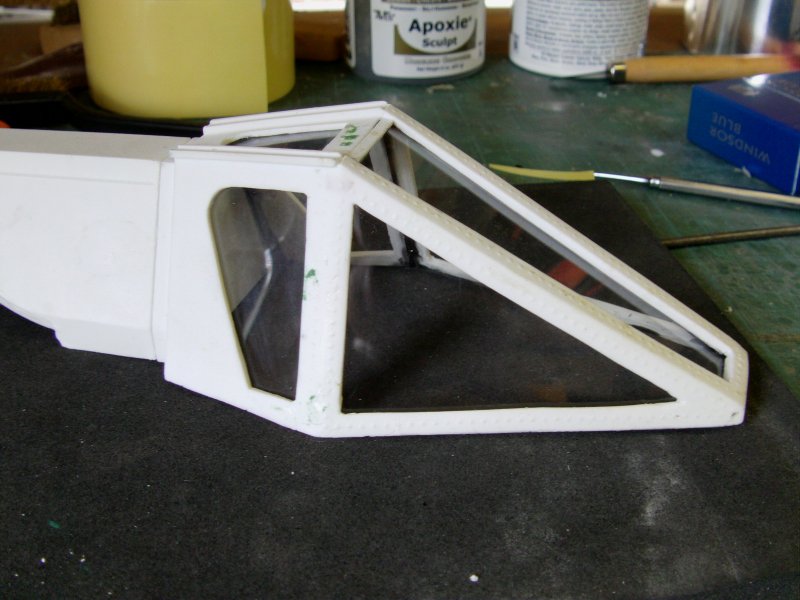
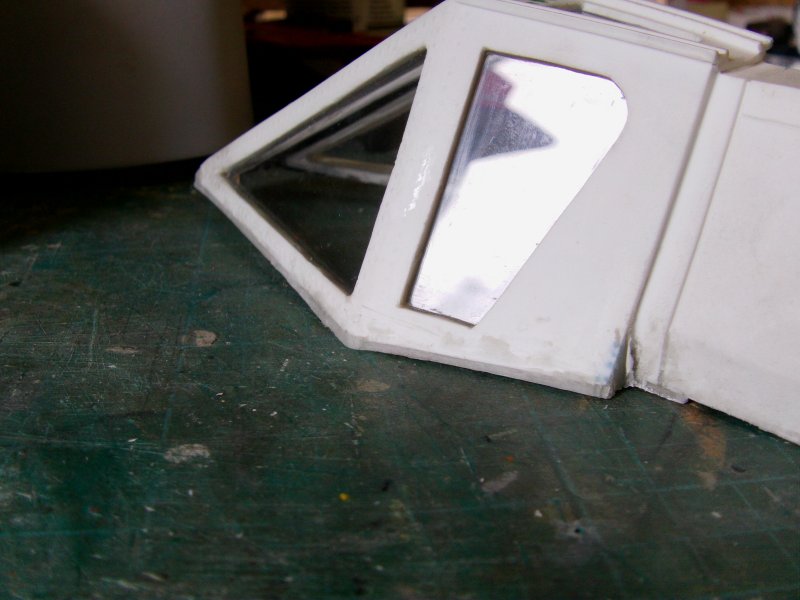
In a lot of places, the clear gear was far from flush
to the framing due to some none too square edging on the canopy frame.
A mix up of the blessed Aves Apoxie Sculpt
and a bit of wet tooling work sorted that out.

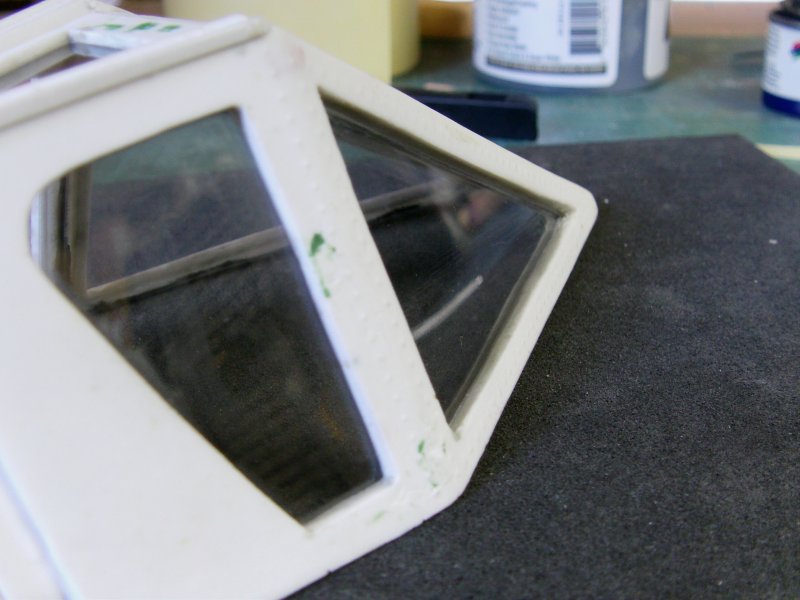
That's a bit more like it!
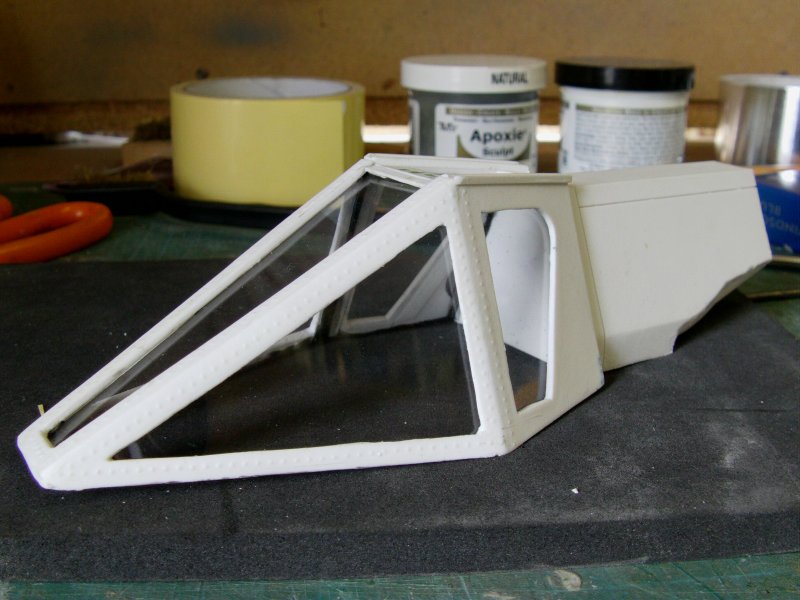
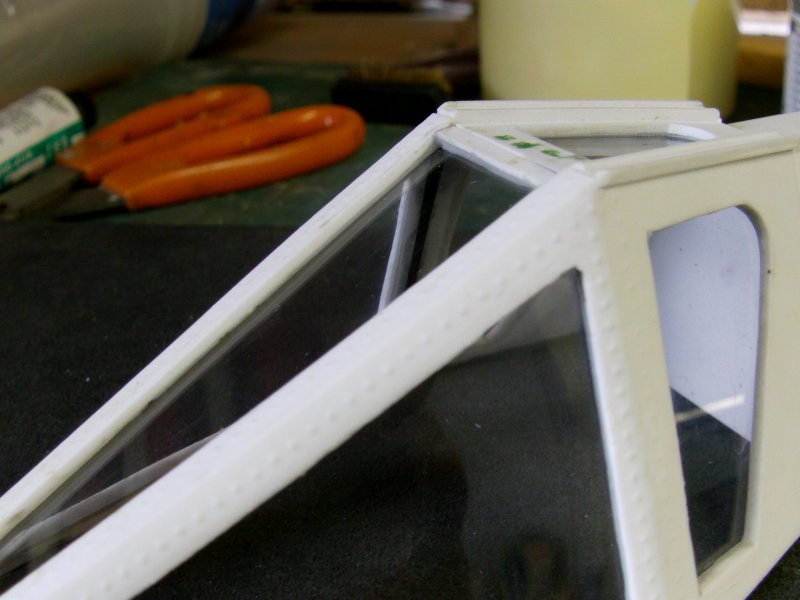
Now how this thing would fit on...
Well I decided that going on past escapades with clear canopies
and windows, a nonpermanent fixing would be a good move.
Just incase I need to get in there because of any
itinerant dust that might reside inside
said canopy that a quick blast with the air hose don't shift
during the final assembly and post paintwork.
Also if it needs to be cleaned for any reason after it leaves me, it makes
it easier on the fella who's way larger than average shelf ornament this will be.
So some very small, namely 3mm diameter by 2mm thick rare earth magnets were brought in to play.
Two for the front with a small brass pin to locate
and one for the rear along with two brass tube locating pins.
Fixing points like so...
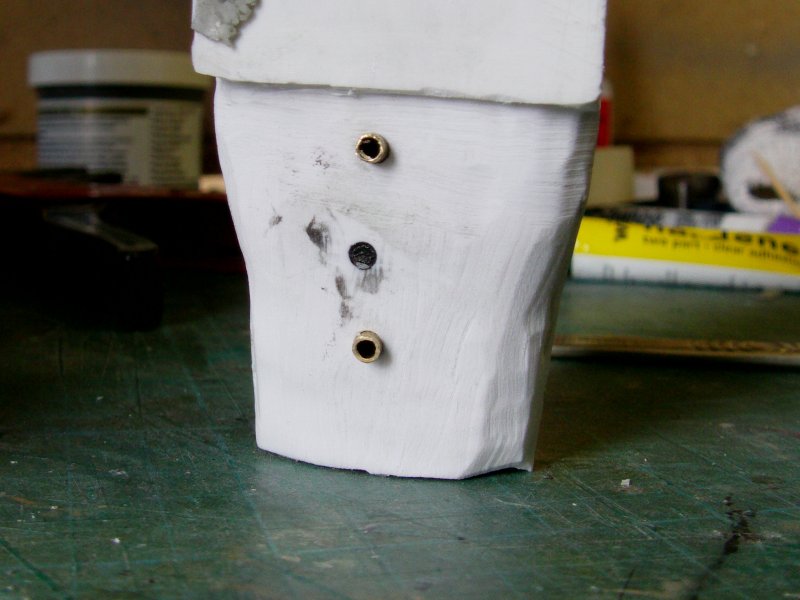
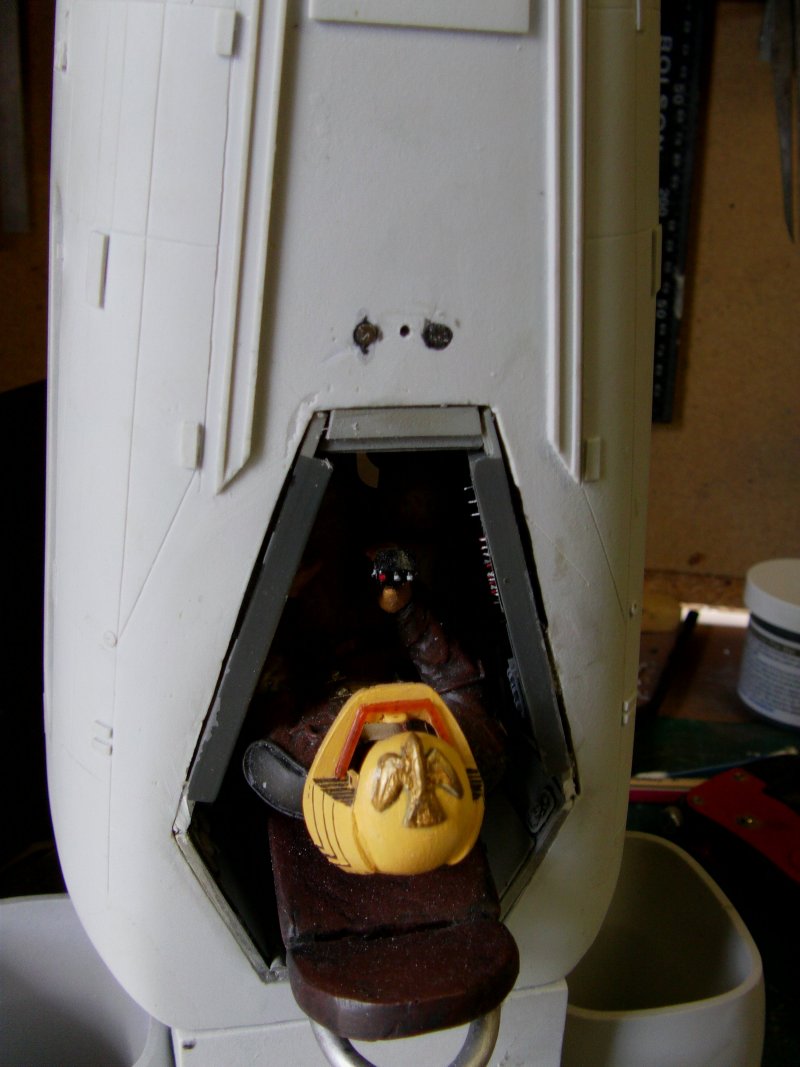
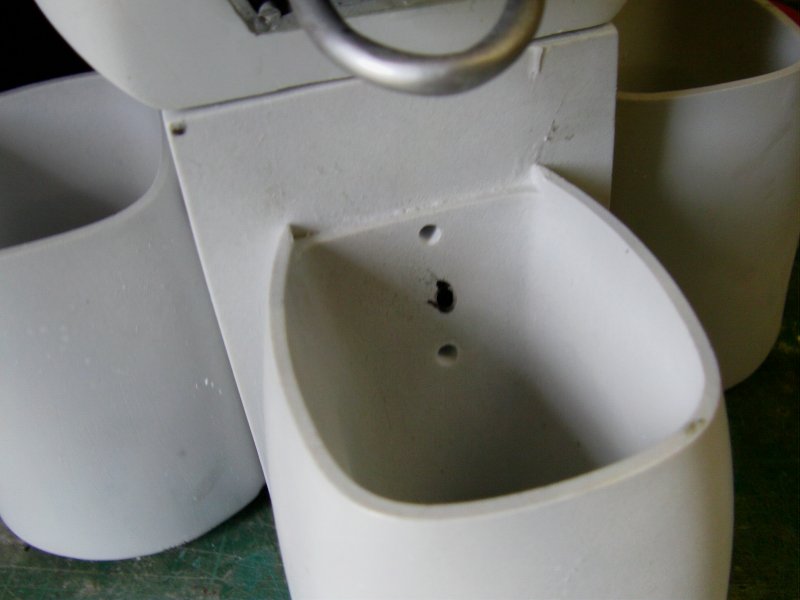
Just slot on, gently press down and it's a done thing.
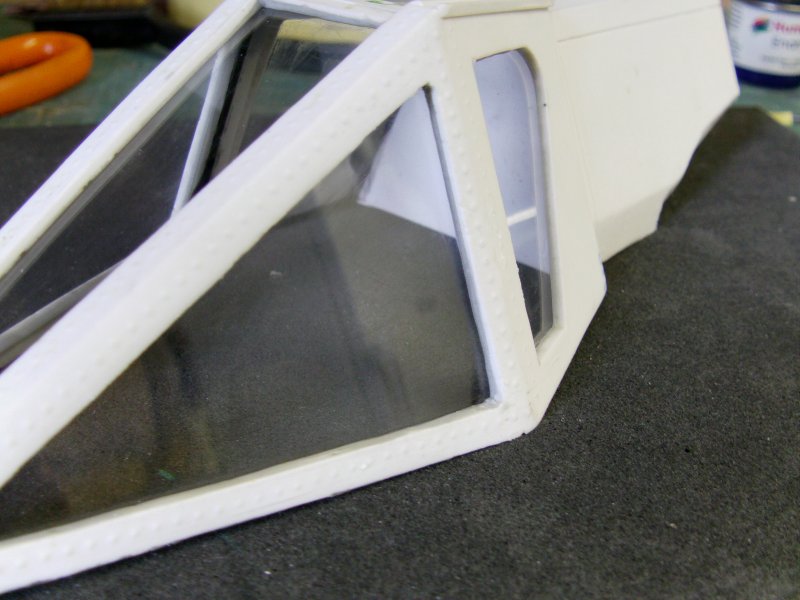
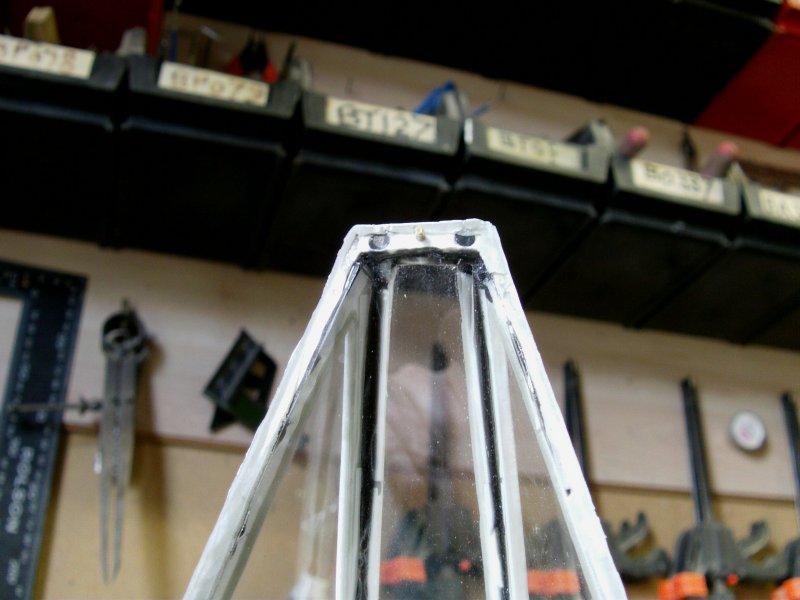
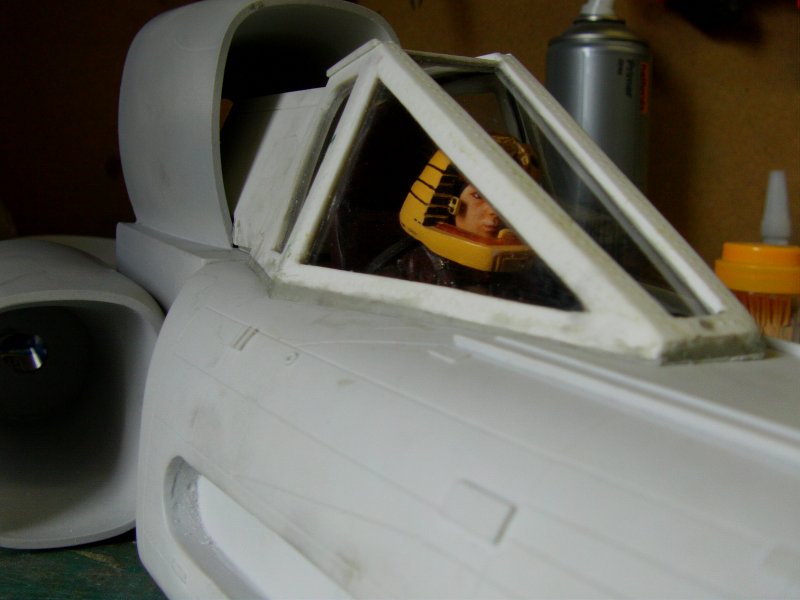
Now for that 'oh dear' bit.
Well while doing the drill/fit/check thing for the canopy
I noticed the the fit was less than stellar...
Well a bit bloody poor to tell ya the truth.
It touched at the very front and the far rear,
the middle was another matter.
Well such is life here about's on a bleedin' regular basis
so the parts where the canopy is supposed to touch got some
ordinary cellotape put on it, the canopy placed where it should be
and there was much squeezing in and wet tooling up of the Aves.
Once cured, a small bit of tugging and rocking and the canopy
with it's new bottom surround came away pretty cleanly.
Only a few little bits of the Aves came away on release but an easy fix

In the second picture, that is almost 1/8th" of Aves top to bottom on the
part where the rear window frame cranks round and
leads to the front part of the frame.
Oddly enough, it required more Aves on that
side than the other but the canopy sits pretty straight and square.
So that bit sitting proper with a snug fit
to the fuselage it do so job done.
And that's the first round of sub-assemblies dealt with.
More on the next page so away with you to that one and we'll carry on.
Page Number