
Salzo Battlestar Galactica
TOS Viper Fighter.
1/12th Scale 31" long


 Page Number
Nuts, bolts, glue, screws, hammer, chisel...
Yep,
Let's Get This Bad Motor Scooter Together Then!
And welcome ye back all to another round of hellhole happenings.
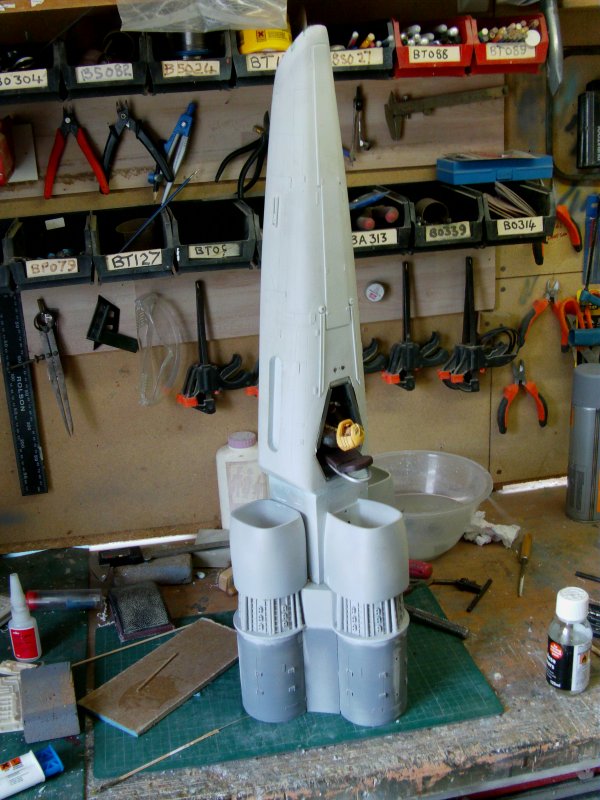
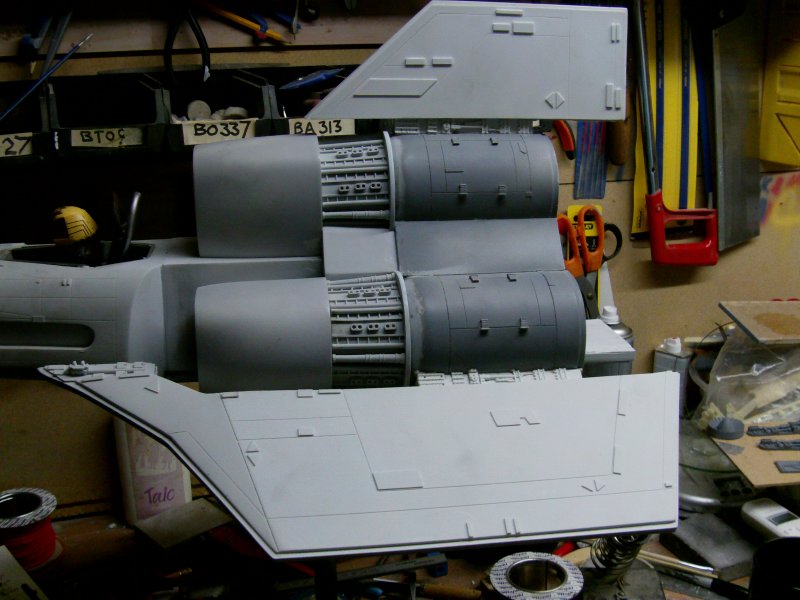
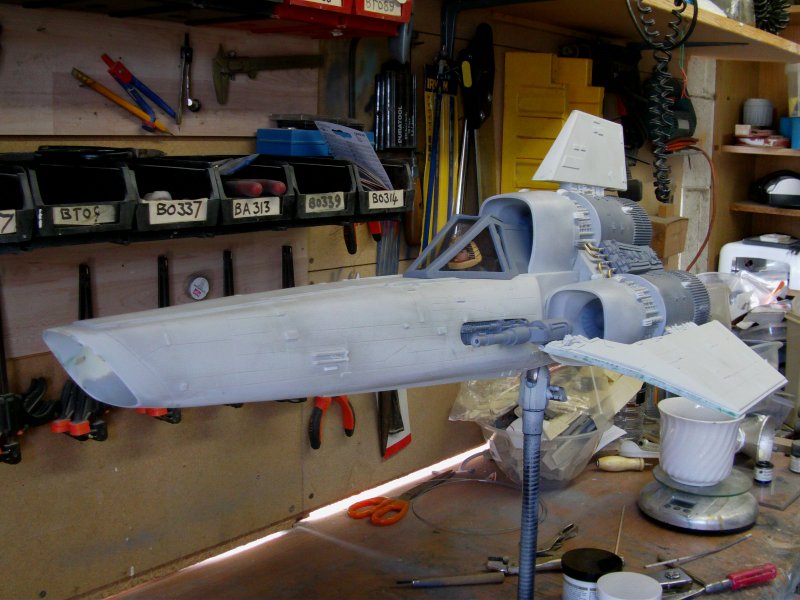
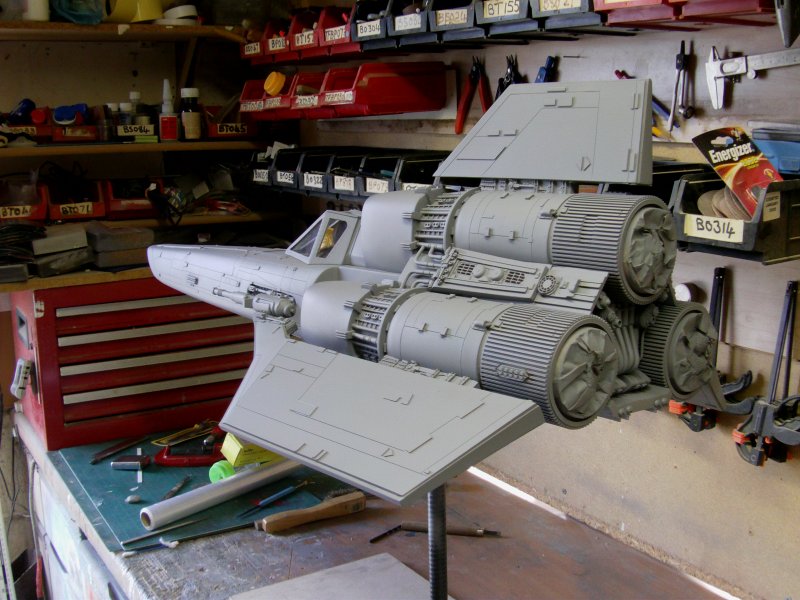
Well time for main assembly so let's have at it.
Fuselage and engine parts assembled with a generous
dollop of 24hr cure epoxy gunk.
Bolts duly slotted through holes already drilled
out by yours truly, nuts added and all tightened up.
So that all set and sorted, time for the additional detail parts
to come out of hiding for the primer treatment.
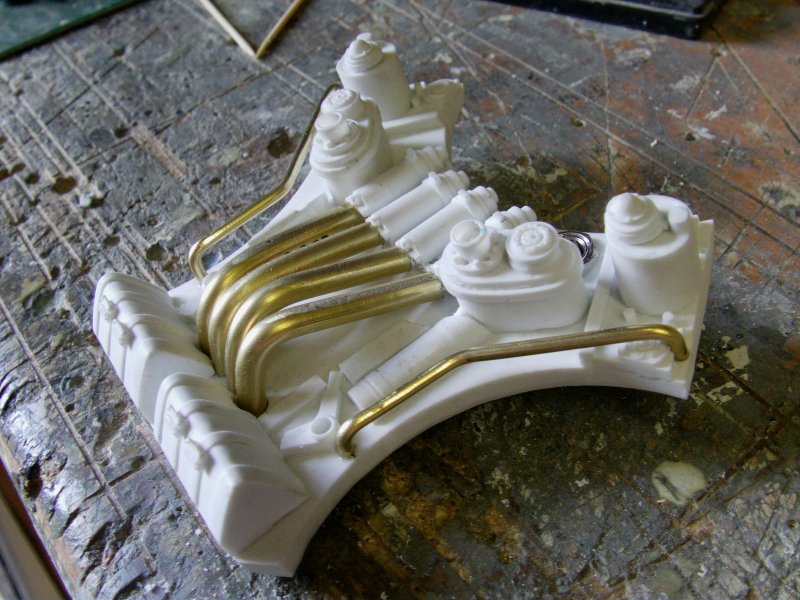
This lot...
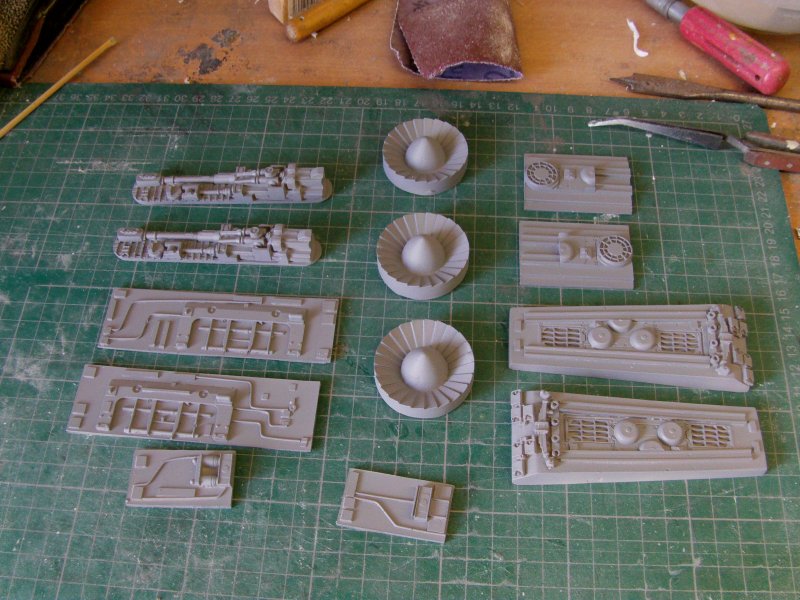

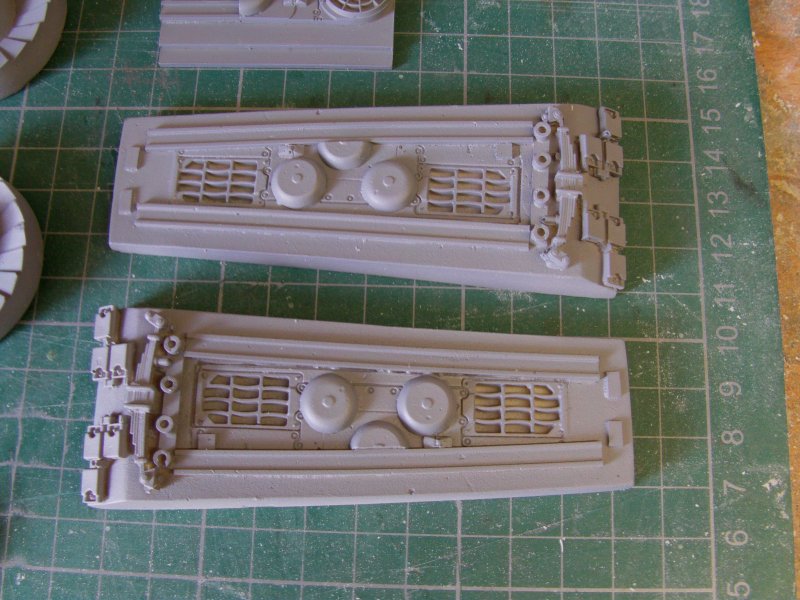
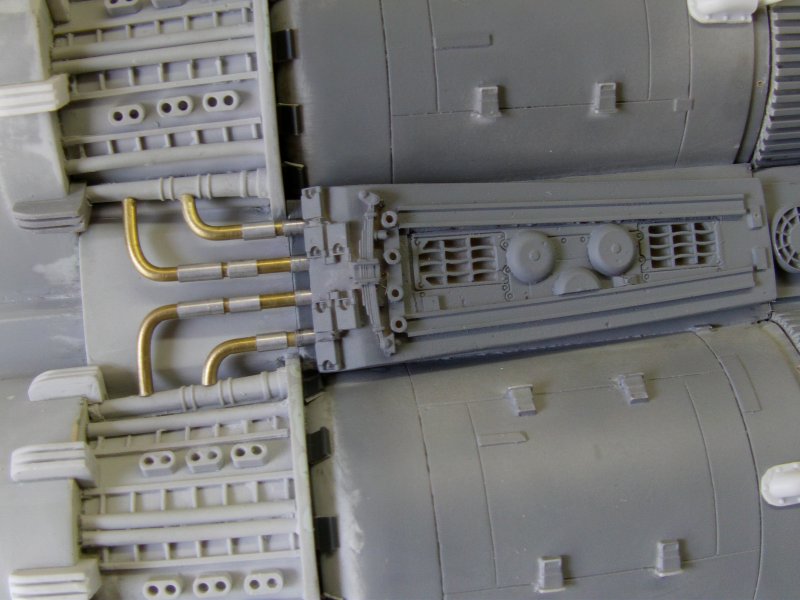
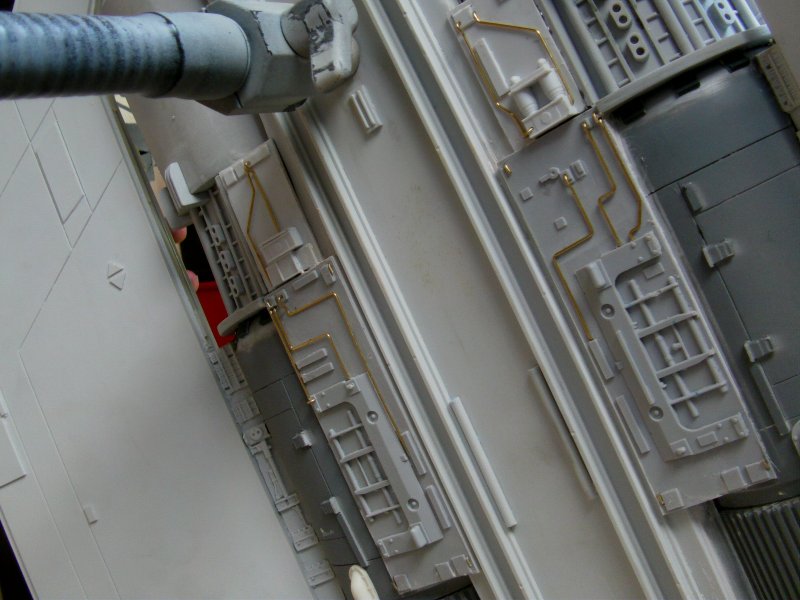
The thin piping on the parts in the last pic
is going to get removed and replaced with
brass wire, namely 1/32" or 0.8mm diameter stuff which will do the trick here.
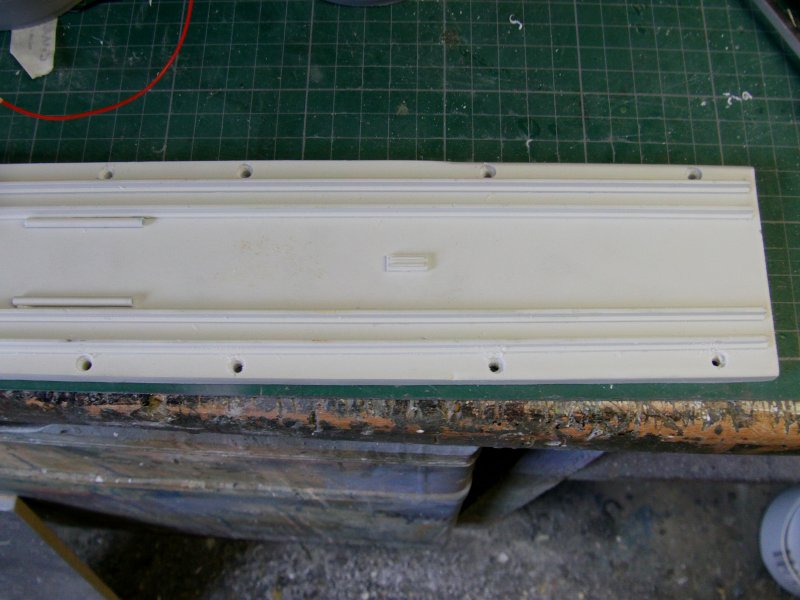
So next up is the belly plate for the fuselage.
Now this thing is a bit uneven in thickness here and there.
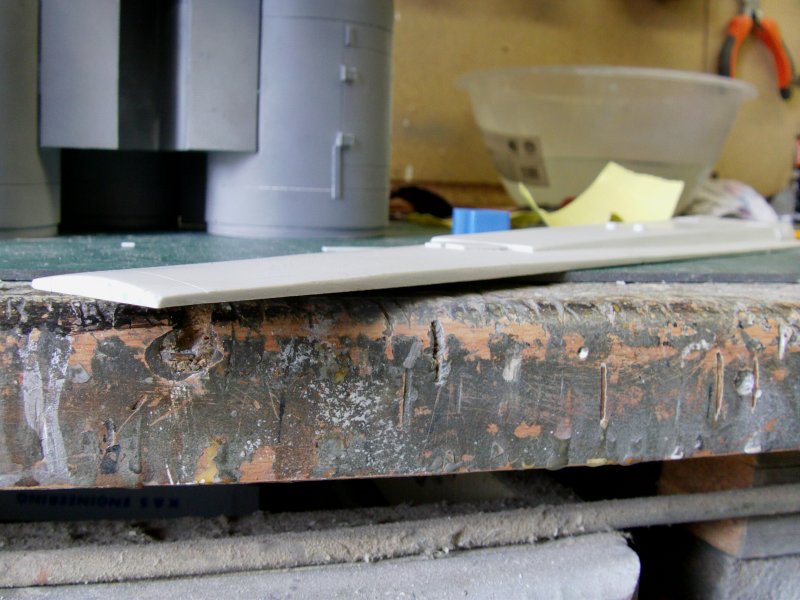
Still, no big deal really.
Some square strip scrap styrene cut in to small
lengths will fit the bill for getting it to sit
as level as possible.
Bits o' plastic cyano glued to the inside at a smidgen over 2" divisions,
depth inside determined by measuring the thickness of the belly plate at the
same measurement points.
Said bits o' plastic backed up with some epoxy stay put gunk and good to go.
Belly plate on and epoxy secured with little fuss
and a lick of Aves wet tooled in for later smoothing off.
Lovely!
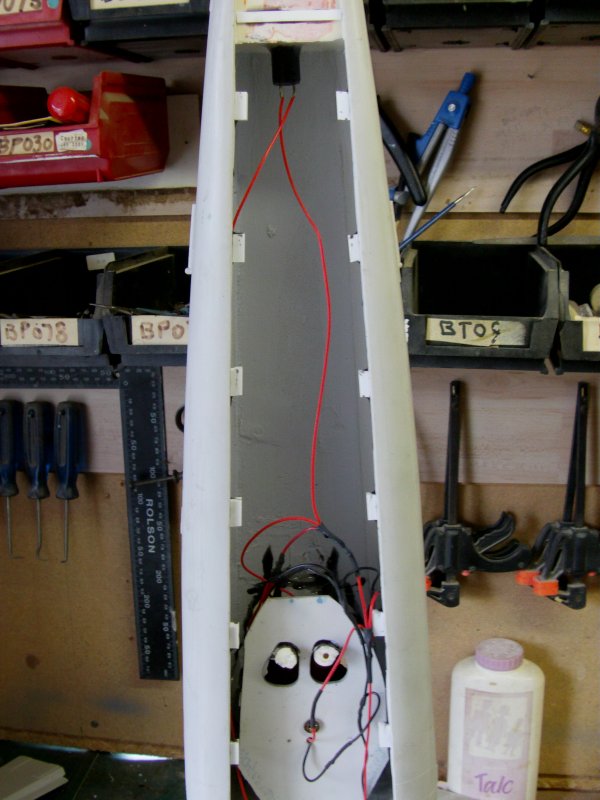
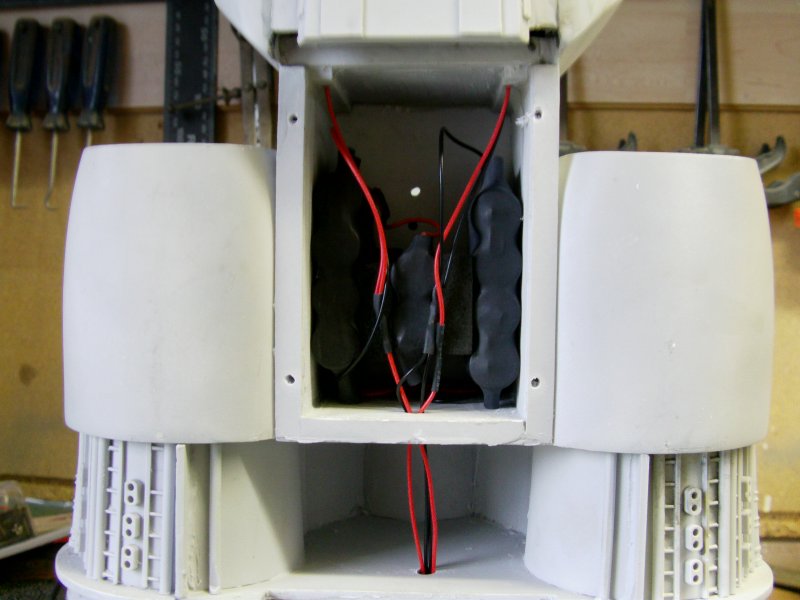
Decided on a change of fitting for the battery pack about here.
Turns out there was a space almost tailor made
for the wee electrical mob.
A bit of hot melt glue and a couple of small
foam slices and they are going nowhere.
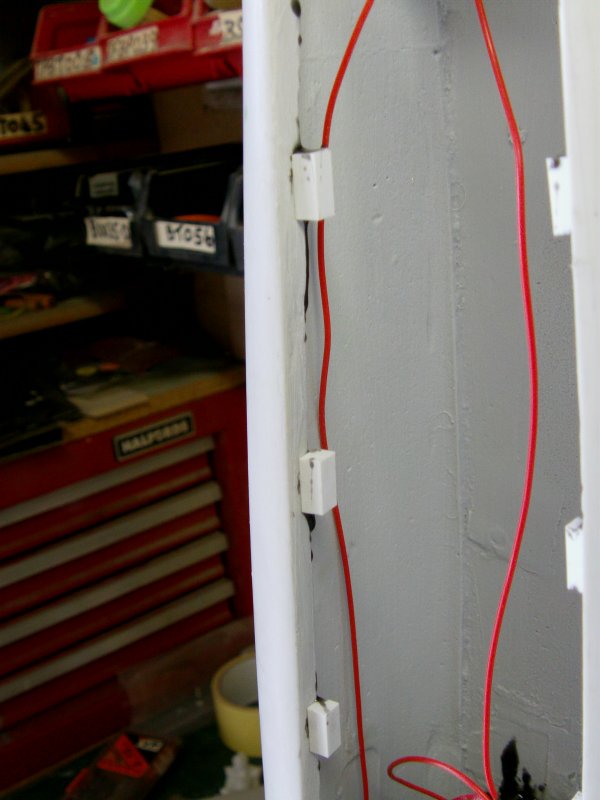
Wiring hooked up for the lighting and charging socket doo-dad.
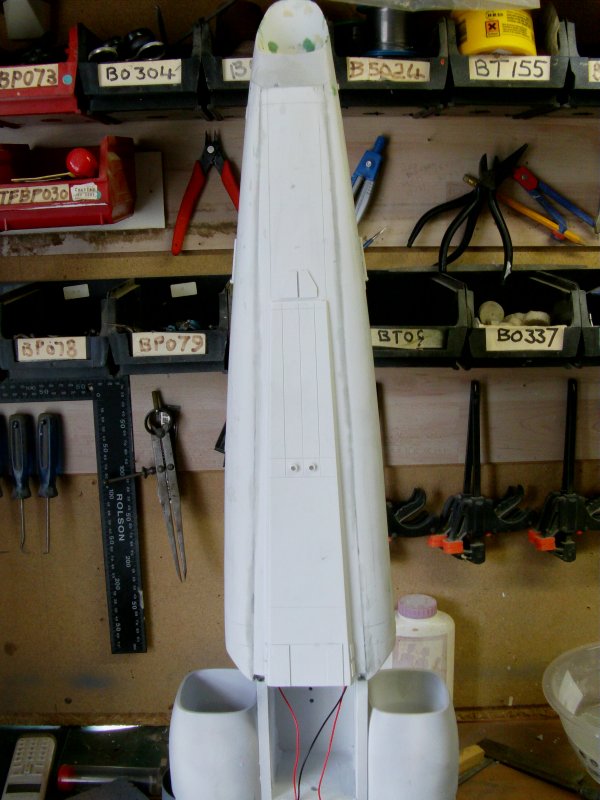
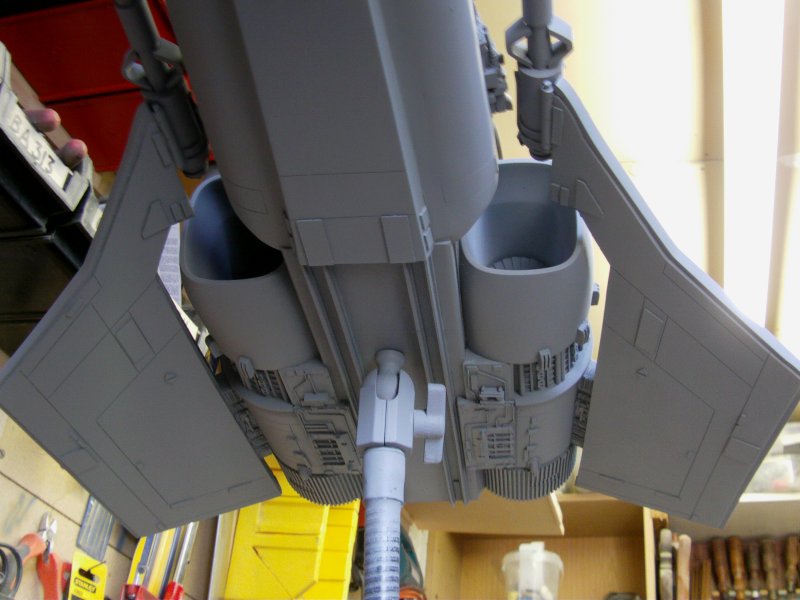
Now to the rail plate that sits on the engine section belly.
Simply done with eight holes to take some small screws,
associated pilot holes in to the engine section meat and
with a serious dose of epoxy, the bugger was in place and shifting for no one.
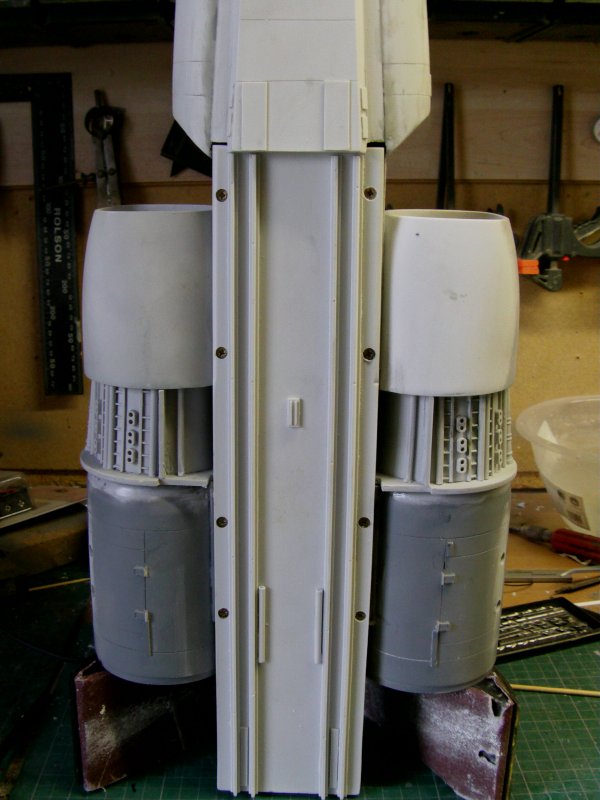
All nice and solid as a resin cast rock...close enough for me.
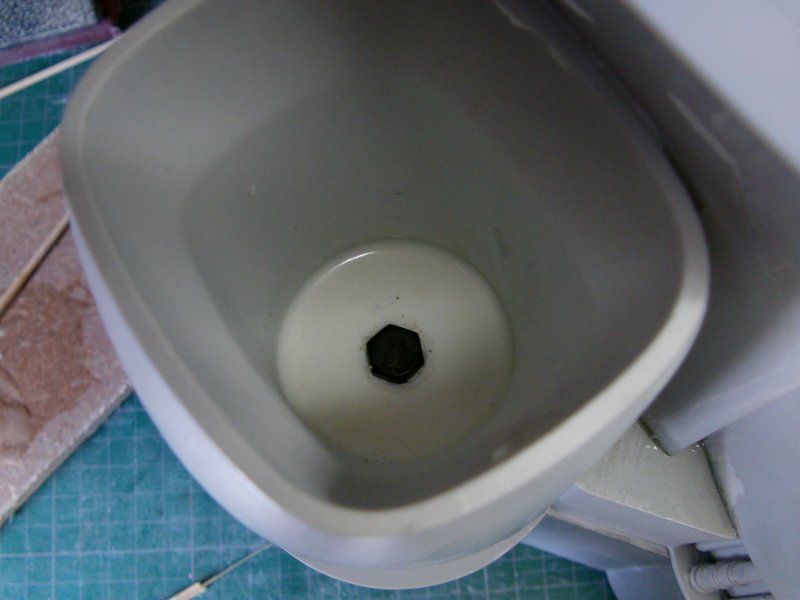
So now for easier handling, a 1/4" X 20 threaded insert was rammed none to delicately in to
the aforementioned rail plate at the approximate balance point.
To which was attached the all purpose Panavise mount.
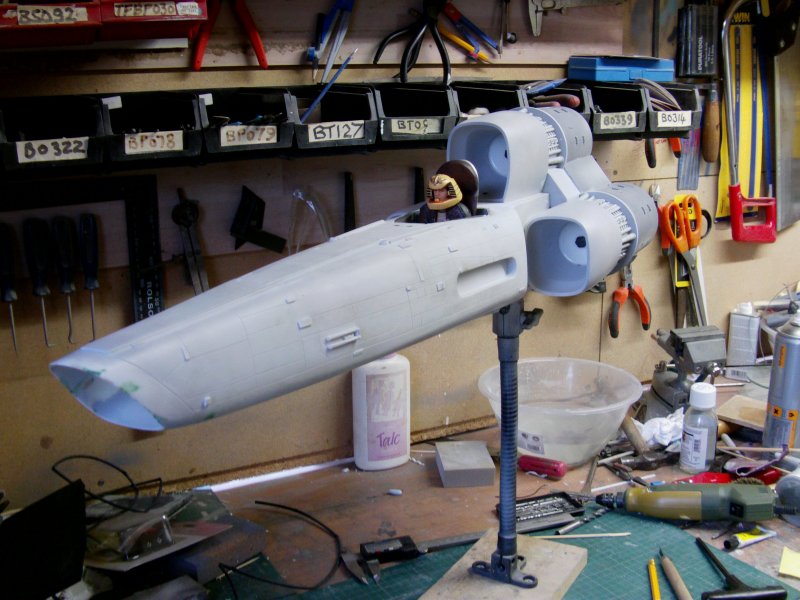
That all settled nicely and saves my arms getting tired so all good round here.
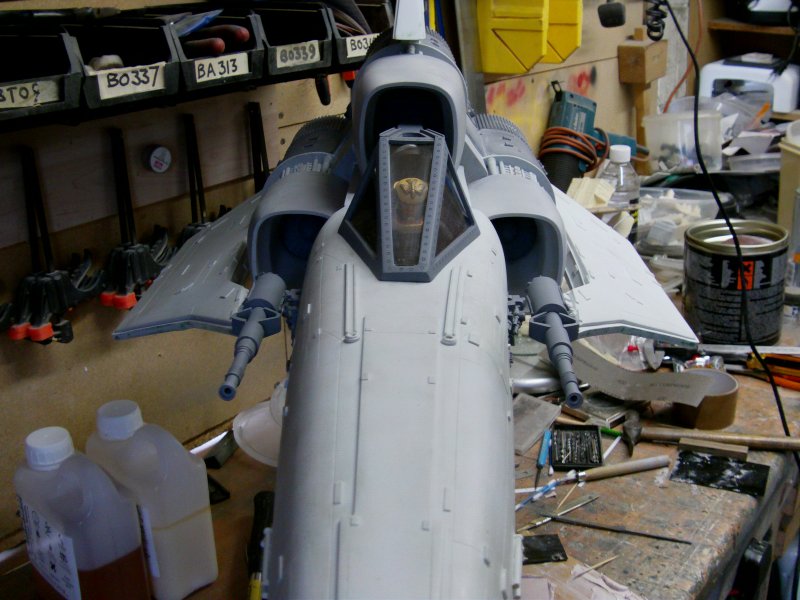
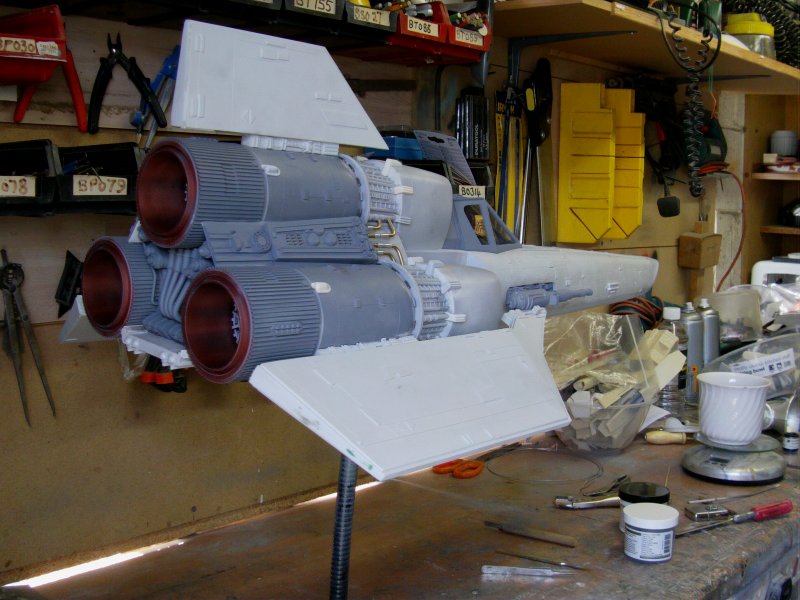
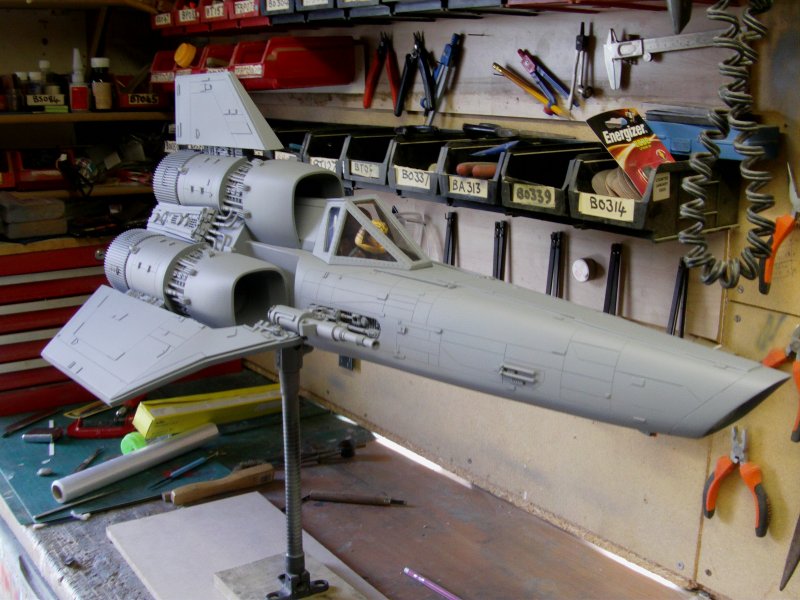
So the fins brought out and secured without mishap
which is damn decent of 'em don't ya think?
And only a slight bit of nudging required to get
everything as all square as possible so to speak.
Lovely!
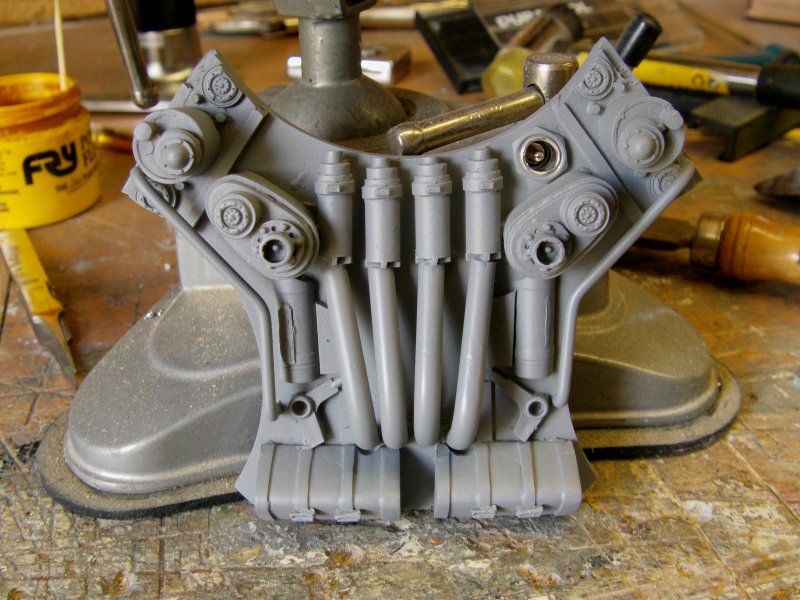
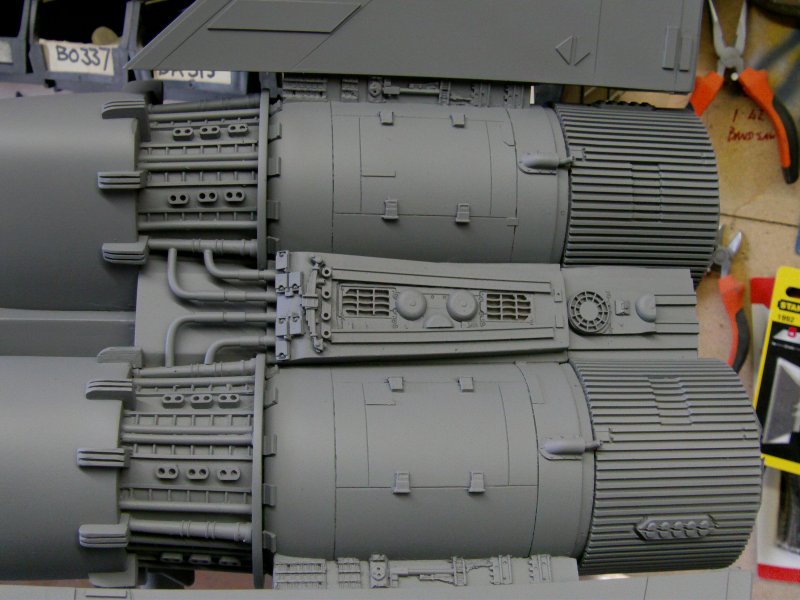
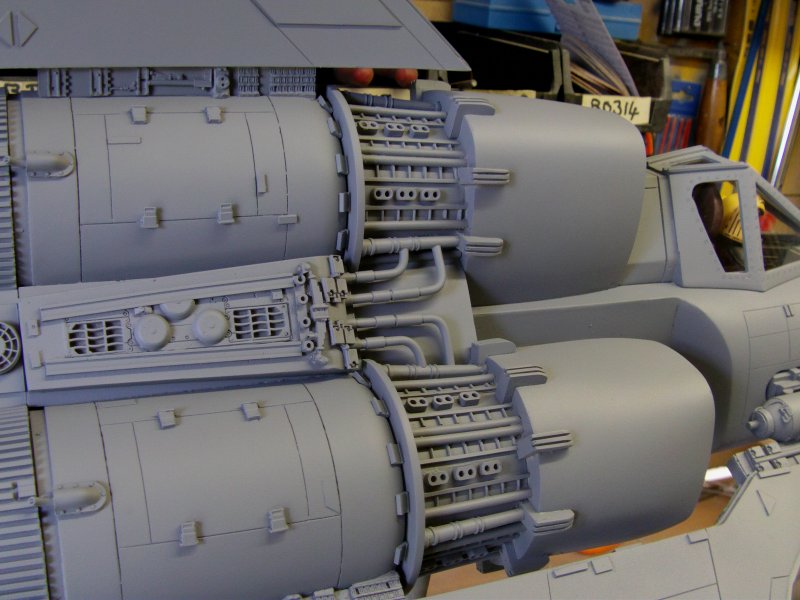
Next we come to the rear detail plate that
sits slightly recessed from the rear of the engine cans.
Now this piece has an additional bit of detail in the manner of a four pipe set up.
The supplied part looks like this.
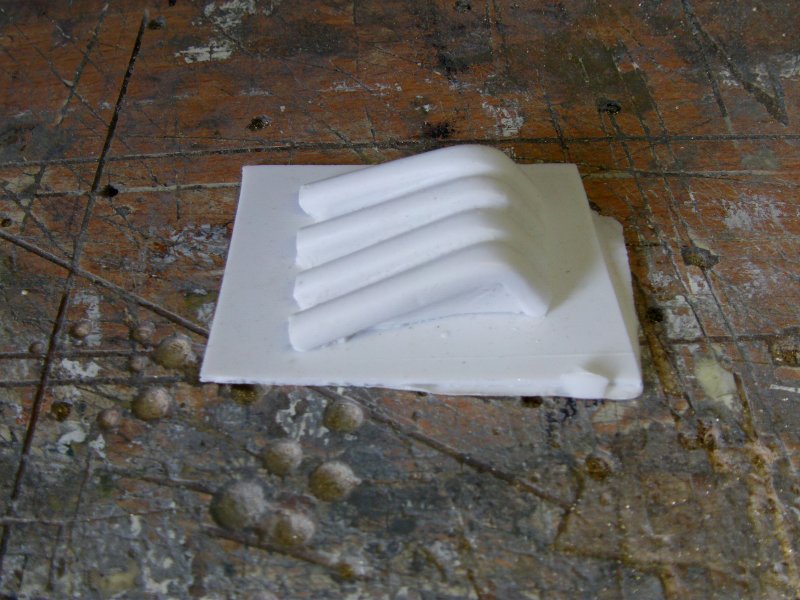
So...straight in to the spares bin with that thing and
out with some 3/16th" or 4.8mm diameter brass rod.
There was much bending and filing done and along with a couple of bits of
3/32nd" or 2.4mm diameter brass rod for a bit of extra detail,
a spot or several of cyano and brass wire pinning top and bottom
to make sure they were going nowhere and lo, the deed was done.
Battery recharge socket installed and then to whole shebang got some
primer lobbed in it's general direction.
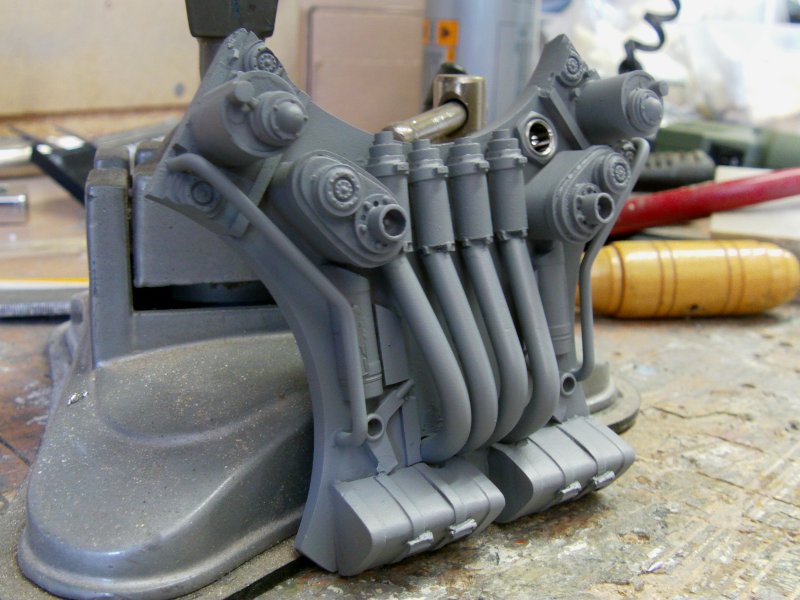
Much better.
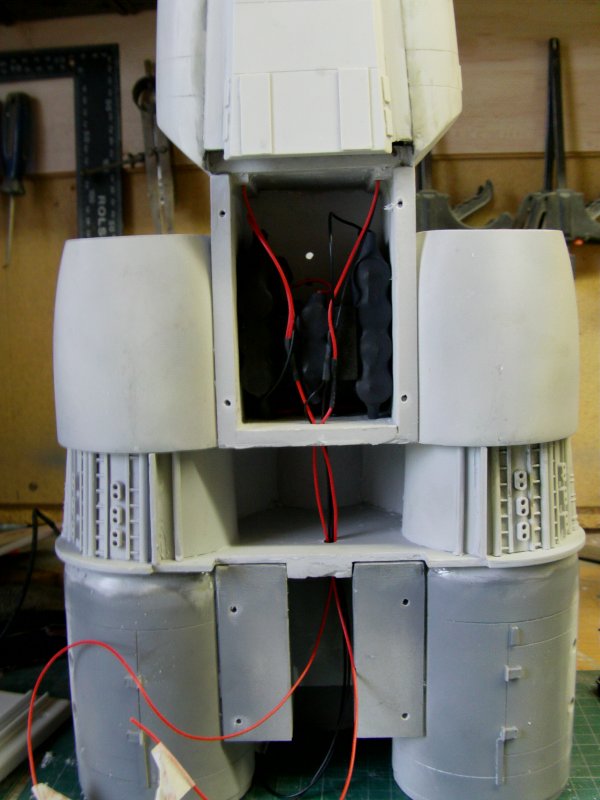
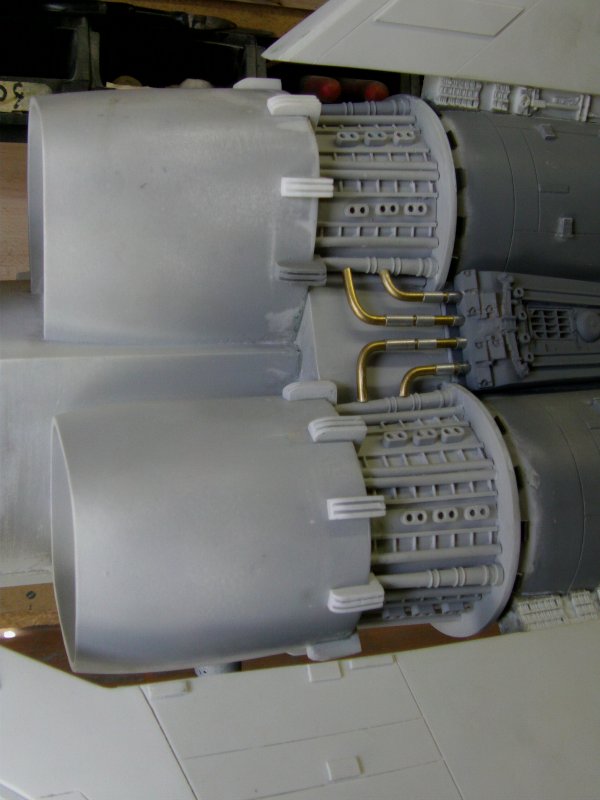
Well long story short, engine cans wired up and secured in to place,
circuit for flickering/flashing LEDs also wired in and set up,
all tested okedoke.
Rear detail plate set in proper position, glued and pinned in,
detail parts between the high engine and
lower engine cans in place and epoxy stay put gunk secured.
Oh, the wire in the pic is coming from the charger, just cycling the batteries as it's been a while.
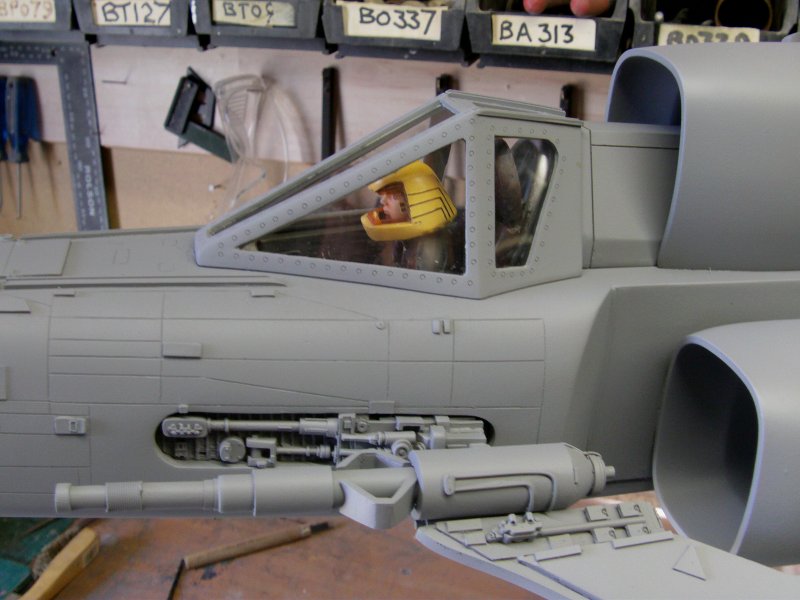
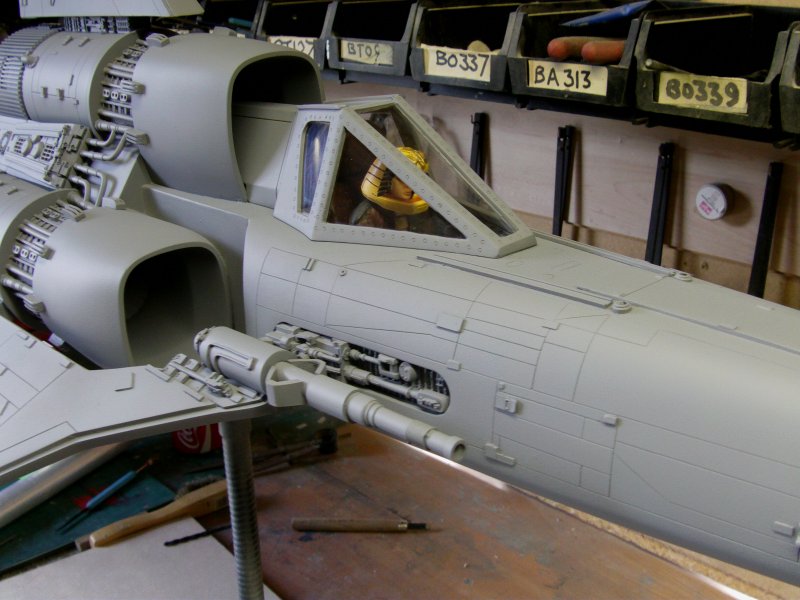
Once dealt with then on to fitting the detail plates in the
fuselage side depressions and fit the guns.
The usual epoxy glue and brass pin dept. for the
large laser firing bits to stay where they are told.
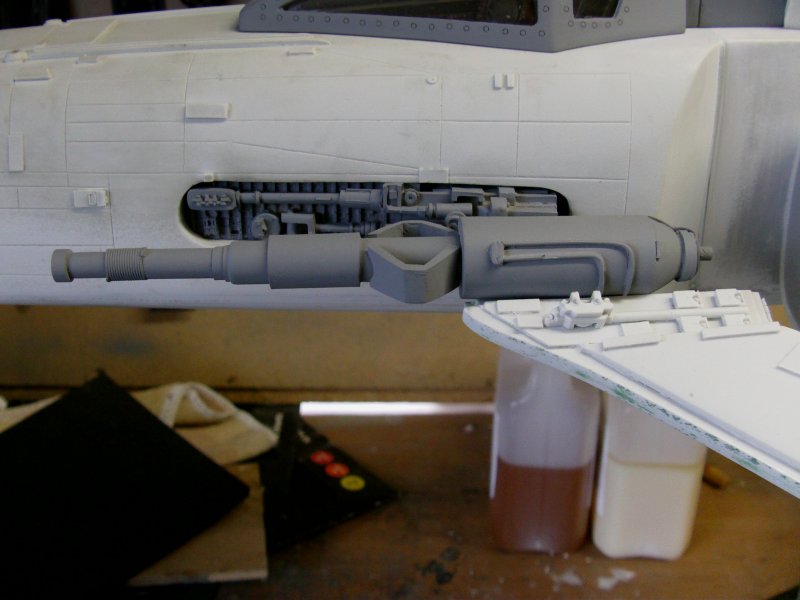
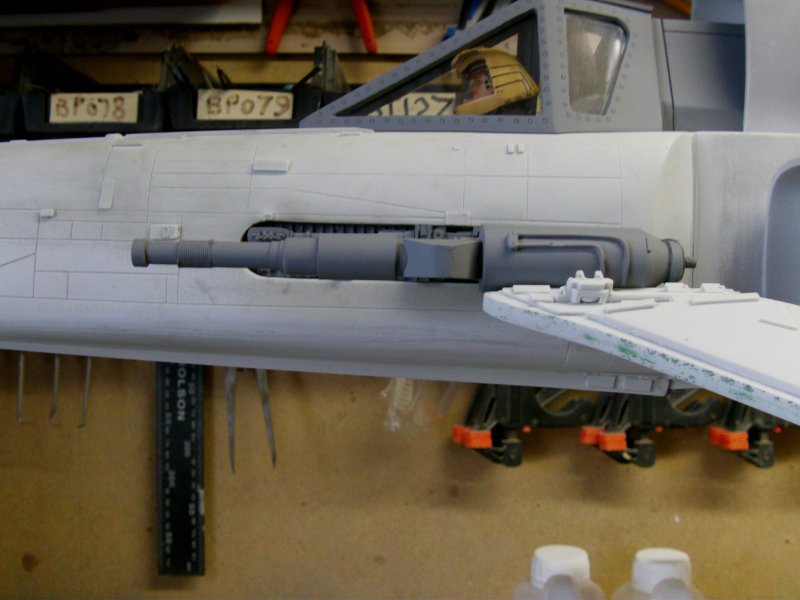
So that's the shooting stuff set and sorted.
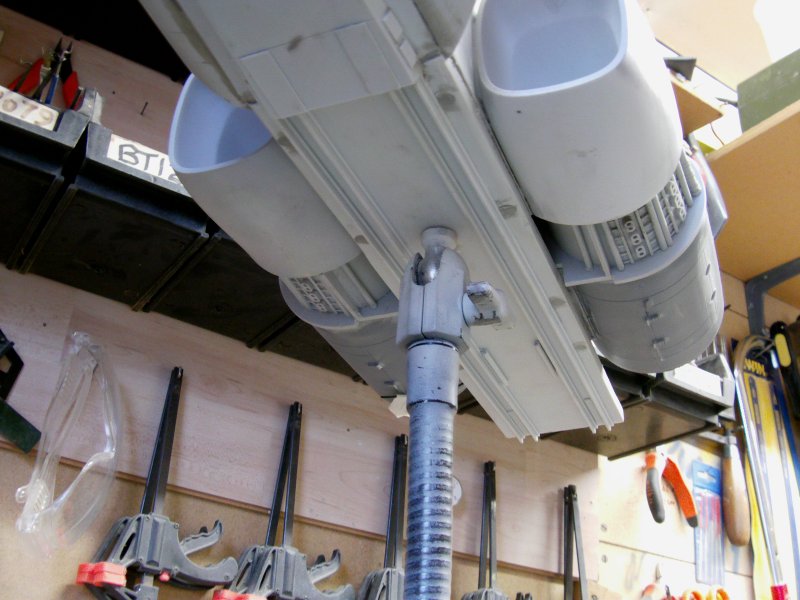
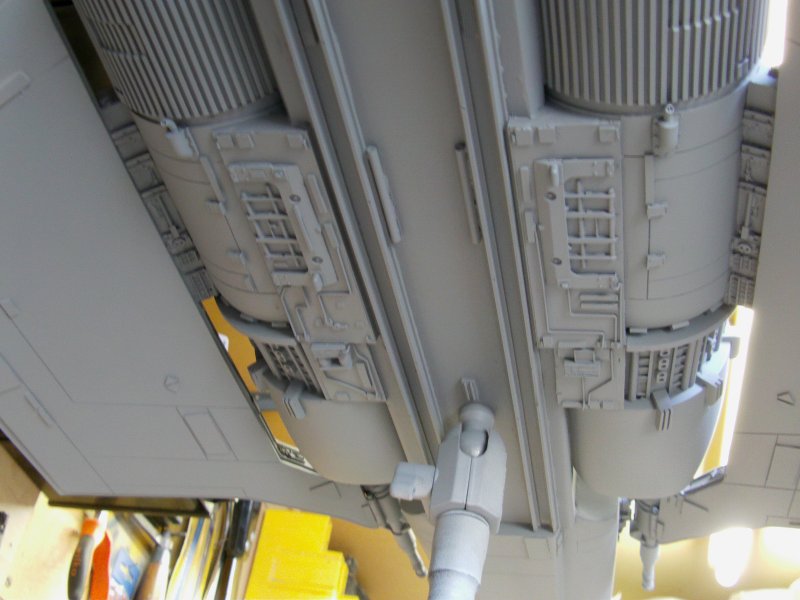
So next up, the detail plates for the engine underside
got the primer cleaned off and that piping removed.
A quick clean up and glued in to position and
filler faired in as they should be.
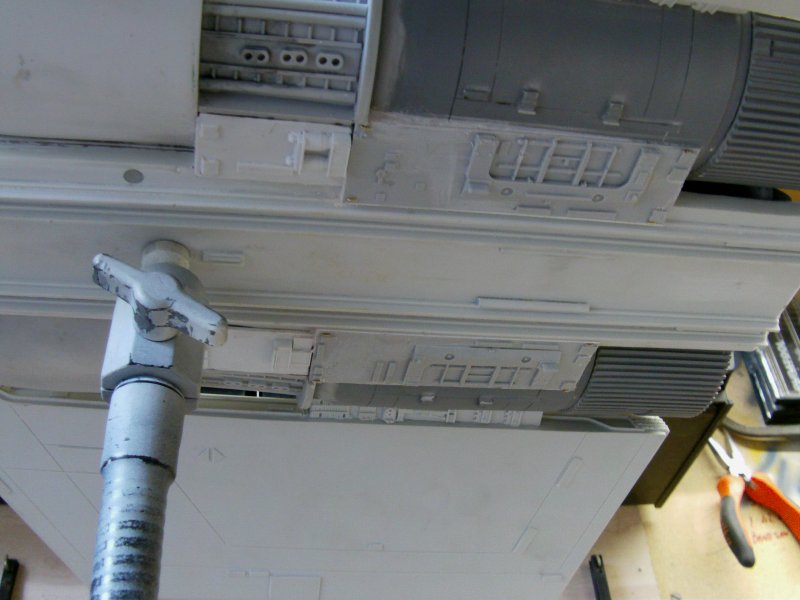
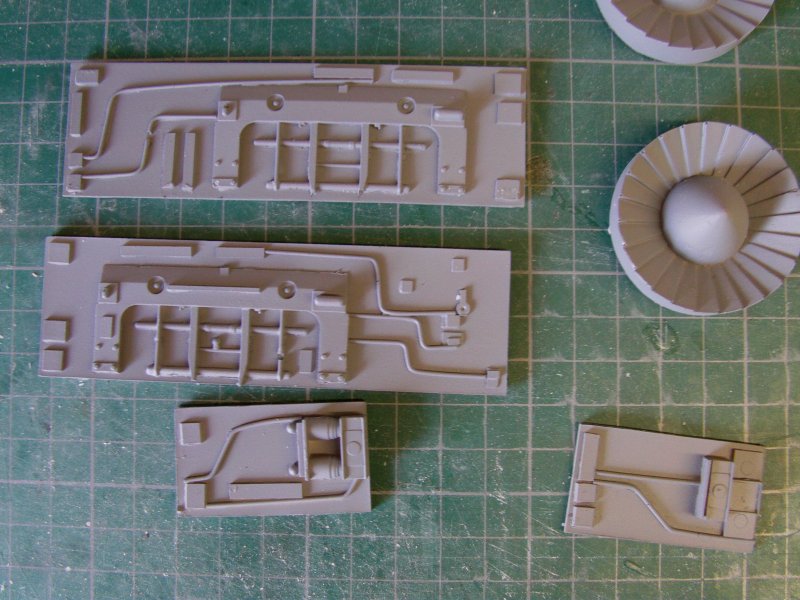
Then for some more topside detailing bits.
The parts that fit in between the engines on both sides were attached,
The small rectangular parts that got removed from the engine casting
were built back on.
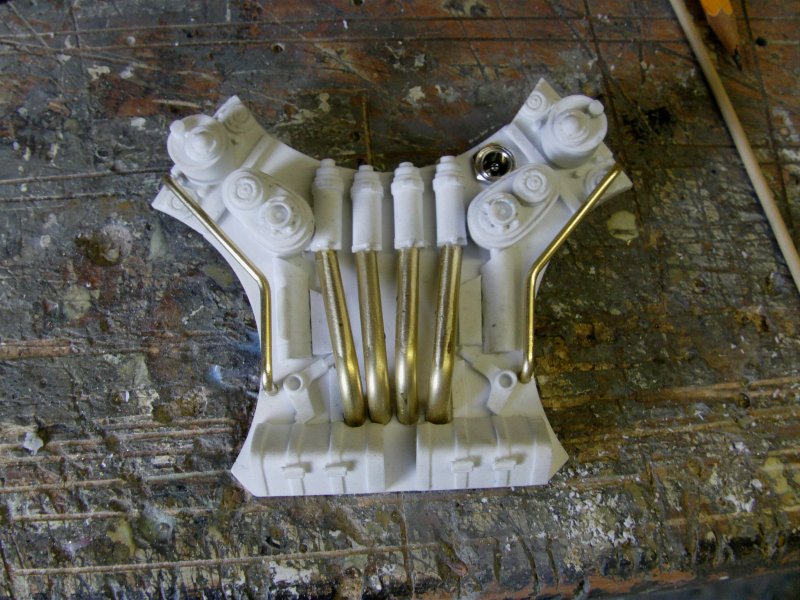
The piping that should come from the between engine detail parts
was made up using some 1/8th" or 3.8mm diameter brass rod
with several sleeves cut from aluminium tube just to dress them up a bit.
Also the kit supplied detail parts that 'hook' around the rear of the intake section
went through the test fit/trim/test fit/glue in/repeat another 19 times debacle.
But they all look the part so as sorta worth the aggro as dammit.
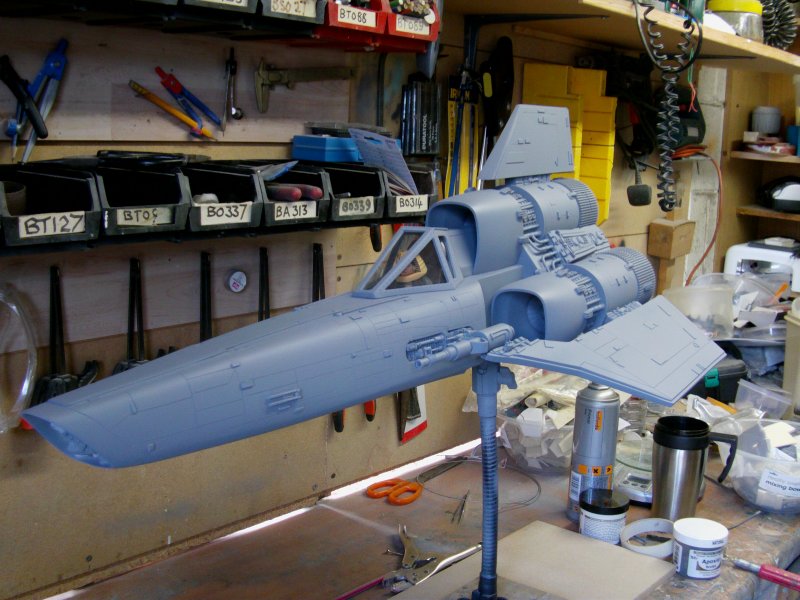
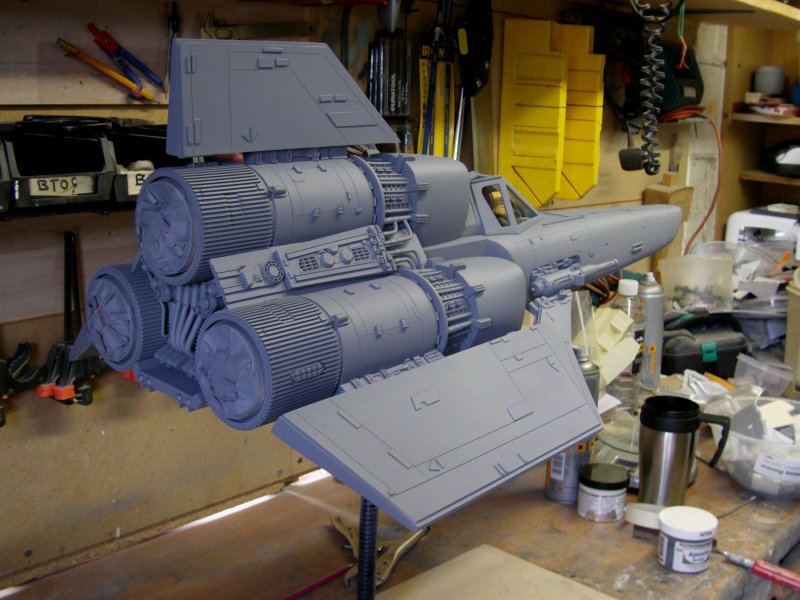
So, almost there now.
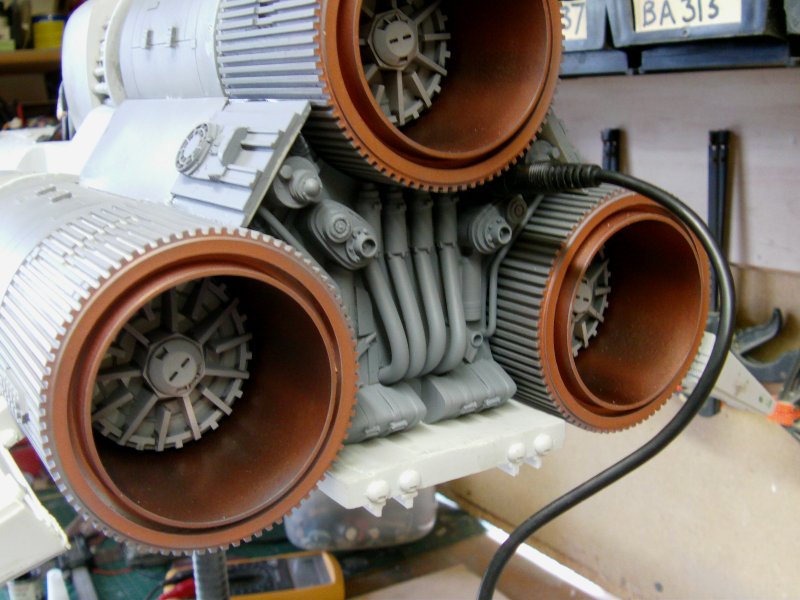
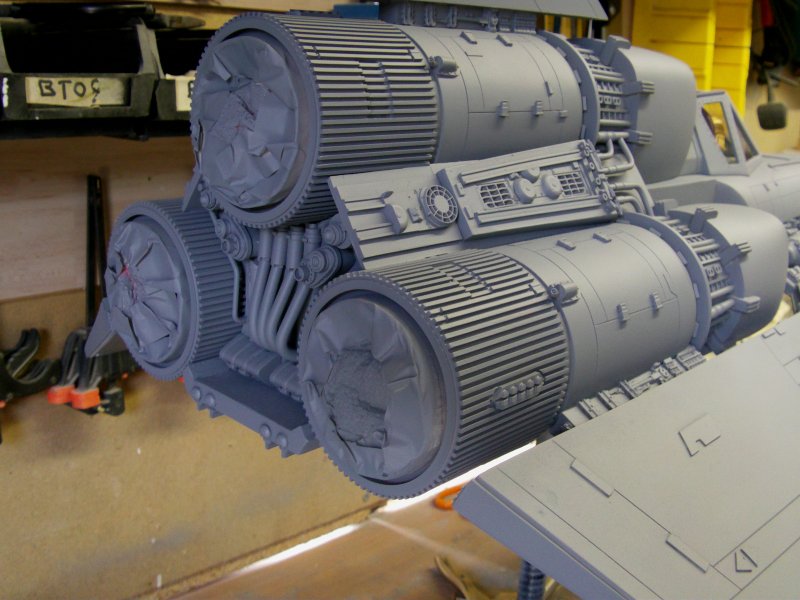
Next on deck, some small greeblies for the back of the engines.
After getting well and truly stuck in place, the third to last was to build up the sloped sides on the rear of the
rail belly plate where it meets the rear engine cans.
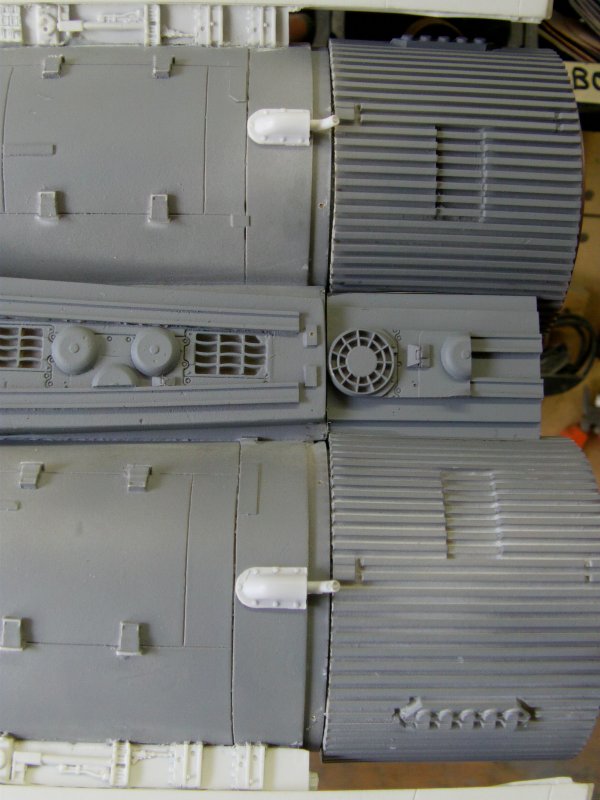
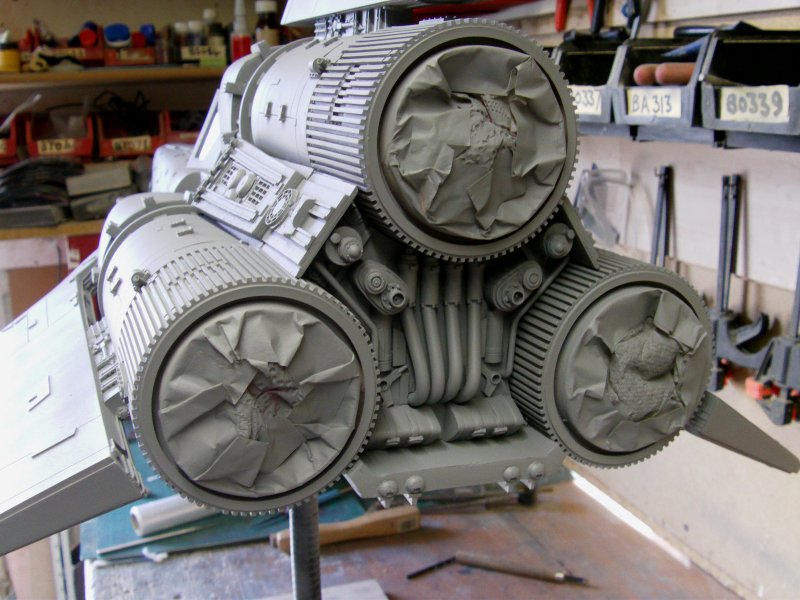
Second to last bits, the engine intake fans installed without fuss.

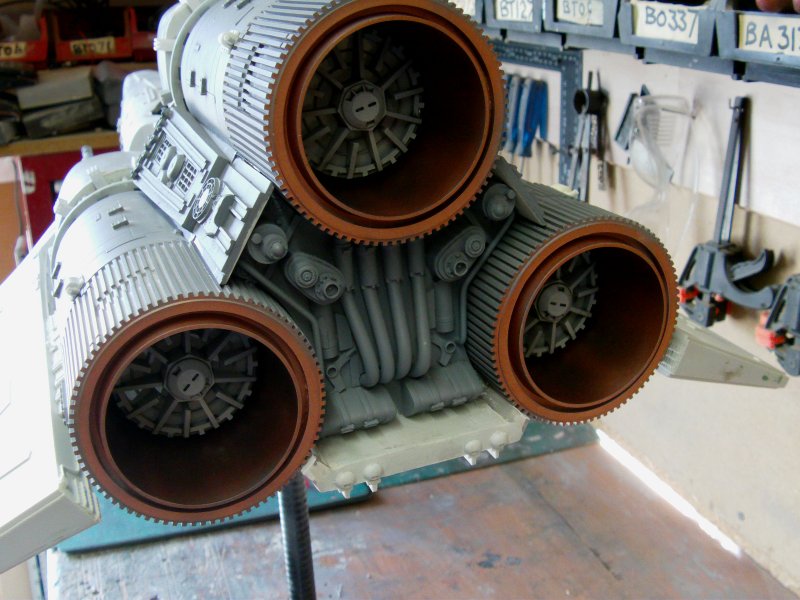
And last but by no means least, the brass wire piping in the engine underside plates!
And that's it, construction complete!!
HOORAH!!
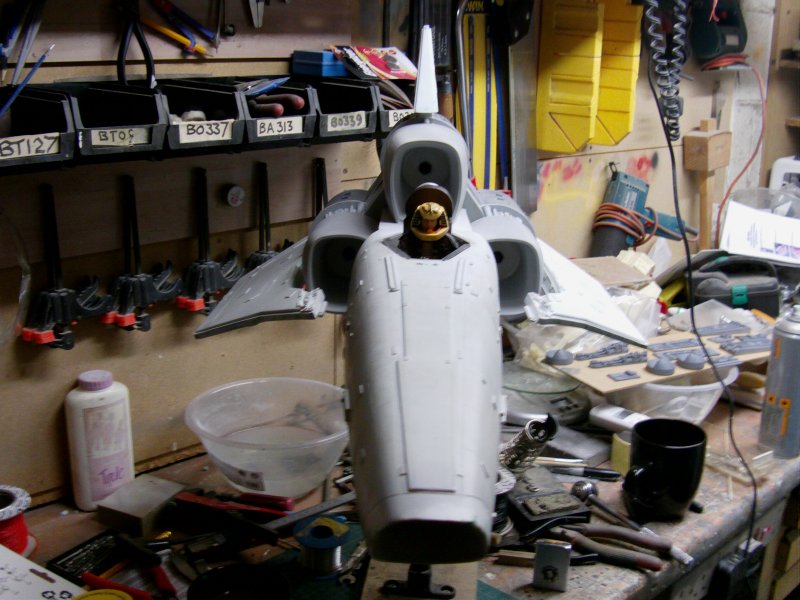
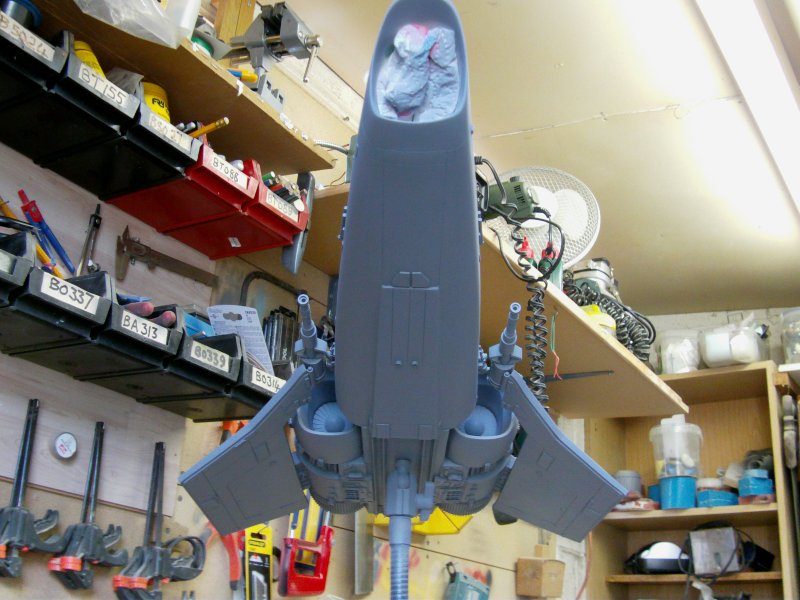
Slapping on the canopy for a look see of course.
Lastly for this update, an all round clean up,
canopy put away safe,
a bit of masking off for the light up stuff and the cockpit, and a serious dose of primer laid on.
Masking for cockpit removed, canopy back on, photo call.
You know it makes sense.
And just for those who might be curious,
just saying this beast is 31" long sometimes can't impart just
how much space this thing takes up so....
The final pic for this update includes the now accepted standard scaling
visual aid tool for scale model photography purposes.
Or it's proper given title of 'Empty Coke Can'.
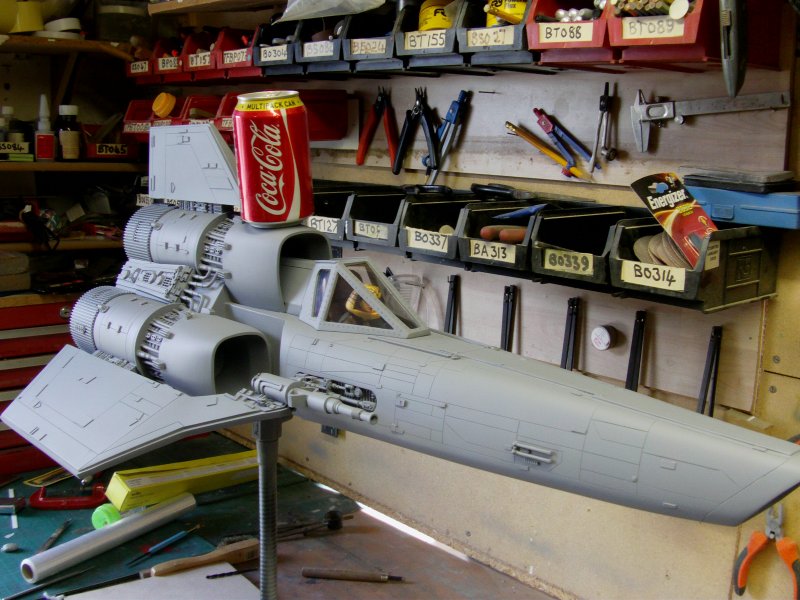
Is that fracking cool or what?
Well that's it for now gang.
At this time of writing the paintwork pandemonium and weathering whathaveyou
is scheduled to happen from tomorrow so expect the final update in a couple of days.
Untill then you goodly folks and folkettes take good care of yaselves and go easy out there now.
Page Number