
Revell Star Trek USS Voyager 1/670th Scale


 Page Number
The journey back from the Delta Quadrant took years
I'm Hoping To Build This A Little Quicker.
Welcome people!
First off, there are plenty of reviews of this kit in all it's incarnations
out there on the net so i'll skip that and get straight to the point...
Wanted to have another pop at this since the last one I built was back in 1996.
So the kit got a bit better in later issues, better decal sheet and so on,
so now seems as good a time as any.
And under the current conditions, waiting for materials to arrive means
I am jumping from job to job untill they turn up so got stuck in to this.
Simple brief and it's a personal project so...
Build,
make look pretty,
light it up,
make the nacelles move
etc. and so on blah blah.
Onward!
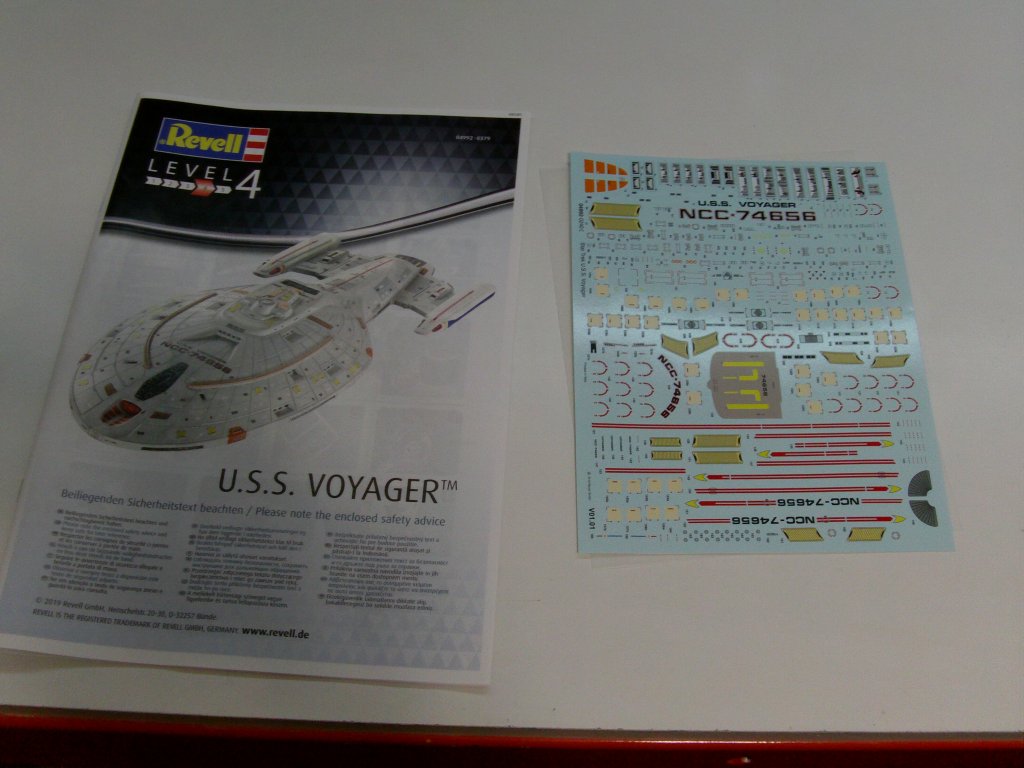
2019 Revell Germany issue in spiffy box.

A quick look see over the parts.
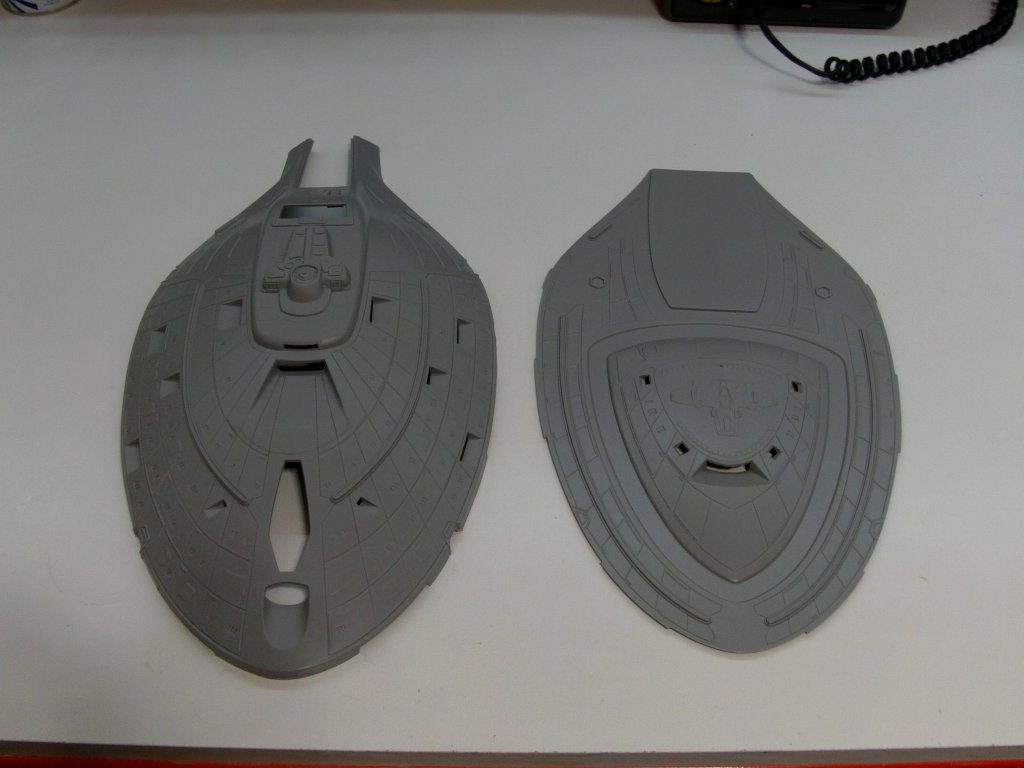
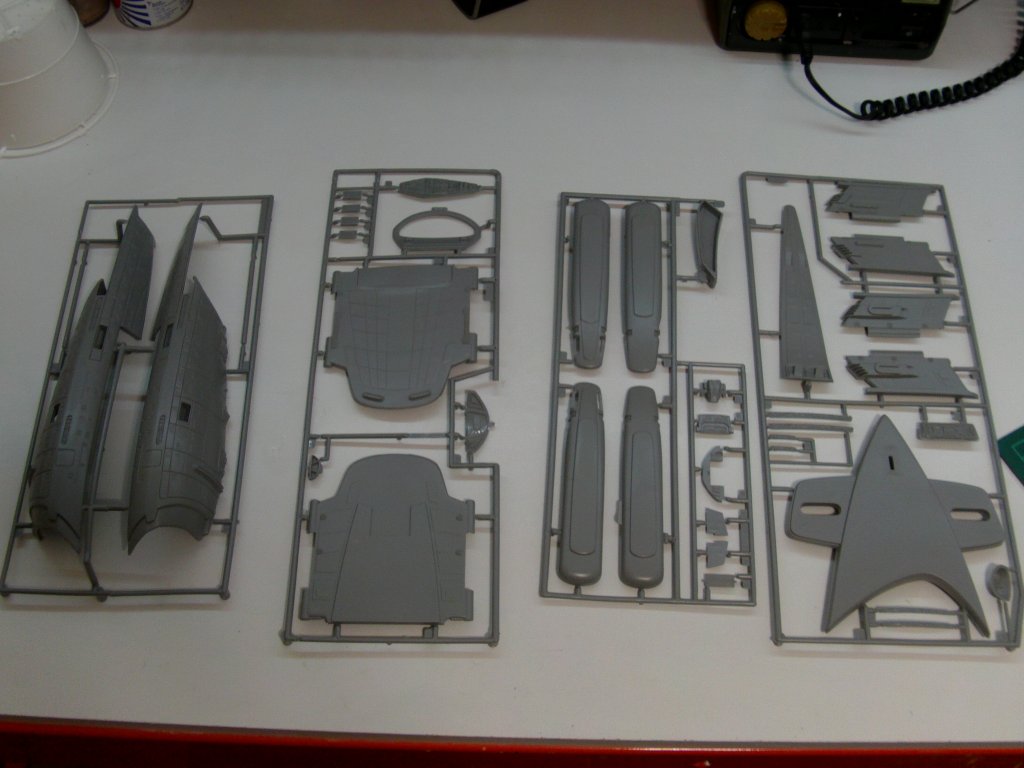
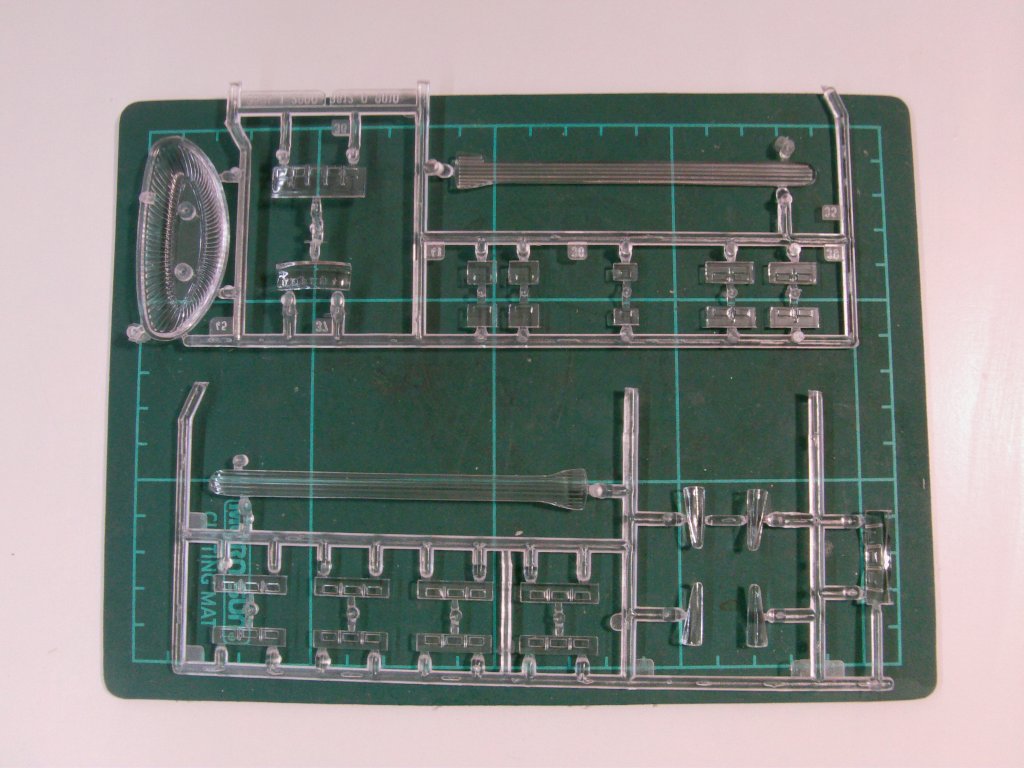
Not forgetting the rather useful destruction booklet and decal sheet!
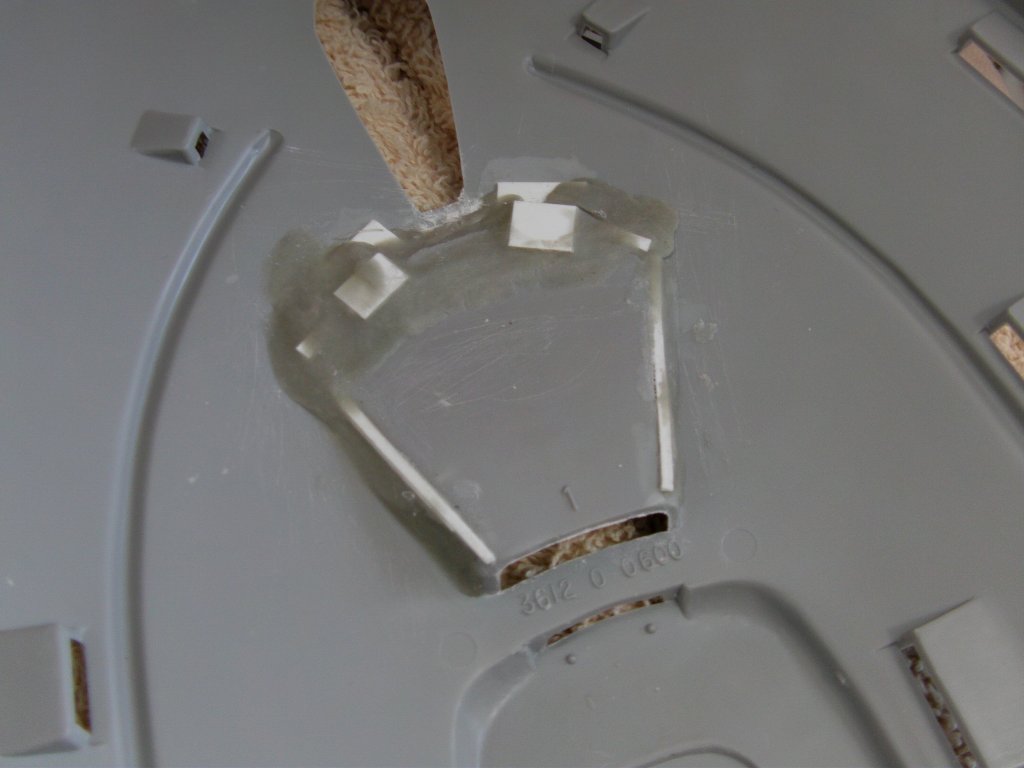
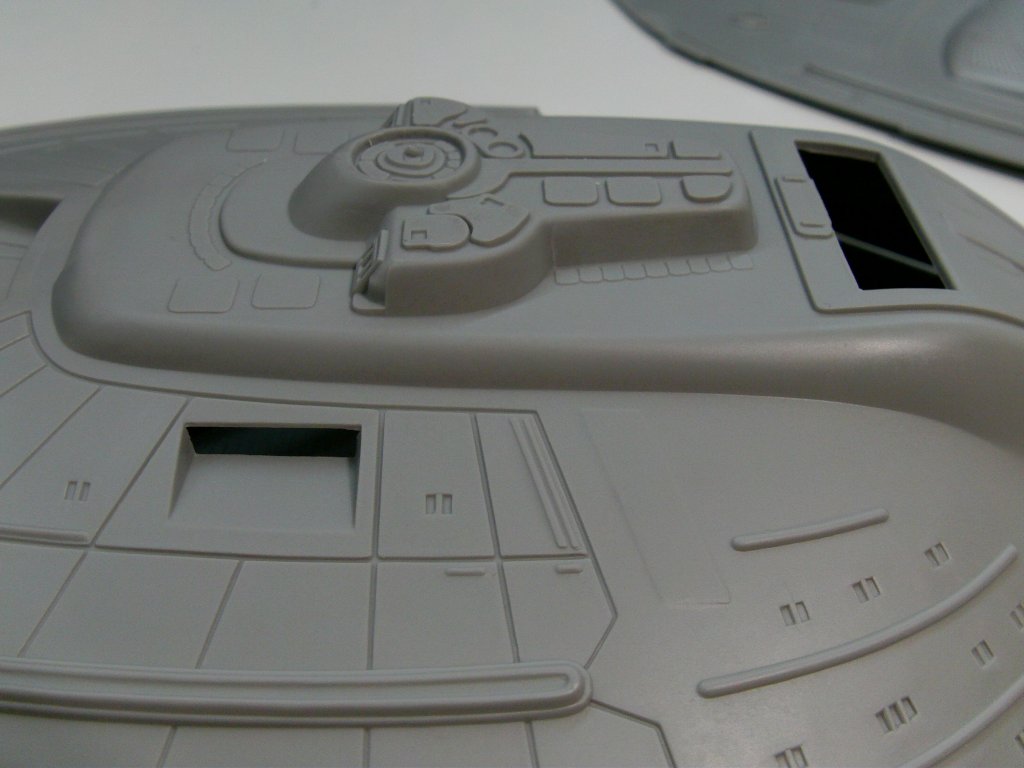
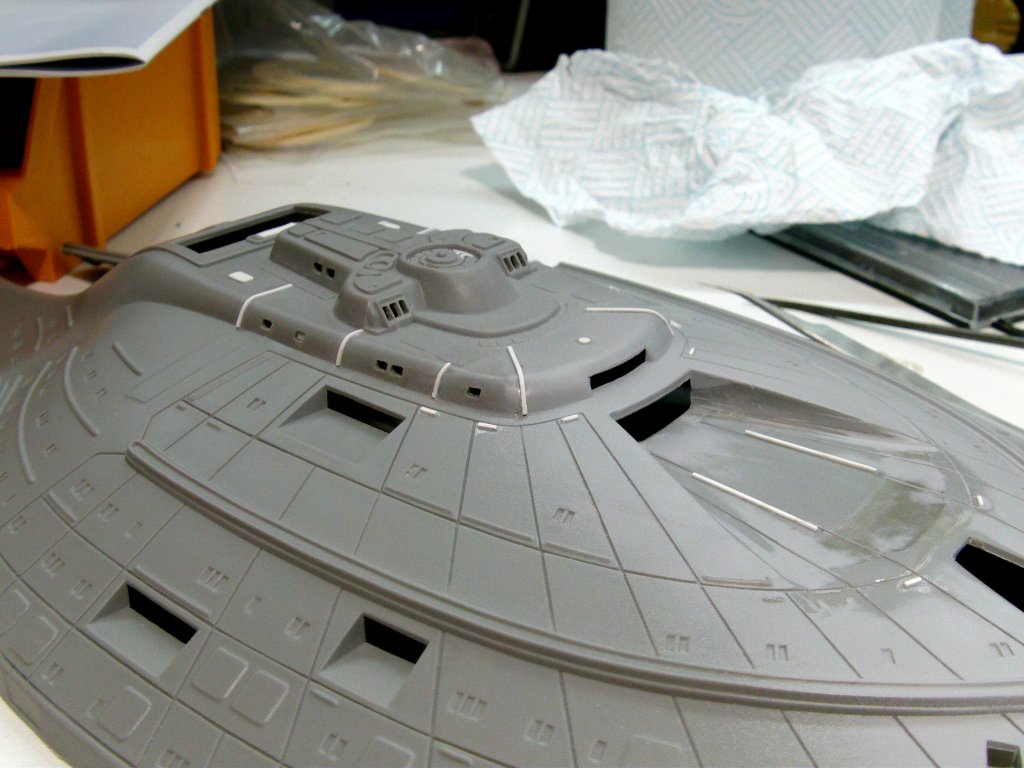
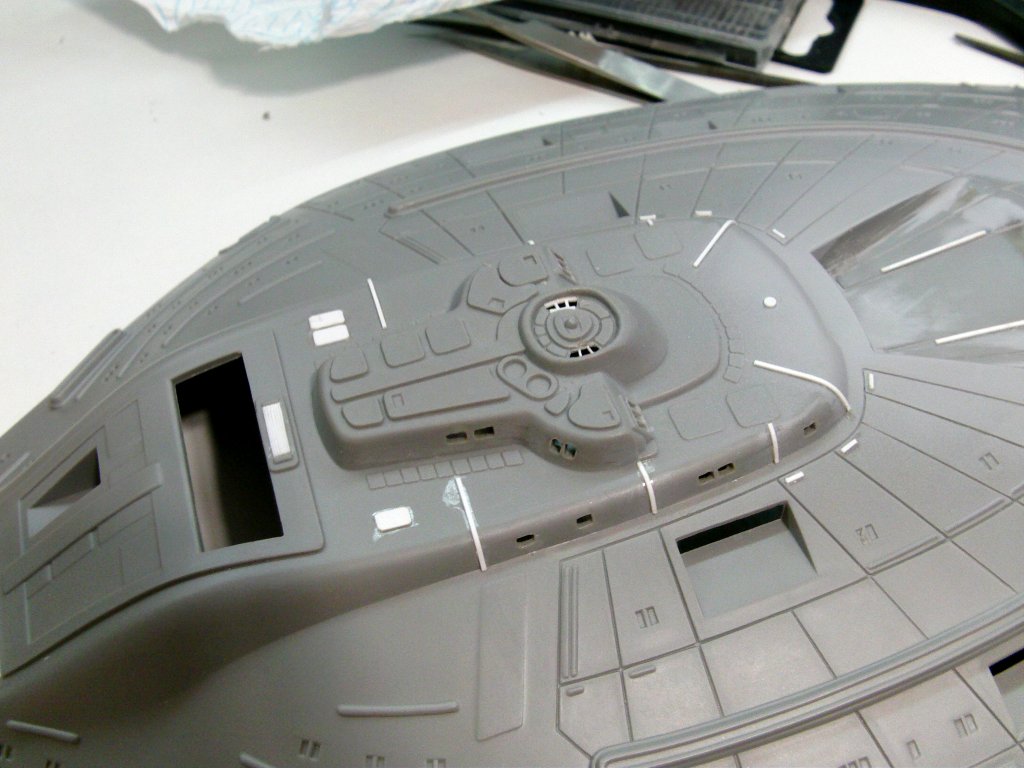
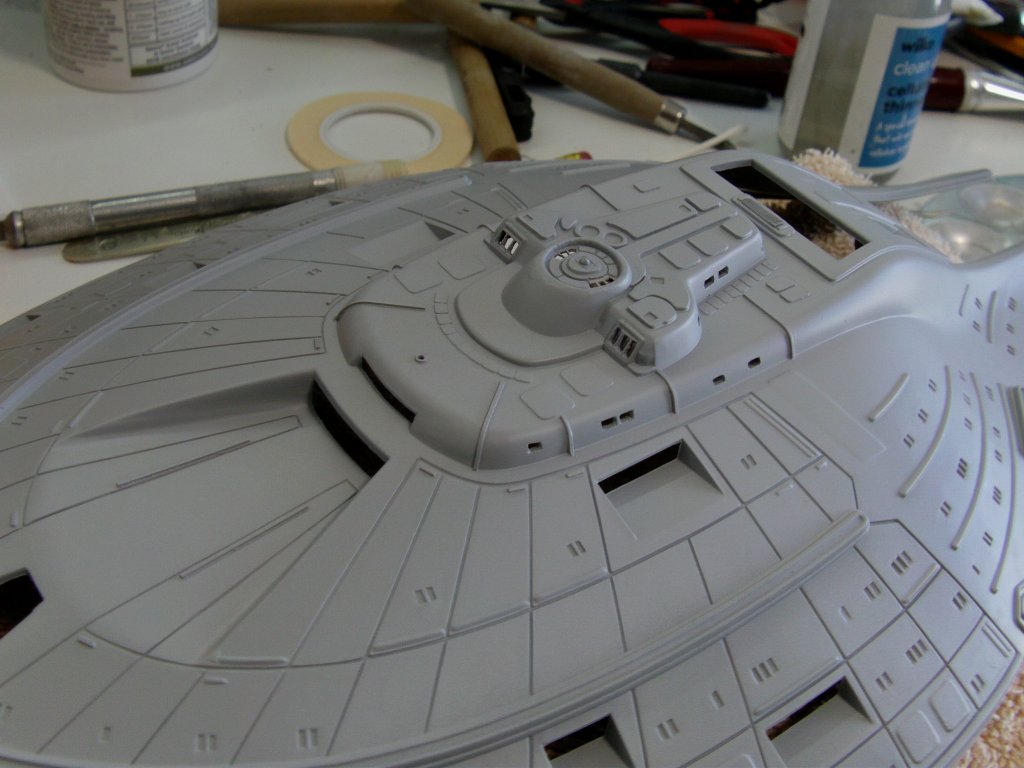
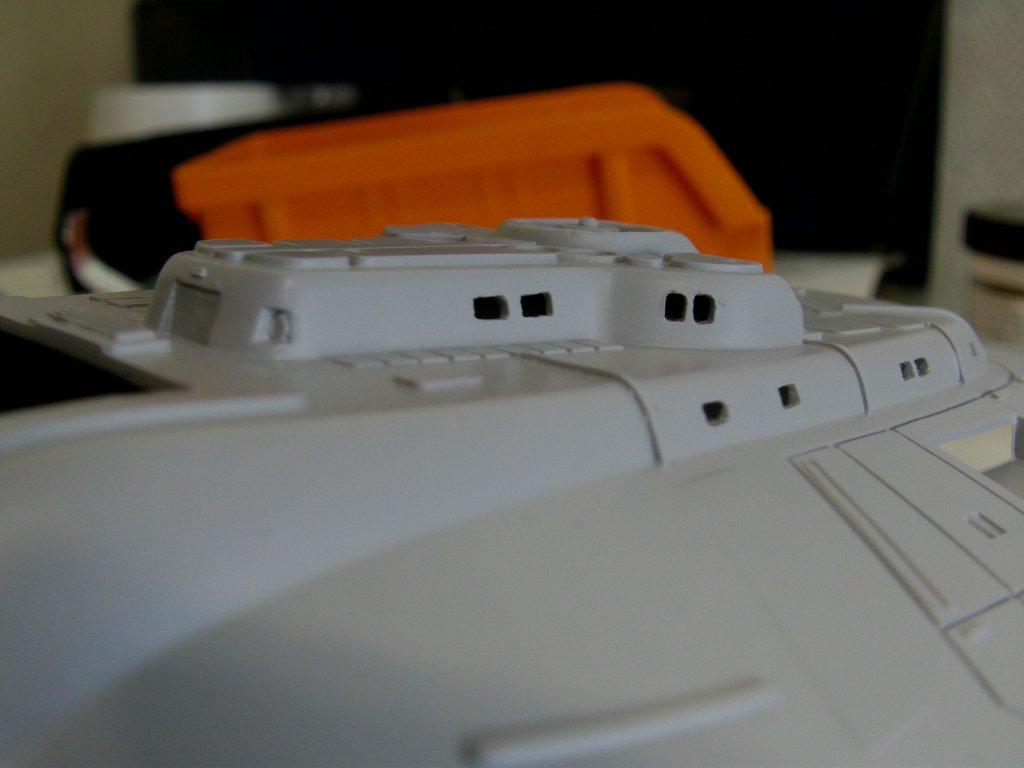
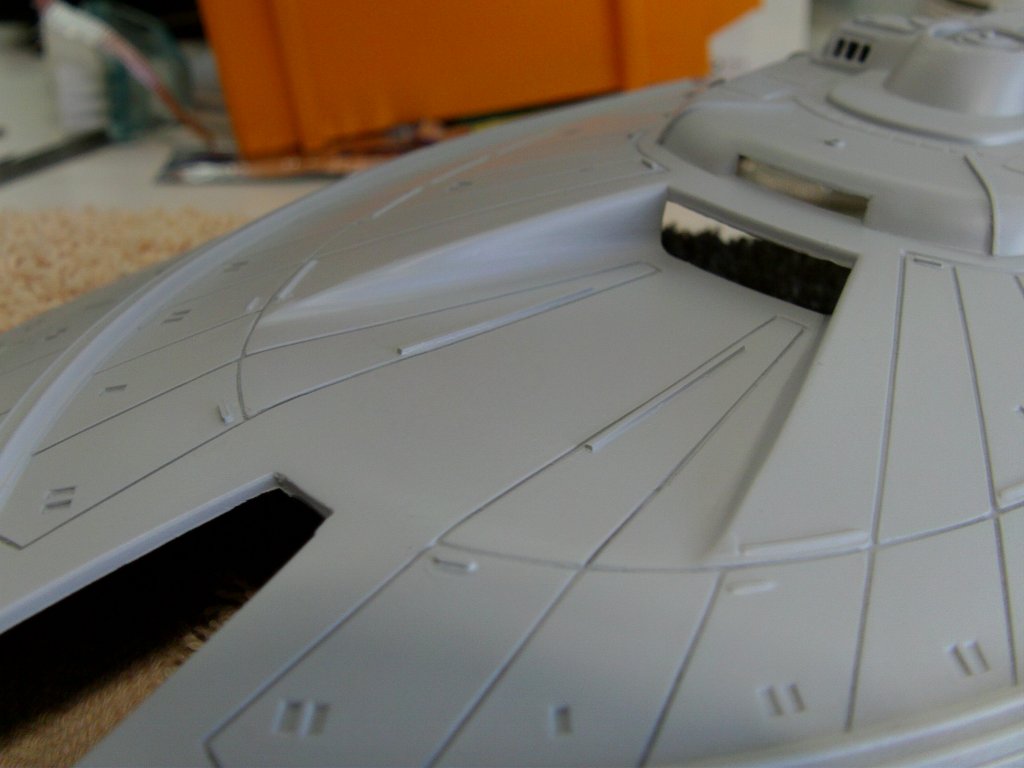
So first up, a detail to be dealt with as it were.
This is one area that has never been addressed on this kit by the manufacturer but there you go.
The inset bit with the five large windows on the top front of
this bad motor scooter to be a bit more precise.
This bit...
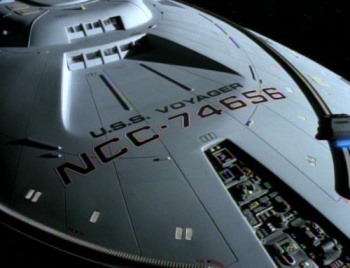
Now it's the forward line where it fairs in to the hull that's the problem with the kit.
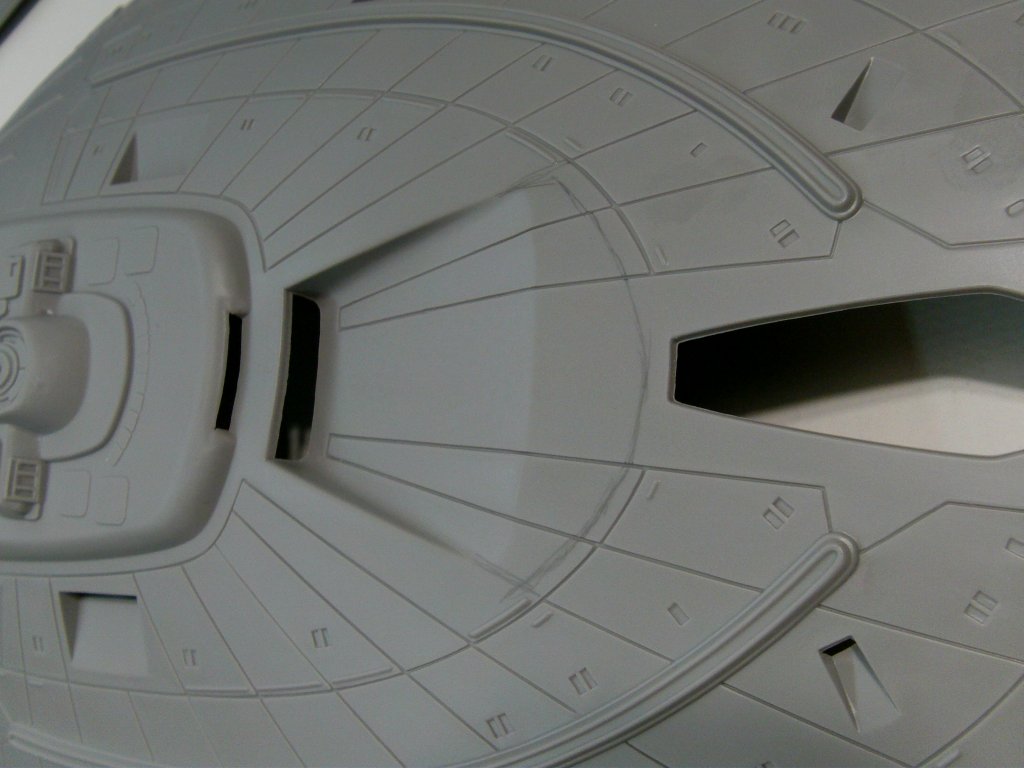
You will notice the prominent ridge in the area which the studio model doesn't have.
Well...It'll just have to go!
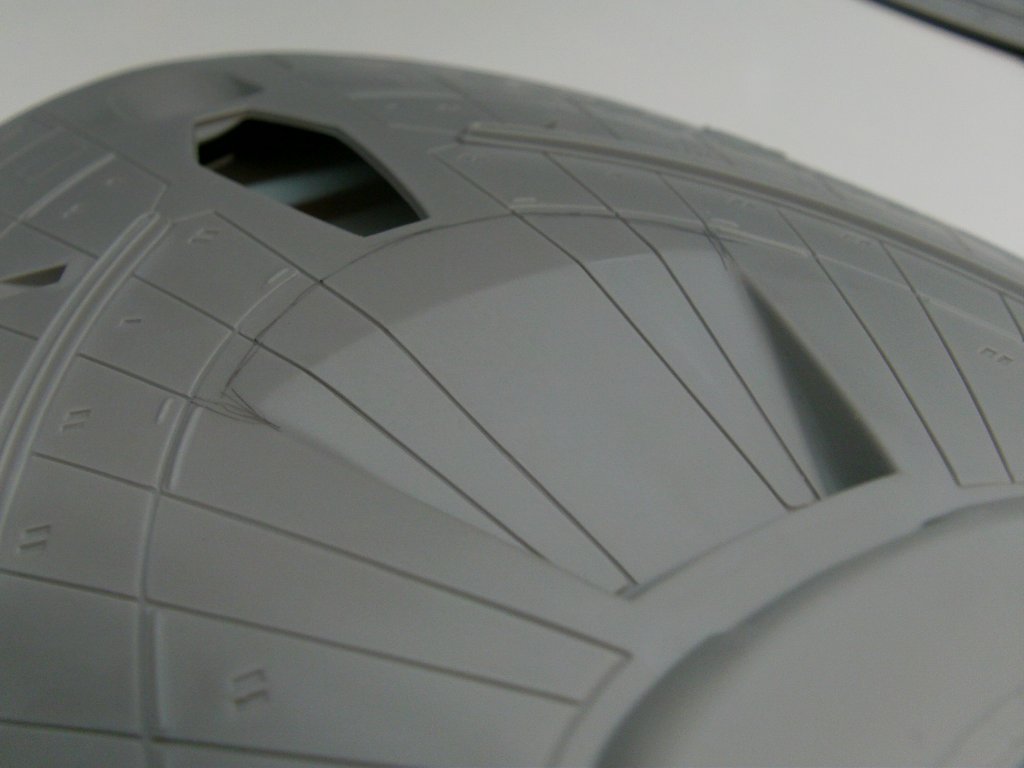
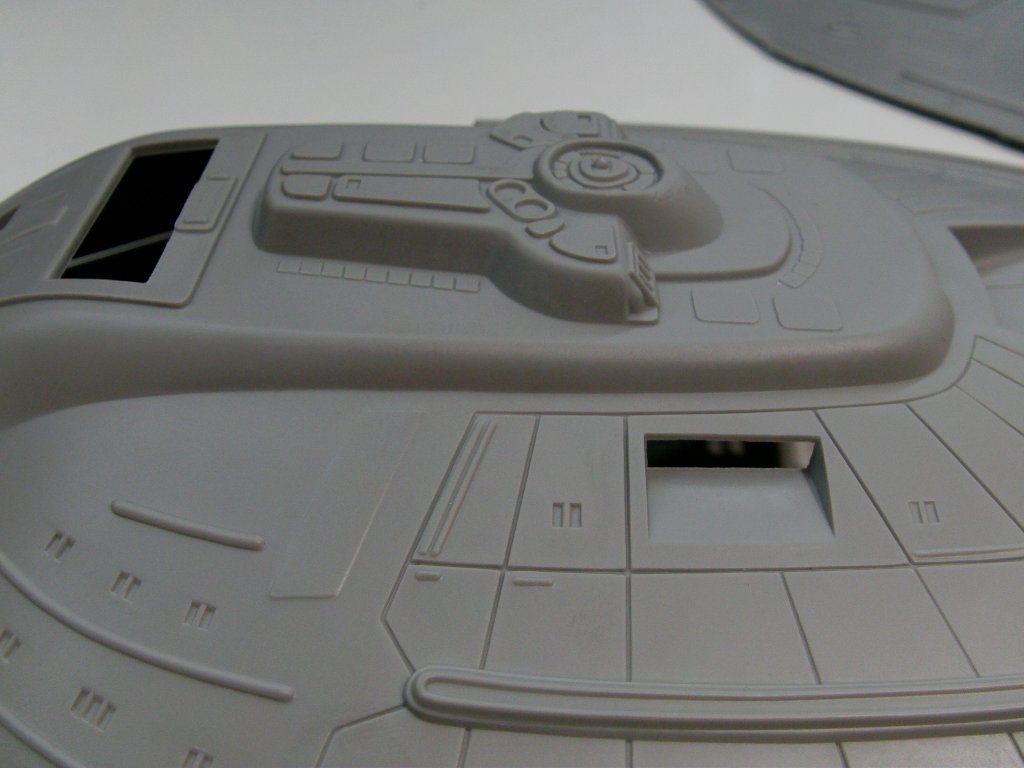
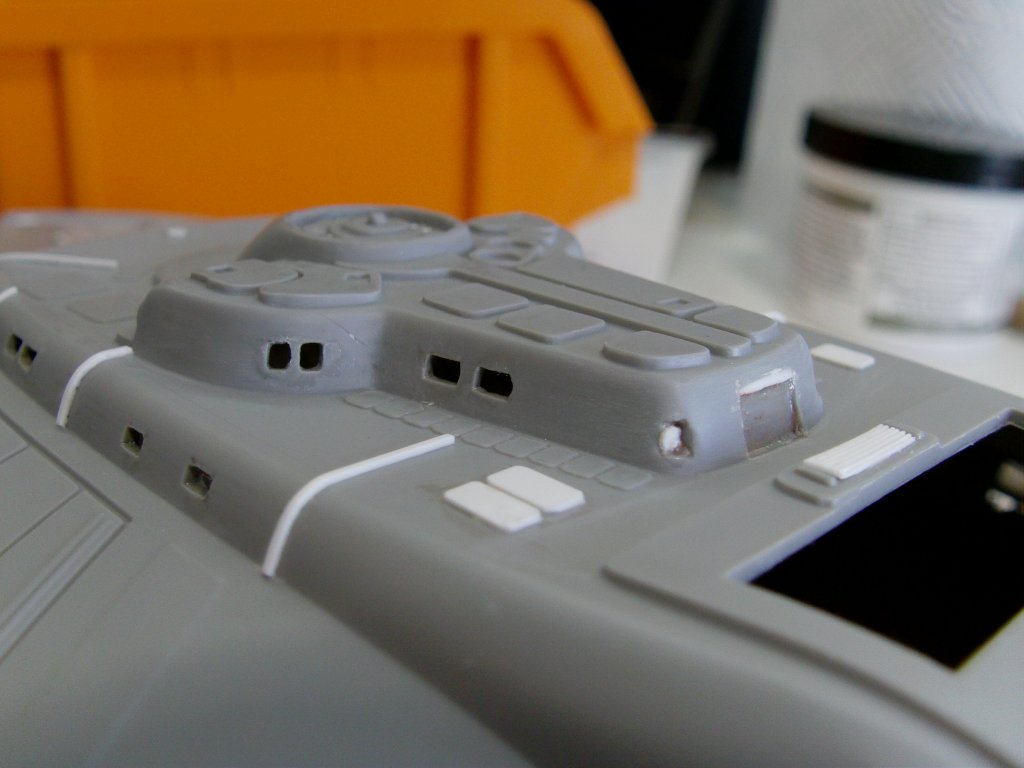
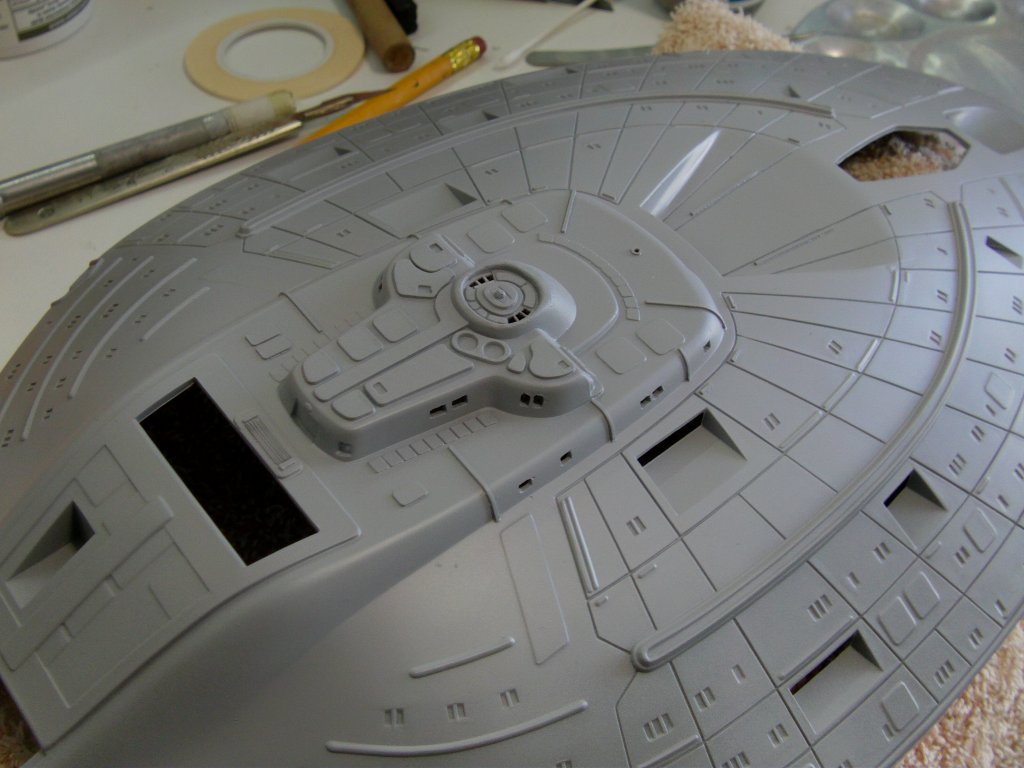
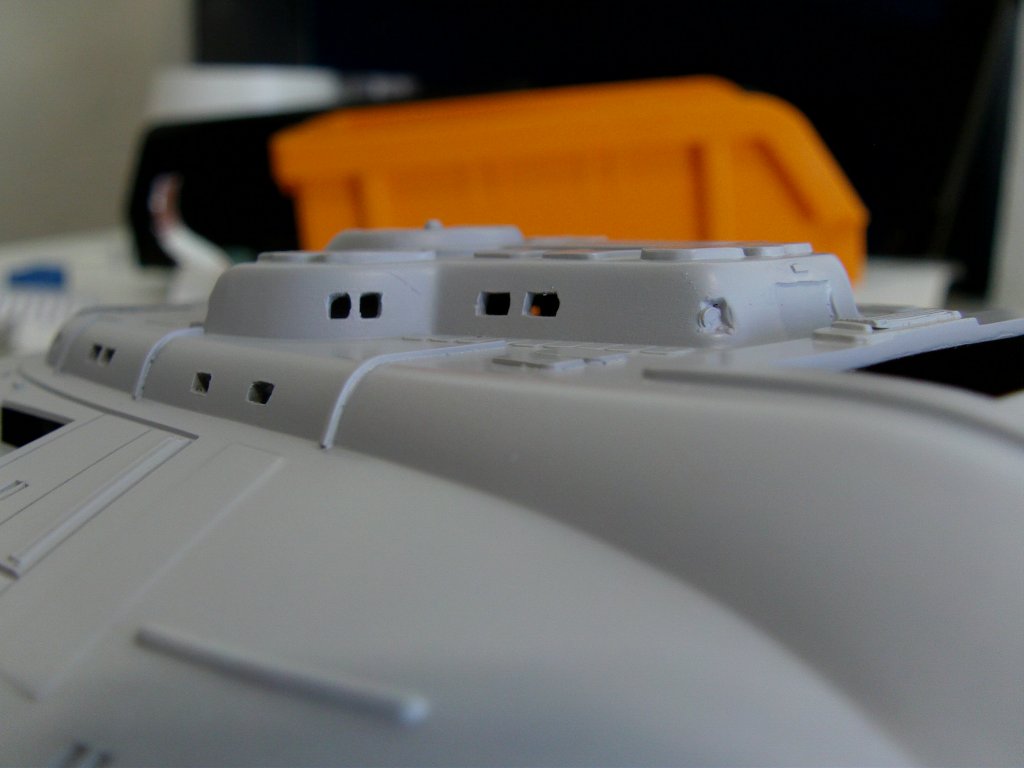
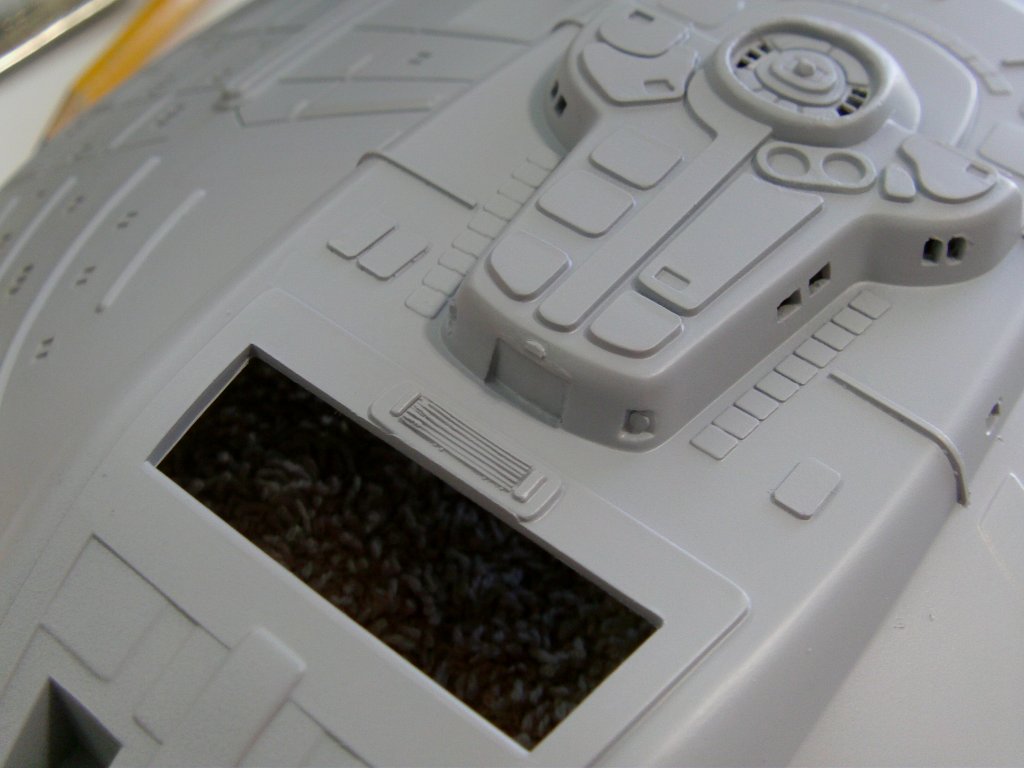
In the next pic, note the crayon like coloured lines.
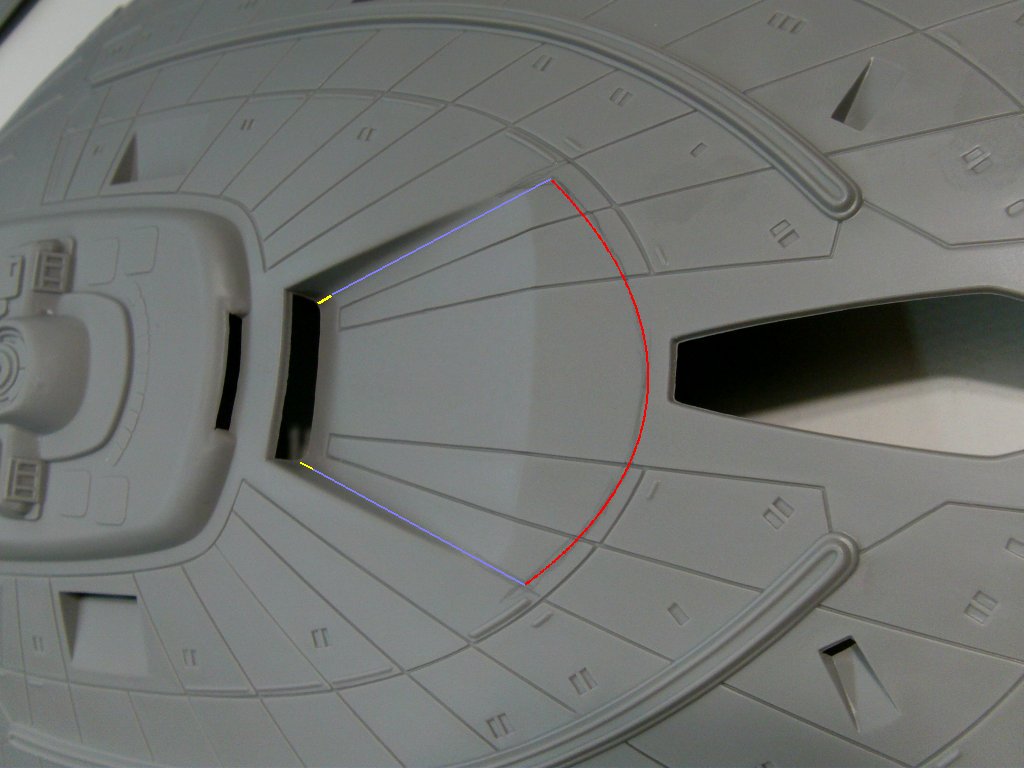
The red line was drilled out,
the violet lines were sliced with a scalpel all the way through the plastic
and the yellow bits were left the hell alone alone.
Said yellow bits made the pivot point for the part for me to bend it down by several degrees.
The styrene is pretty soft in this issue of the kit and that works in my favour.
The larger of the flat areas was made level with the red drilled out line,
this was backed with styrene bits to hold it level and secure,
then Aves Apoxie Sculpt got plastered on inside and out.
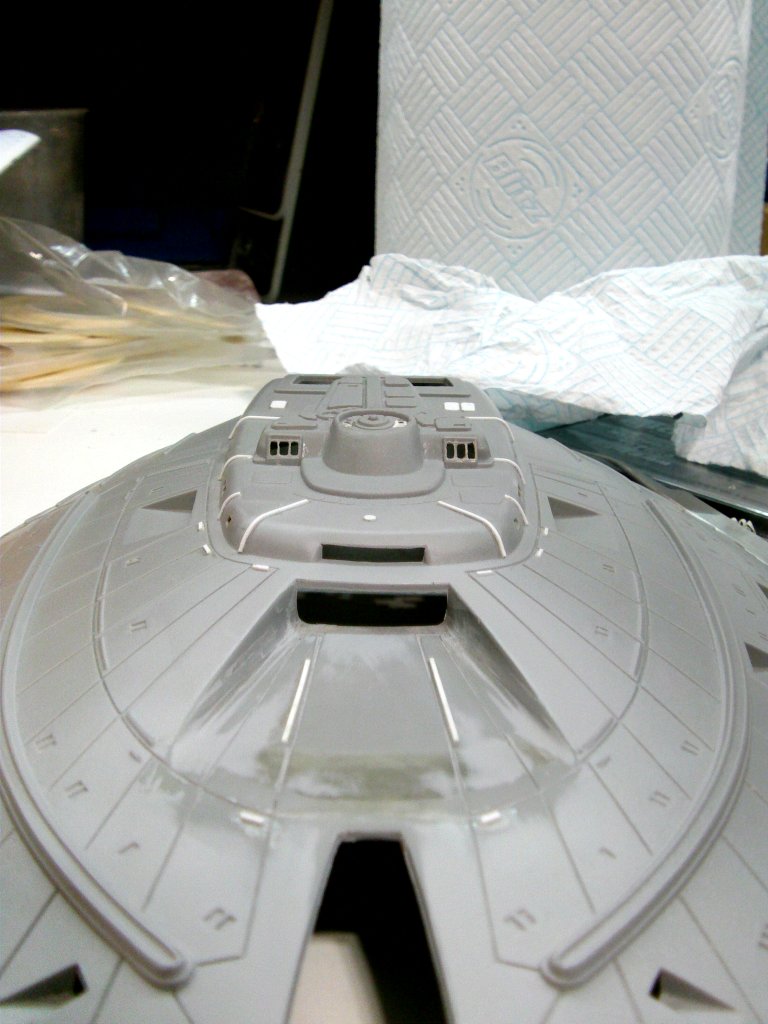
Once all cured, the outside was wet sanded and the grid lines re scribed.
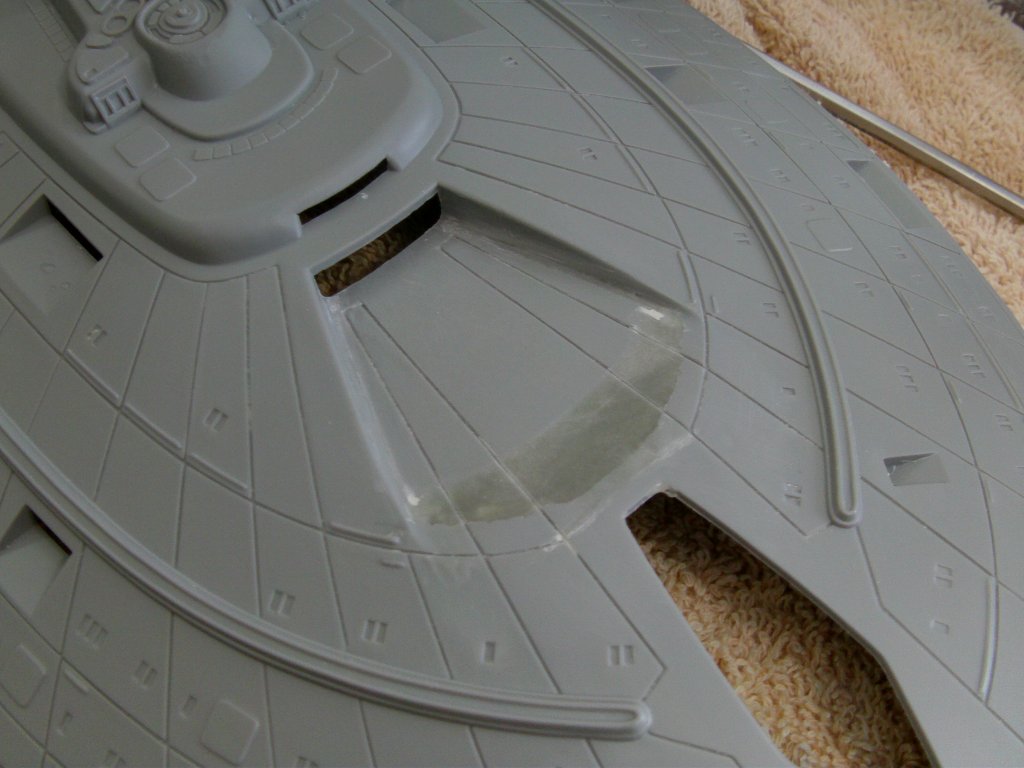
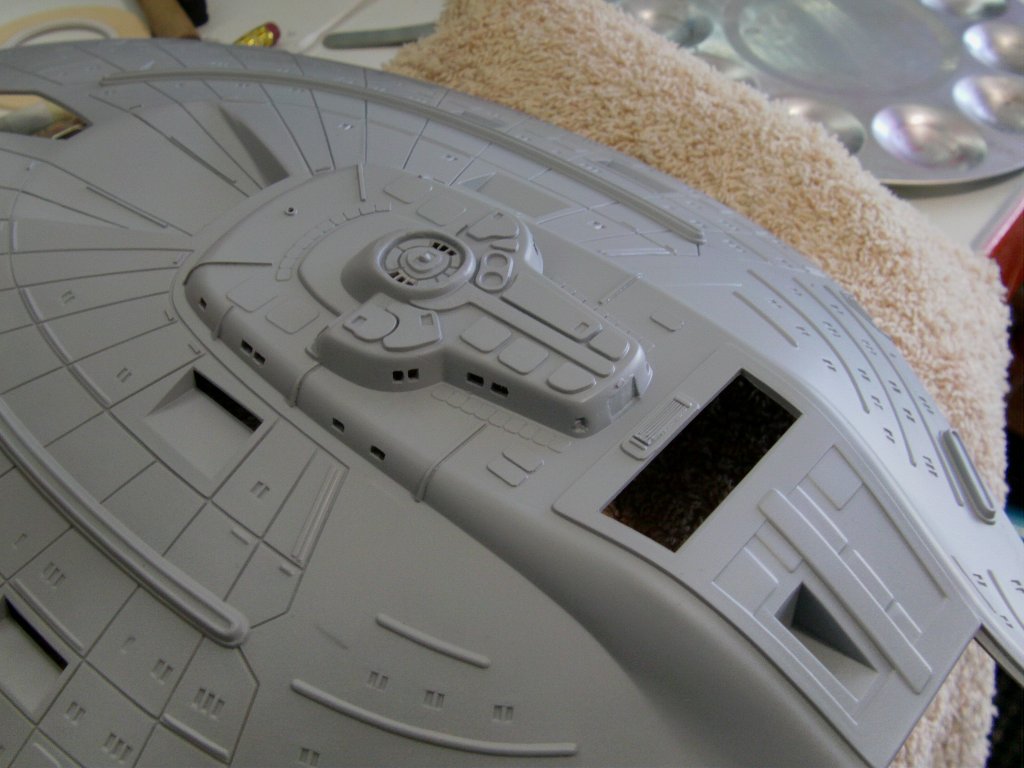
A goodly dash of Tamiya grey fine surface primer to get a look at how that was shaping up.
And one didst see it was shaping up rather well.
Much to my surprise.
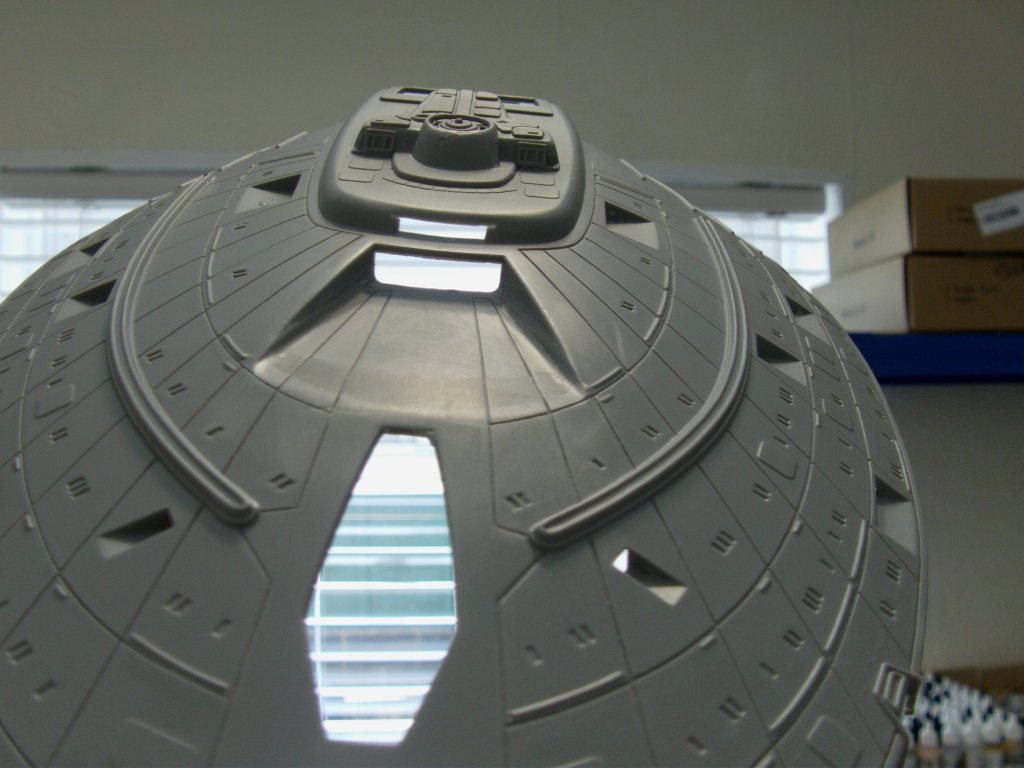
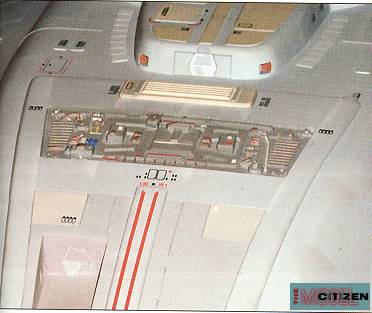
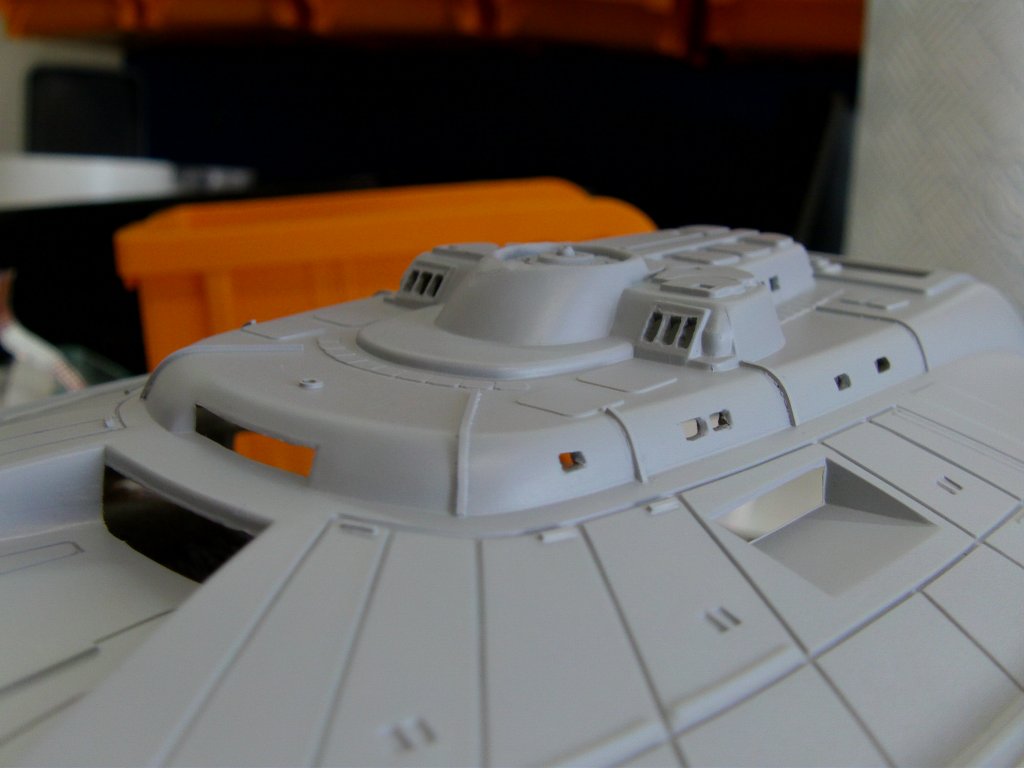
Now the kit has been through an upgrade or three since it first came out in about 1995
but there are places where it's lacking in certain small details.
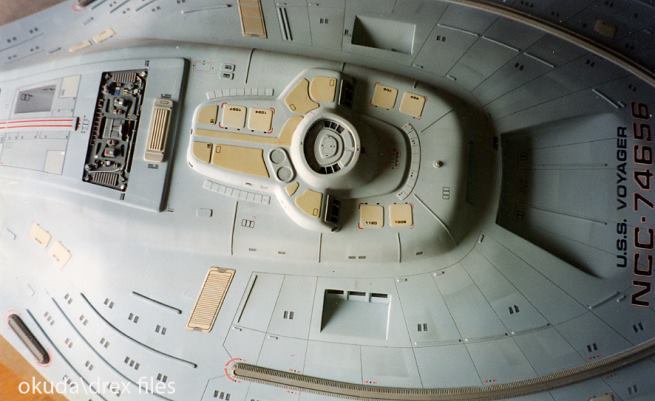
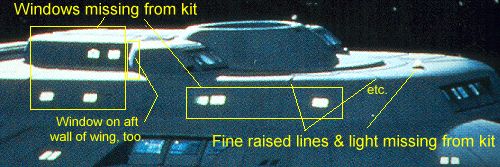
The bridge module and the part it sits on are one example.
The kit looks like this...
Surface detail and windows are two of the main things missing and
these couple of pics plucked off the net many moons ago
show that better than I could explain so...
With me so far?
Excellent!
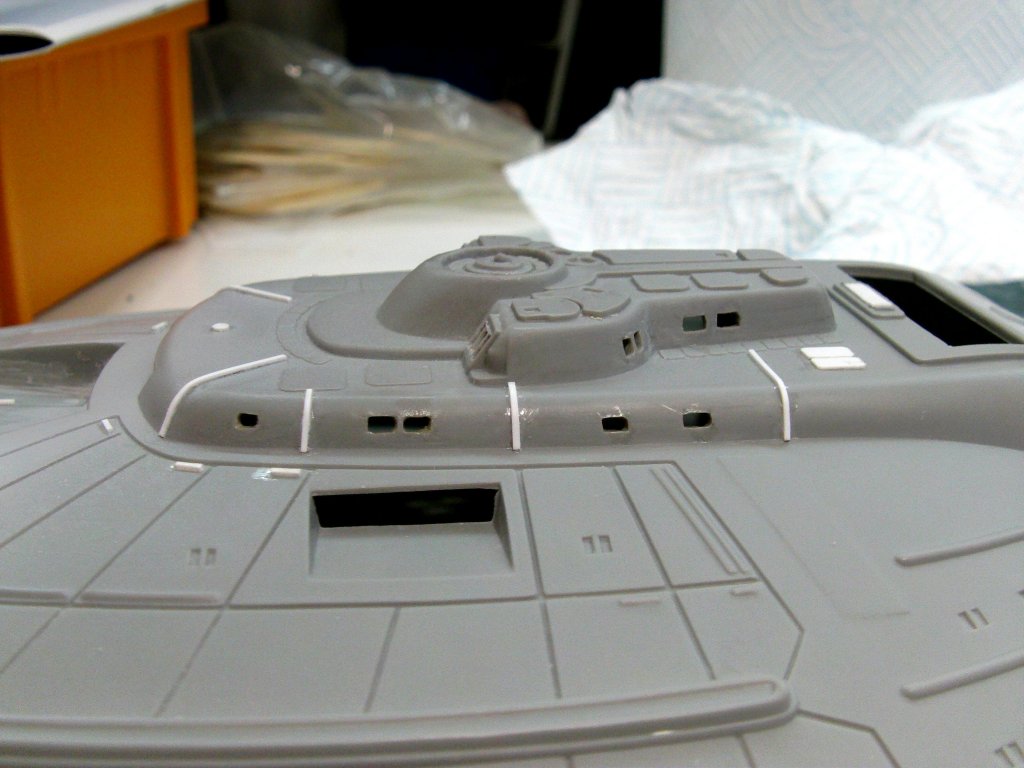
So time for the well practiced drill/grind/slice/file/sand dance around
the workshop to happen along with many a styrene bit to help.
Oh and a dab or several of glue as one does.
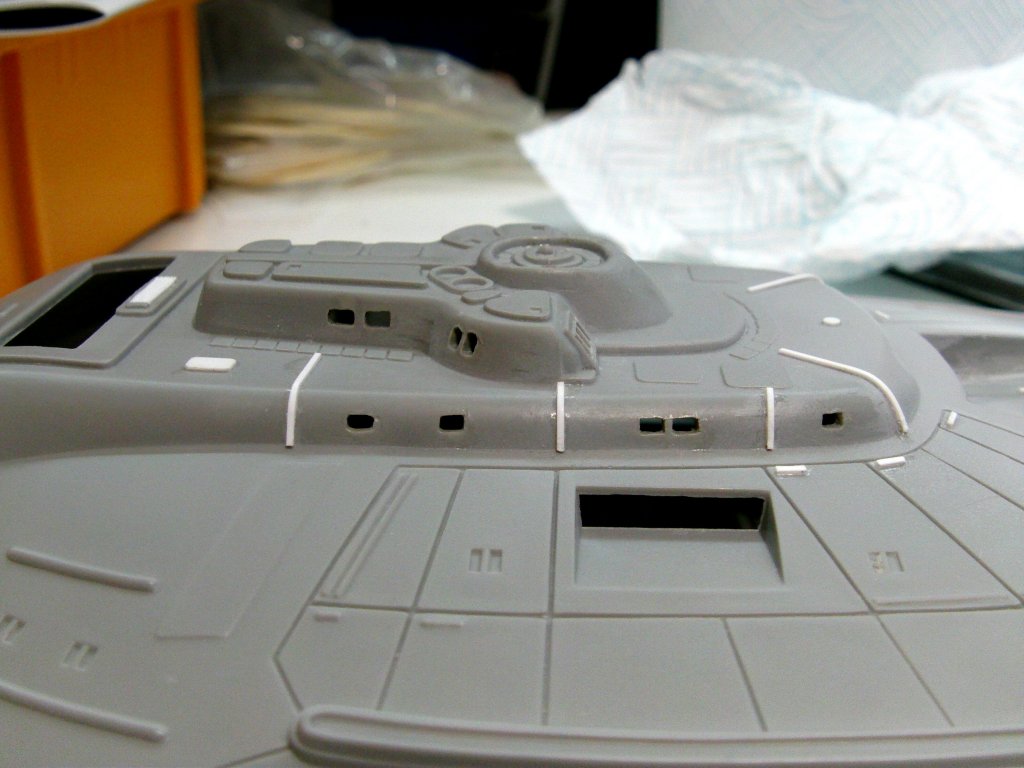
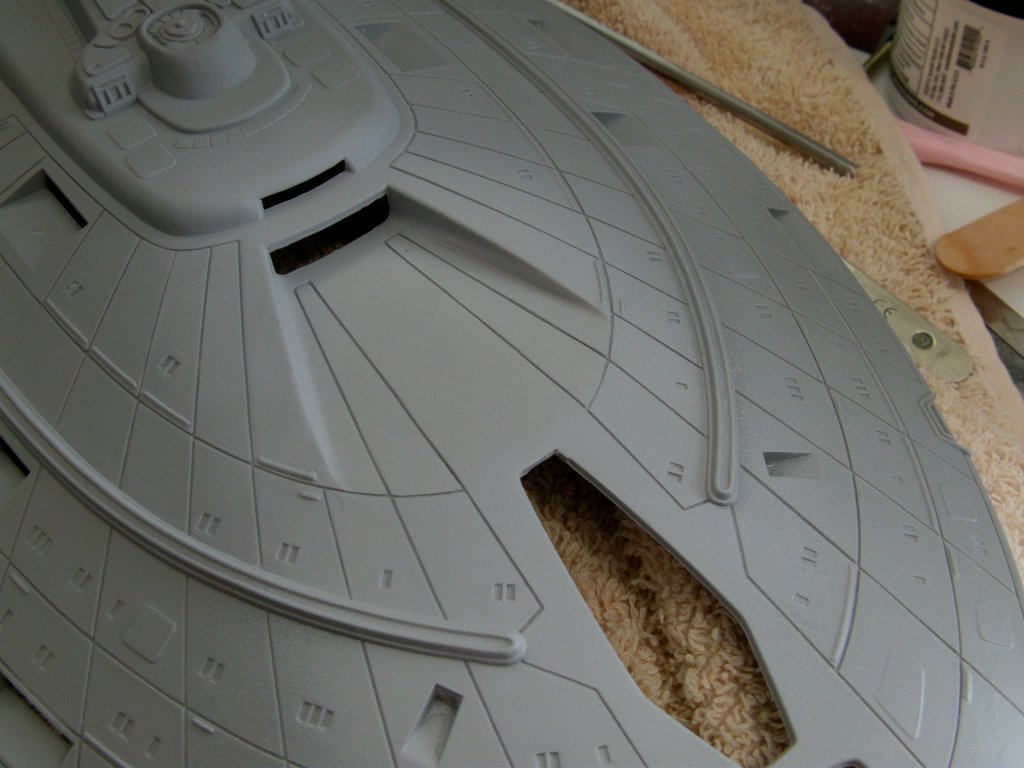
The back end of the bridge module needed a bit of looking at.
The kit is smooth but the studio model ain't.
One inset for the airlock and a couple of wedge cuttings coming right up!
A bit of miniature chisel and scalpel blade work later,
the deed was done in more or less goodly fashion.
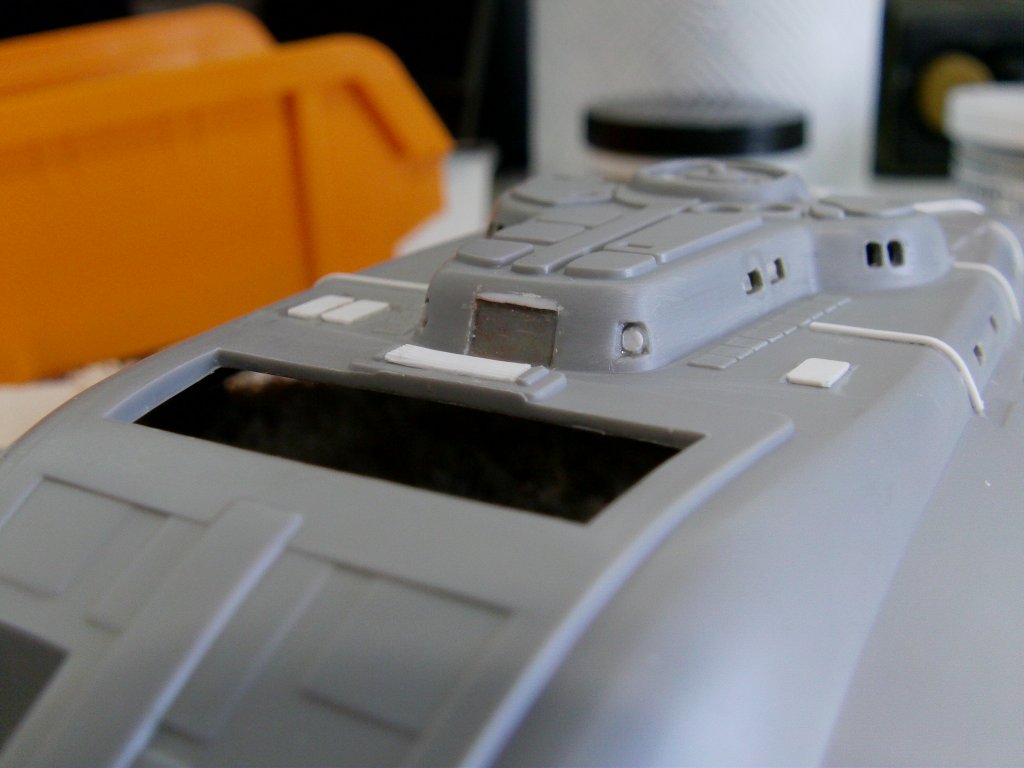
And lo' 'twas time for a squirt of primer to see if the work was commendable...
or crap....

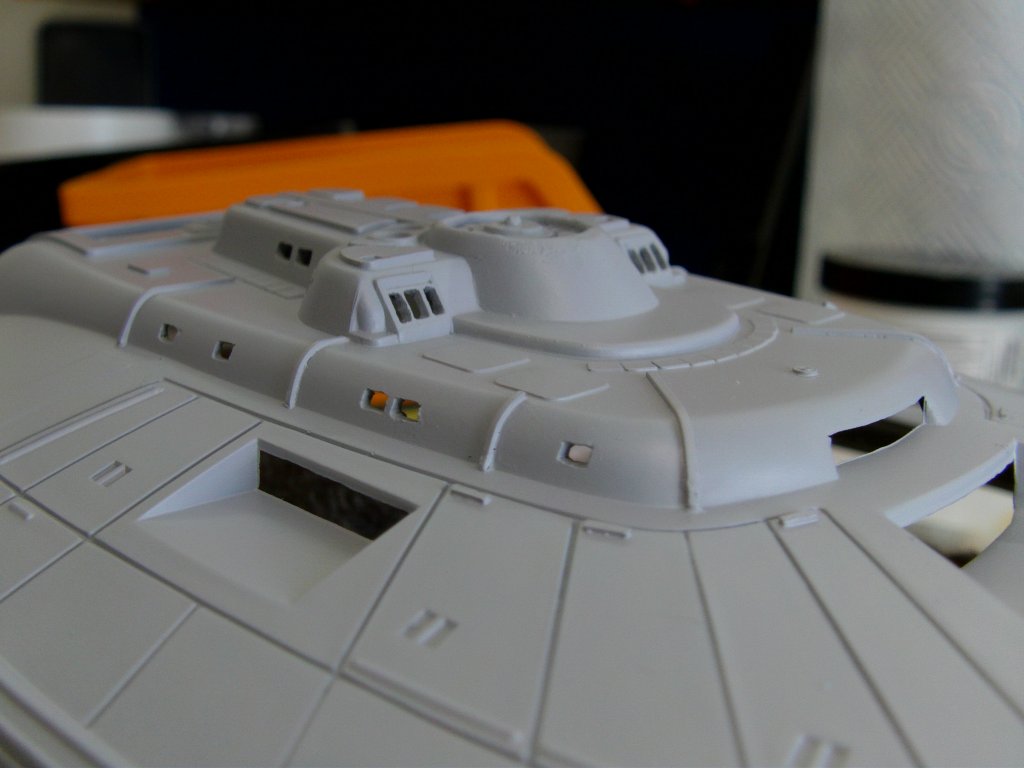
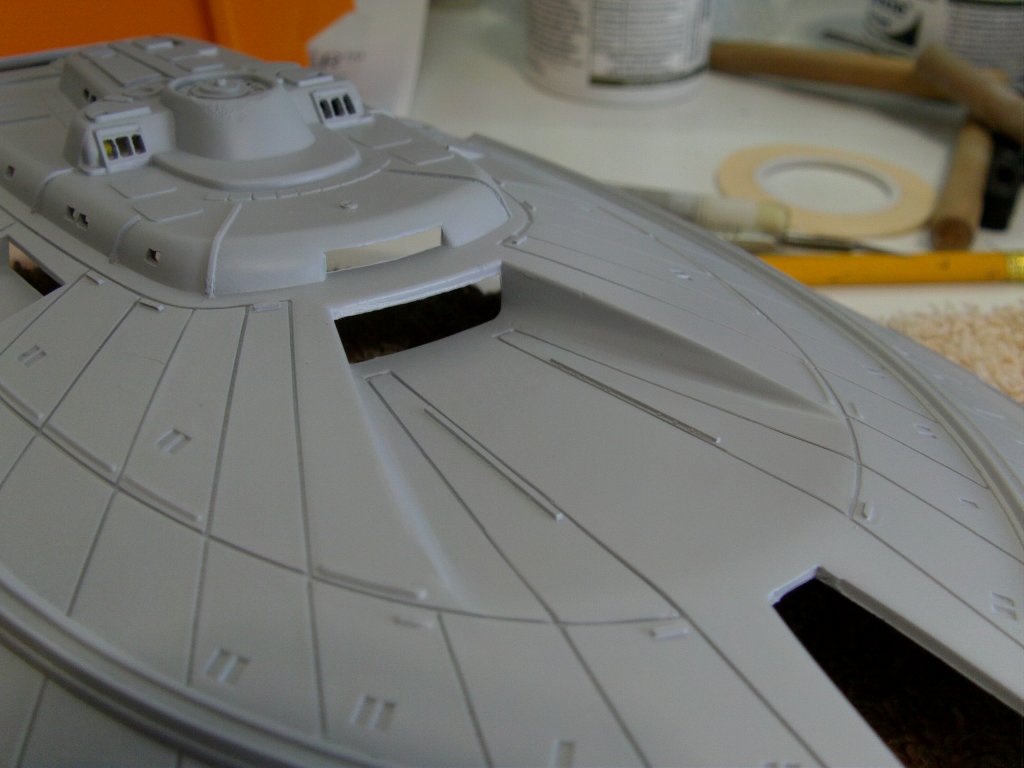
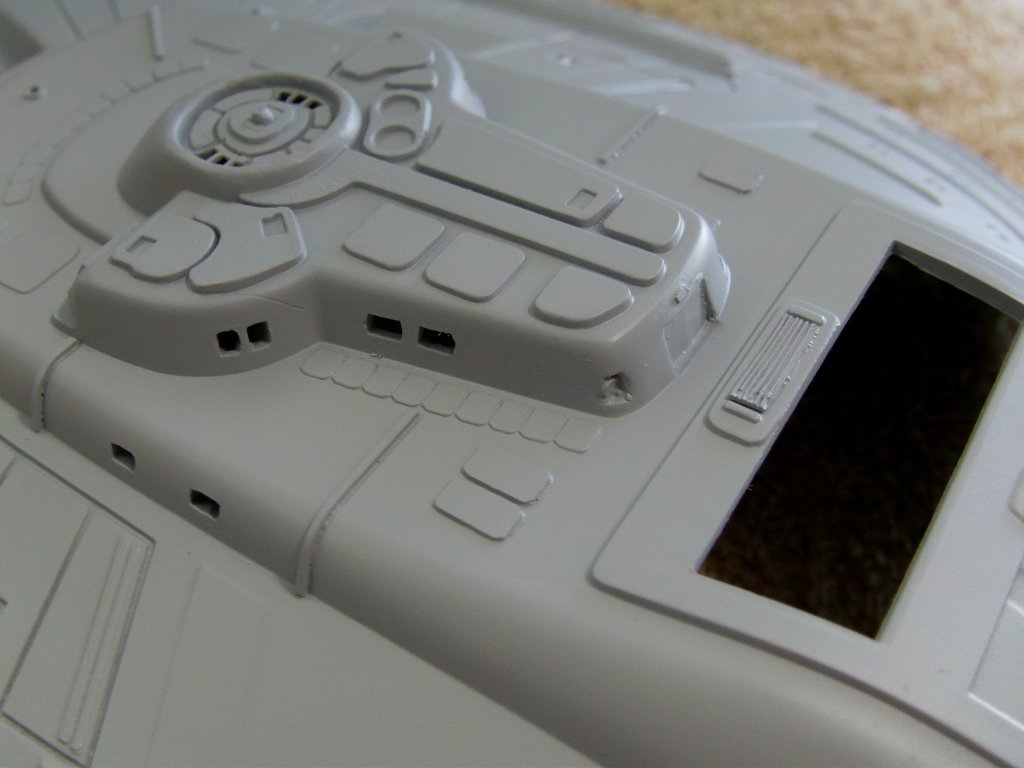
OK, methinks that will about do it.
Something I can work with, so calling the main grunt work with the top of the primary hull a done thingy.
Much more to take care of and we'll get to that in the next update and all those to come.
And methinks there will be a few of those!
I'll see you lot back here for that so untill then,
you goodly gang go easy out there now.
Page Number