
Fantastic Plastic Battlestar Pegasus
1/3700th Scale


 Page Number
Back to the front of the queue...
S'pose I'd Better Start At The Front Then
Welcome back all and it's been a fair old while.
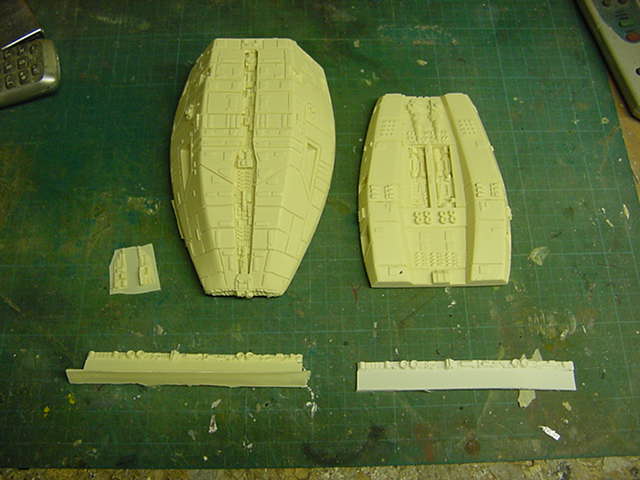
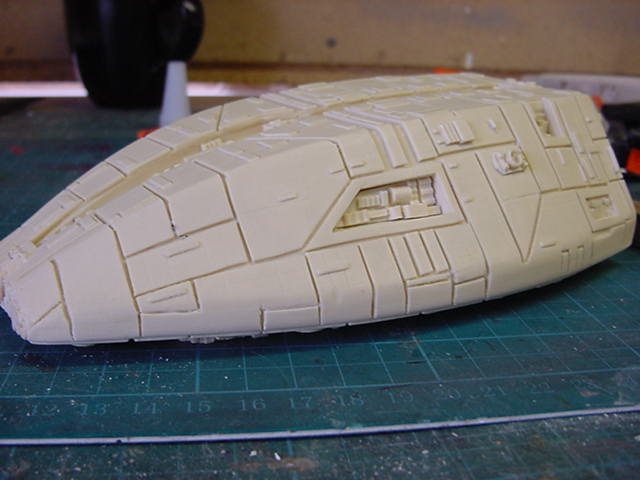
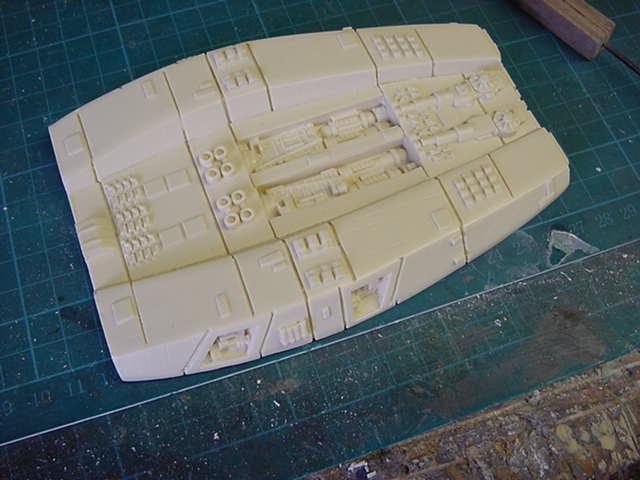
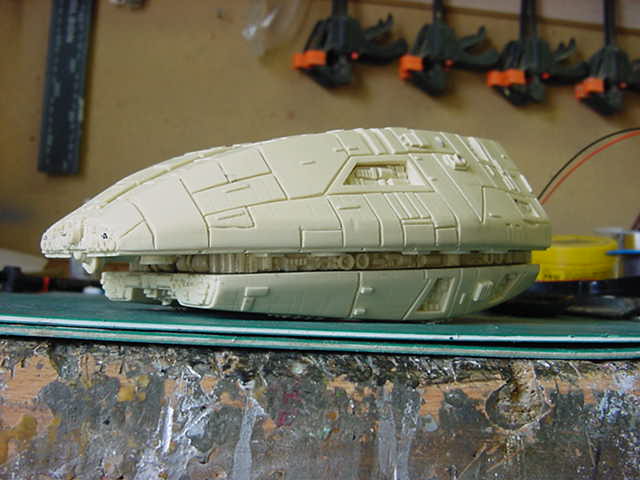
Right then, to business with the front end.
The parts...
So the prep for getting in there and lighting it meant
a couple of largish holes required for my
way less than dainty fingers.
A bit of pencil marking and some rippy bit attached to
whizzy thing violence later, we got
somewhere in the vicinity of what's required.

Now this will require more that a few small holes put in it
but treading carefully is the name of the game here
as some of the casting wasn't exactly even in resin thickness.
No big deal and par for the course sometimes but trying to
thin any of that down to even it out
would have been asking for trouble so
not going to push my luck there!
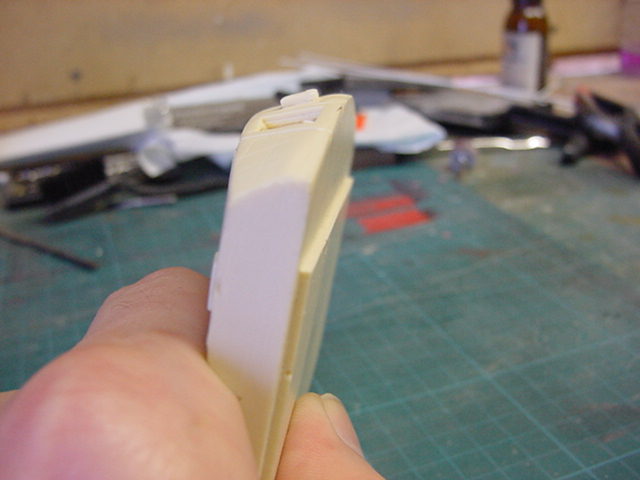
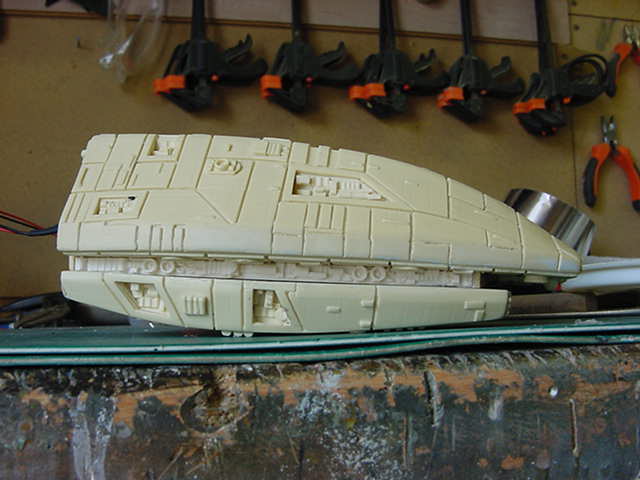
So small parts for the inserts on the sides cleaned up
and glued where they should be.
Long thin detail strips likewise dontchaknow.

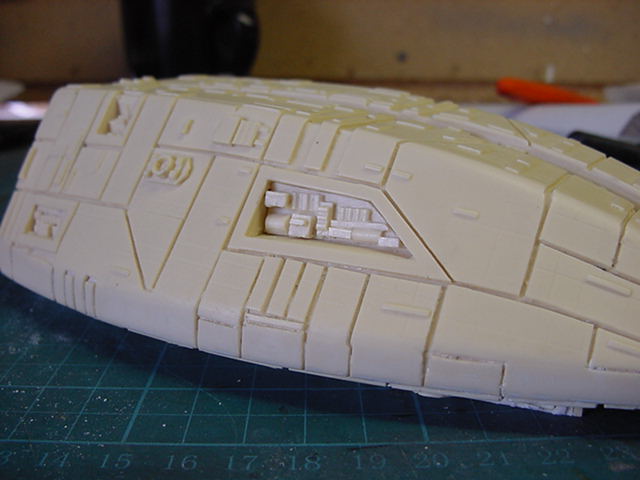
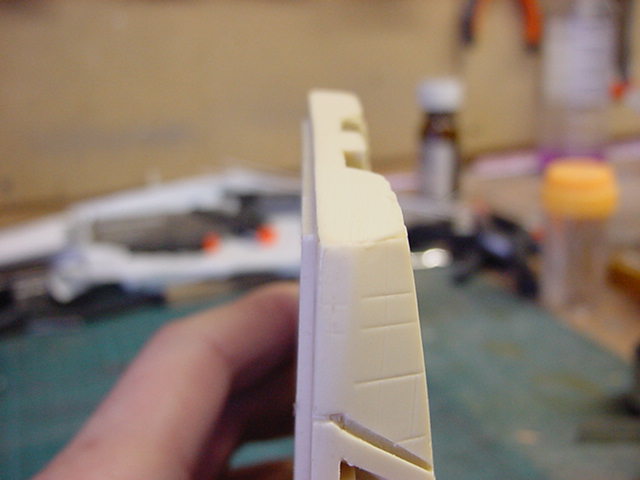
Ran slap bang in to a bit of a hiccup here.
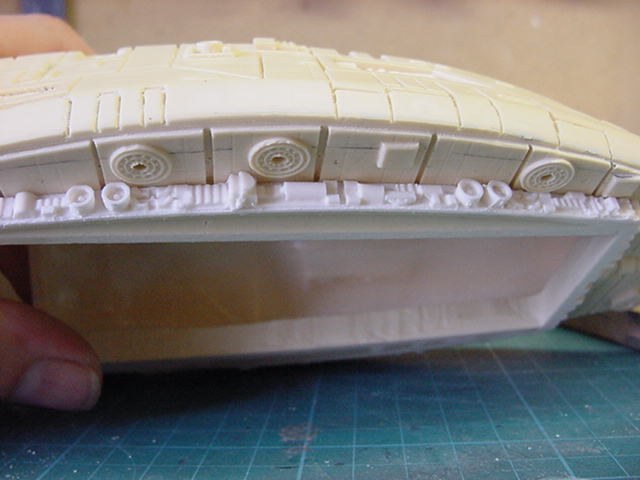
The large part that goes on the bottom of the front section.
Nothing up with the casting surface detail wise or what have you.
This is supposed to sit flat against the underside, problem being...
Flat was the one thing it wasn't.
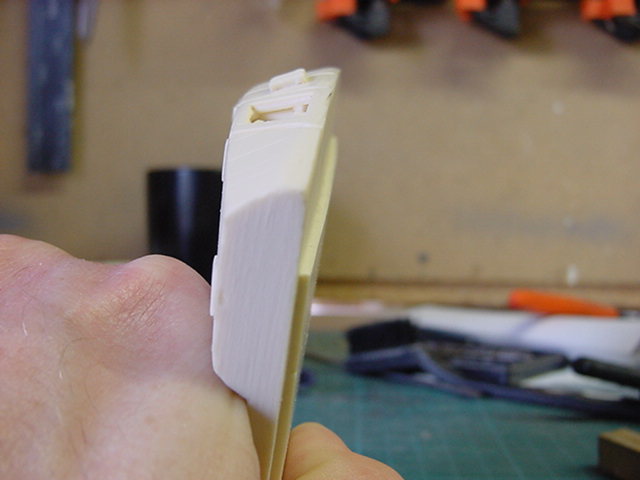
I can assure you that is not lens distortion.
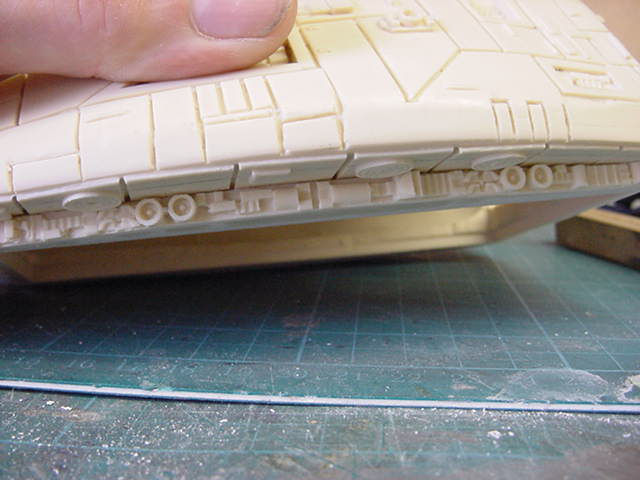
So to deal with, well it took a while but
something other than yours truly did most of the work.
I have one of them small toaster ovens in the hellhole.
Well useful for heating up etching chemicals or baking sculpey.
No longer any good for the midnight hot snack dept. sadly but that's life.
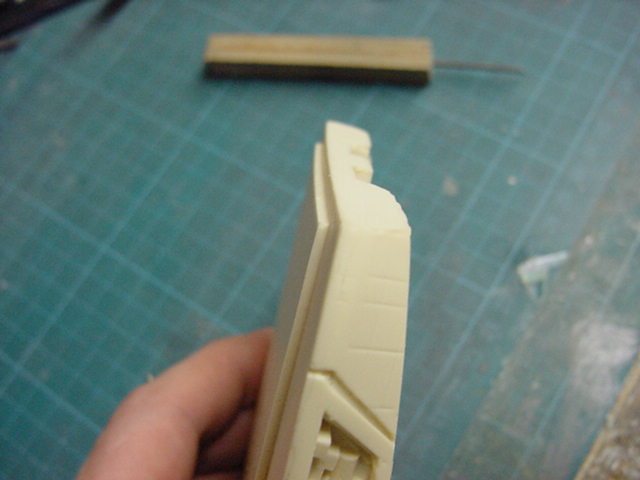
Anyways, two small slabs of 1/4" MDF with the offending part sandwiched loosely in between,
Reason for the MDF is so the heat from the elements doesn't hit the part directly.
Placed in said oven and start the heating on a low.
That's about 30 degrees C with this puppy.
Over the course of about 30 mins, the temperature was slowly raised
to about 50 degrees C then left for 30 mins with
the odd check to see no heat damage was occurring to the part.
It had not I am happy to say so oven gloves on after time up and get the part out.
Mmmmmm...toasty warm and home baked for that hellhole flavor,
just the way I like 'em!
So the part was then clamped to the bottom bit of MDF and left to cool down.
The result.
Better!!
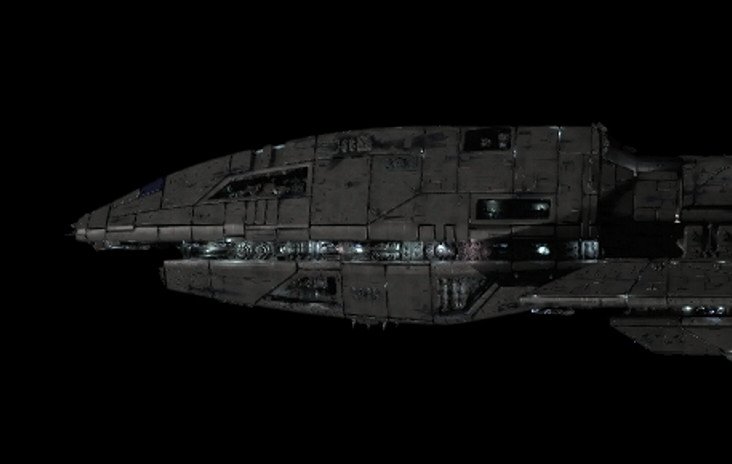
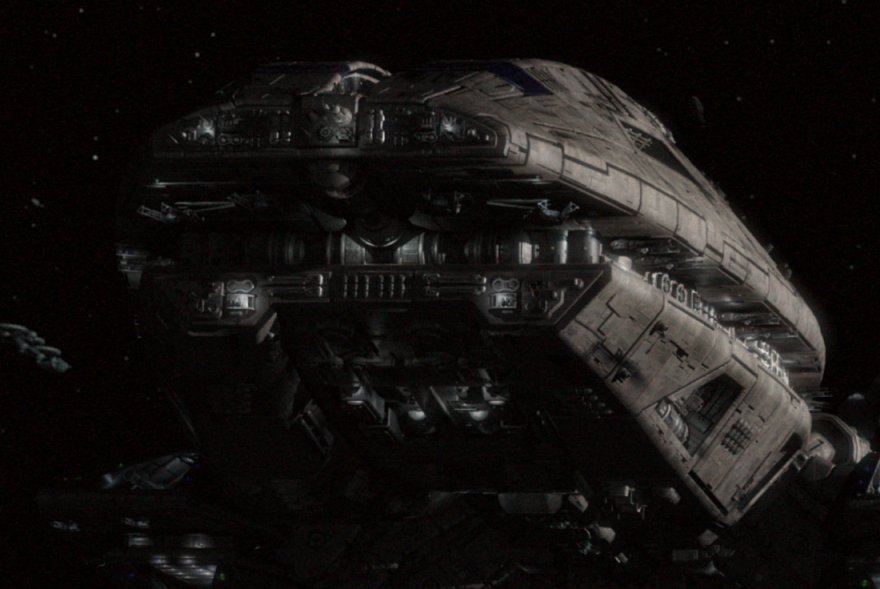
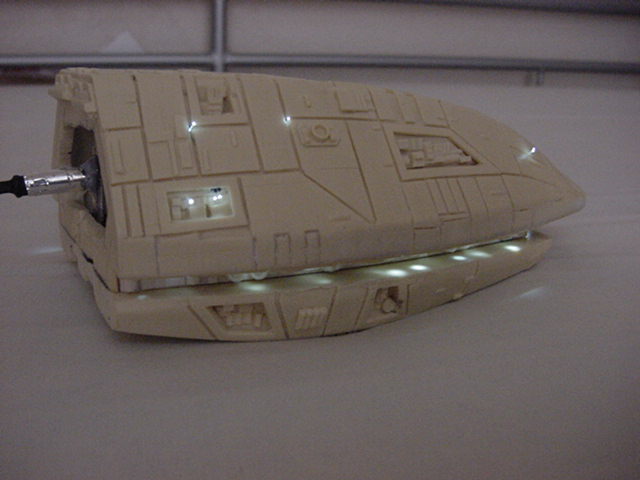
So now to the lighting laugh riot.
Thing is with some of the lighting on this beast, being that it was all CGI
the lighting seems to mainly consist of light 'splashes'.
That is to say you can see where the light is hitting
but where it comes from is, a lot of the time, not to be found.
Also the lighting seems to be just a little a bit
inconsistent at times as to what and where
though that may be just me.
Lovely.
A couple of cropped screen grabs and a part of a render should help illustrate.

Well this will need a bit of fiddling about.
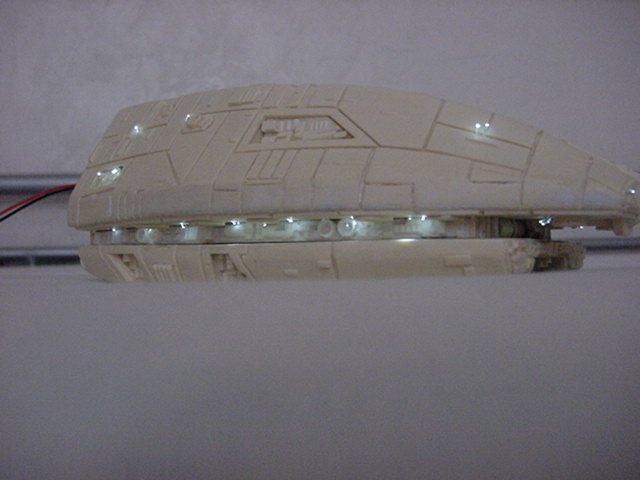
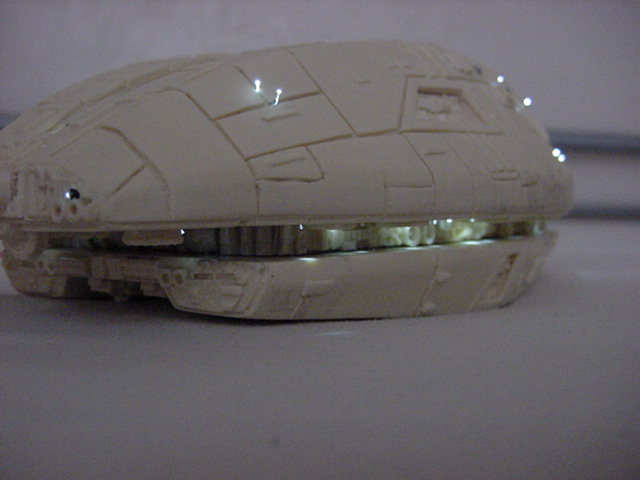
Time for a rake of fiber optic and some of my infamous 90 degree heat bending stuff!
A bit like this...
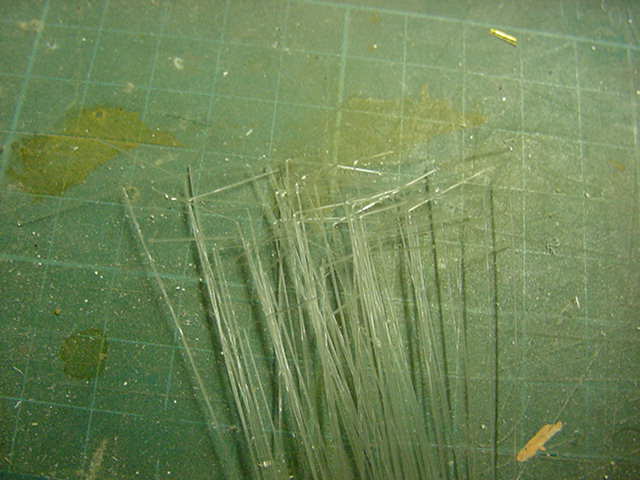
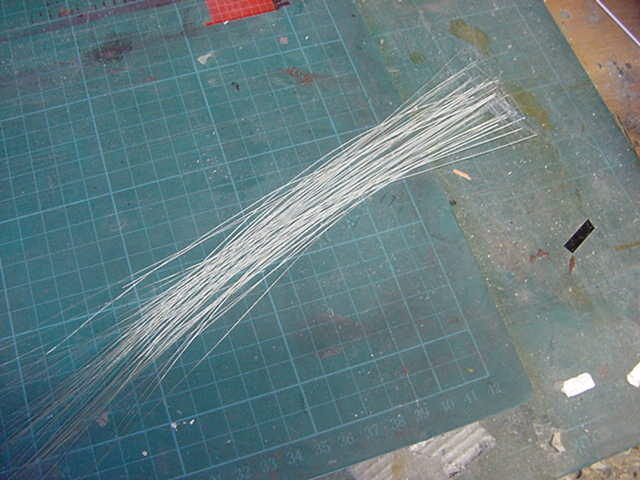
Some of which was separated in to three strand bunches
and glued into small bits of nylon tube.
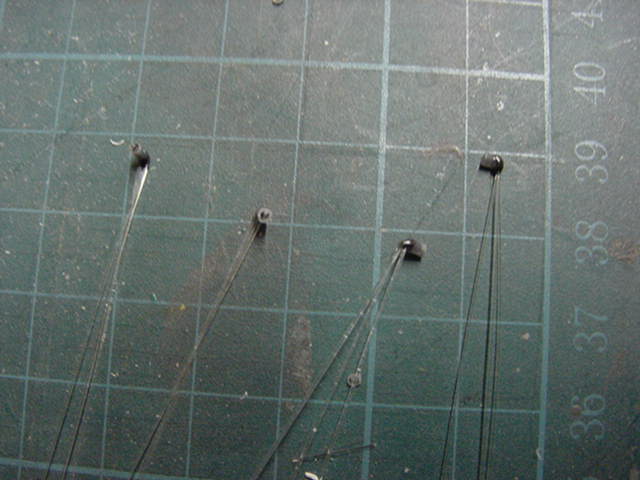
12 of them made up, eight for the top trench and
four for the two inset bits on the underside.
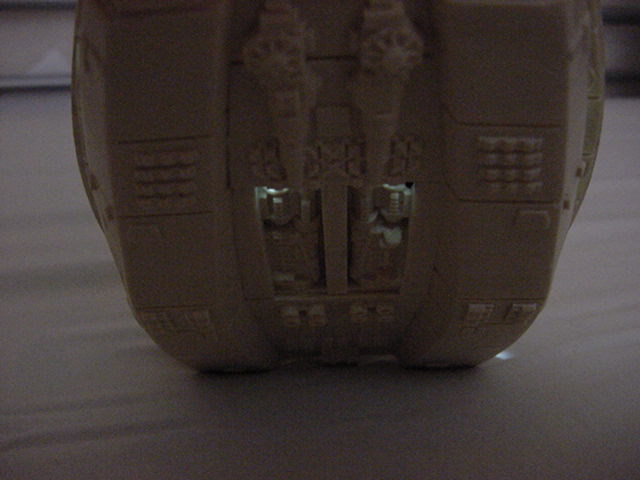
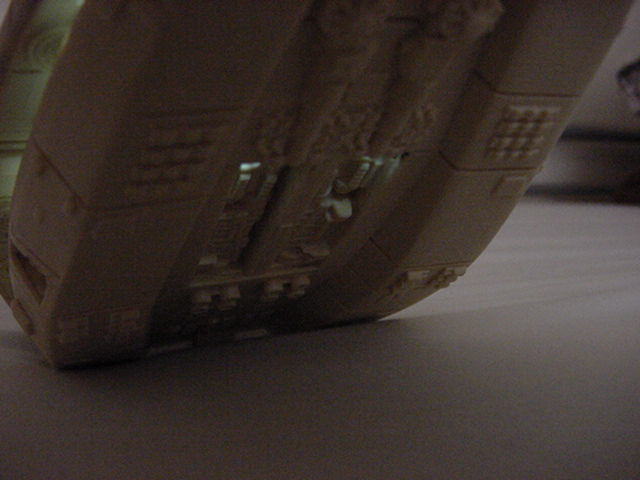
Straight strands set in to the underside of the edge trench for down lighting.
A fair few of the bent bits also in the same areas to cast light on the inset detail strips.
Due to the thickness of the resin along the top trench, the lighting that
appears to be windows or something all over the sides was left out.
It was a bit of an impossibility to drill all the holes required to
pull that off with the angles involved.
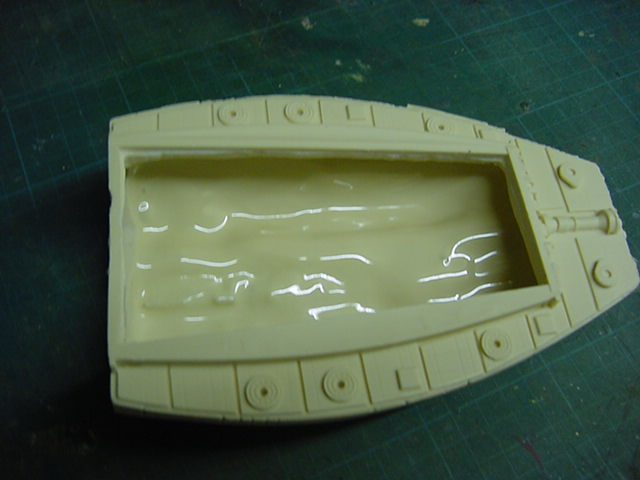
So then, mucho fiber sliding about and many a dab
of the epoxy stay put ya bugger gunk was slapped on.
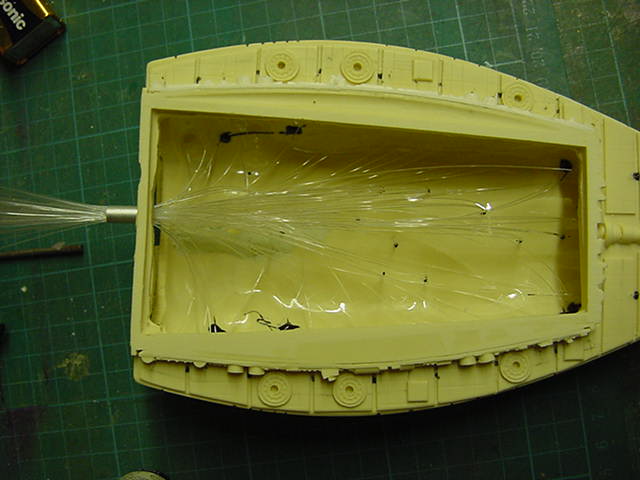
After which all the FO was slid through a short bit of aluminium tube.
A short slab of 2mm thick plastic with a hole drilled in
to take the tube was glued in to the rear.
Once all settled and the underside piece glued on,
some more epoxy gunk with a drop of enamel black paint
mixed and liberally spread about the FO at both ends.
Once cured, the business end of the deal was trimmed and cleaned up.
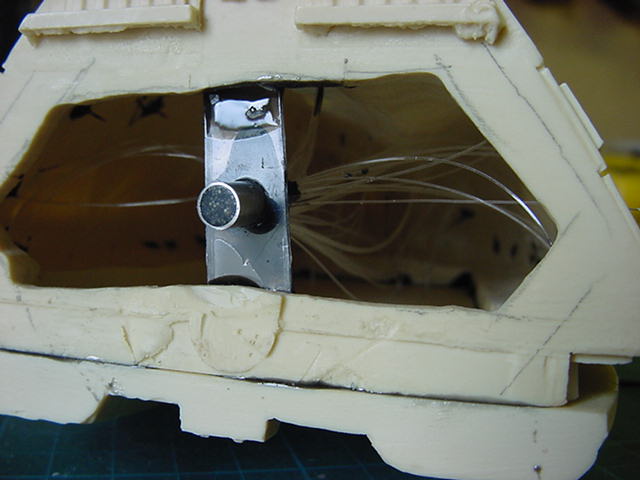
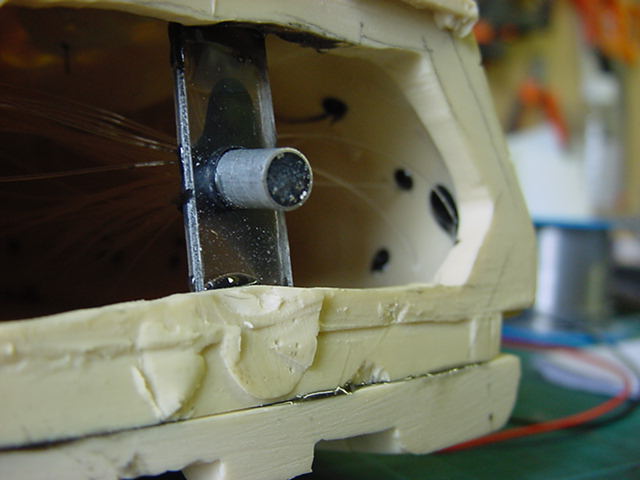
A painfully bright 5mm 32000mcd LED was brought into play then.
Jammed in to a short length of alloy tube and wired
up with a resistor then heat shrink tube insulated
around the resistor and a larger bit around the whole lot.
A short length of alloy tube the next diameter up was cut and this
would serve as a joint collar for the LED to the fiber optic end.
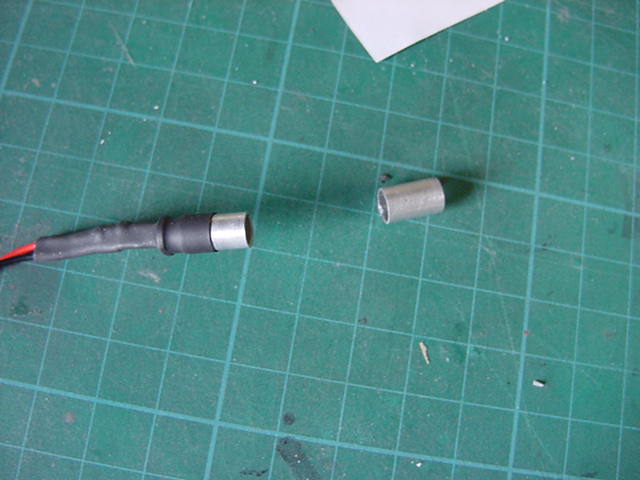
Clear epoxy glue and a bit of self adhesive aluminium
tape got that in position and going nowhere.
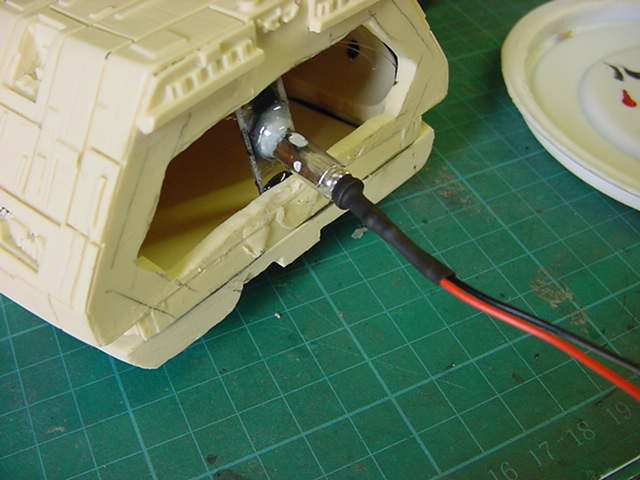
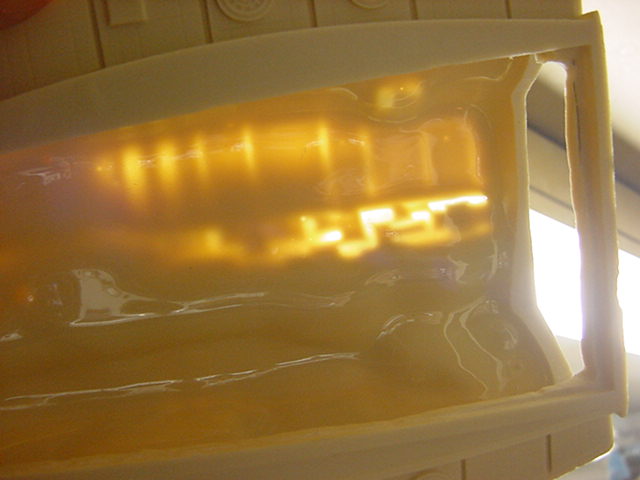
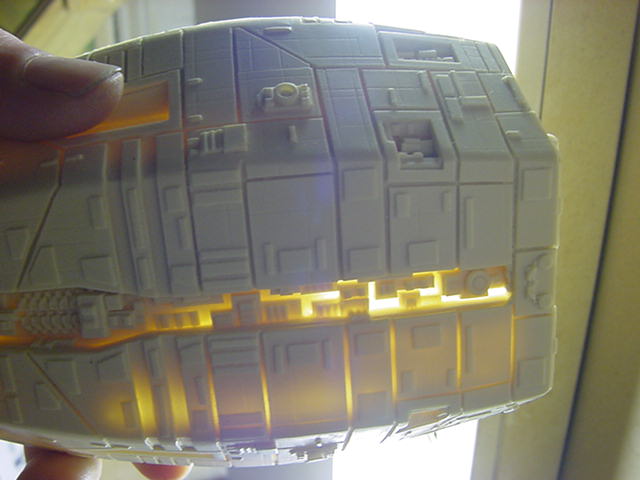
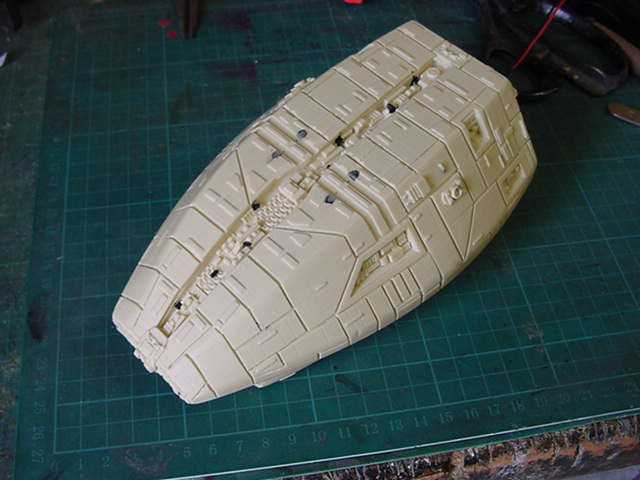
So front end build pretty much complete.
Much still to do and a lot of the fiber optic strands will
be tidied up after painting but as
done as needs be for now.
So how did all this work out I hear you ask?
Well not like I ain't asking the same thing meself
so out with the small block of 9 volts,
a trip indoors as it's a bright and sunny day and
I want to see how this all works out properly.
Oh you want to see some pics do ya?
Well since you ask nicely...
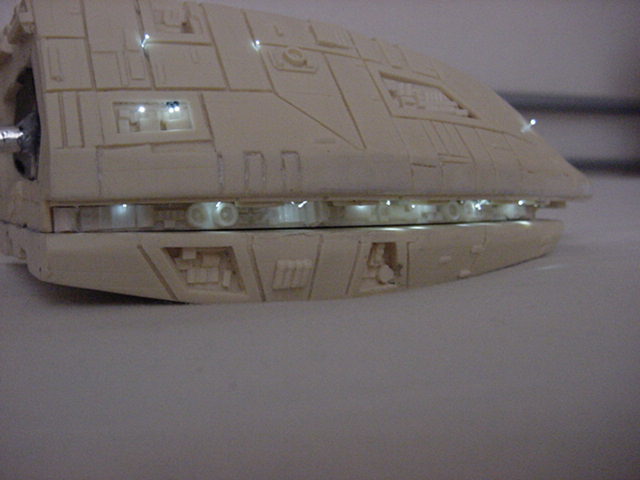
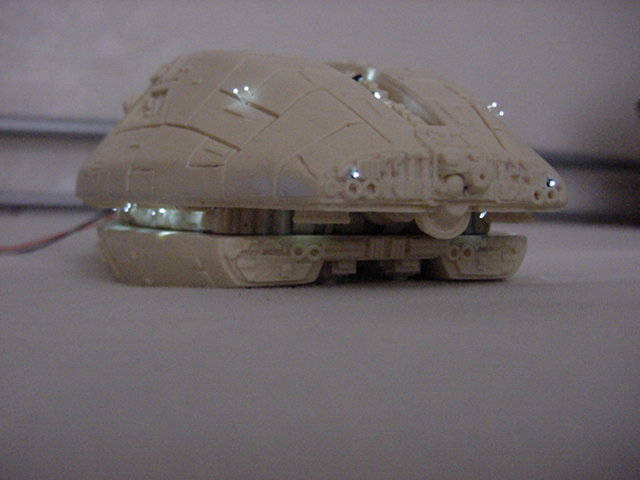
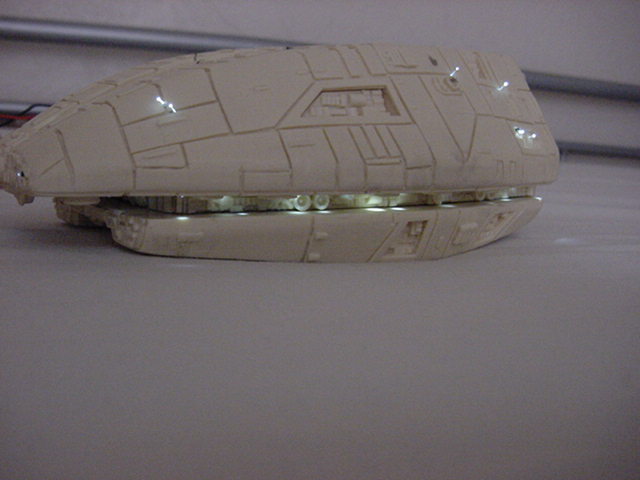

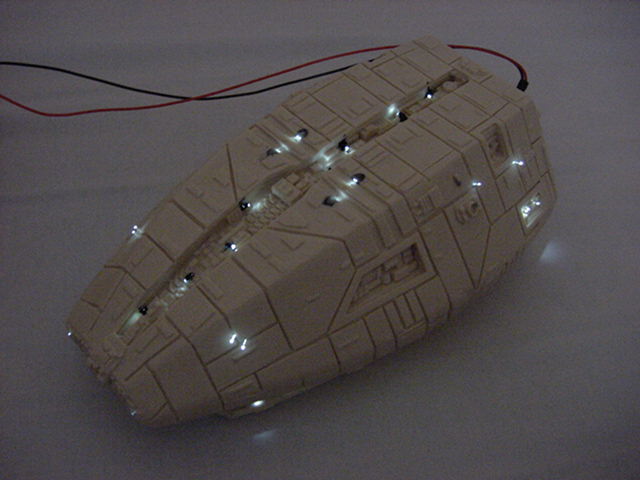
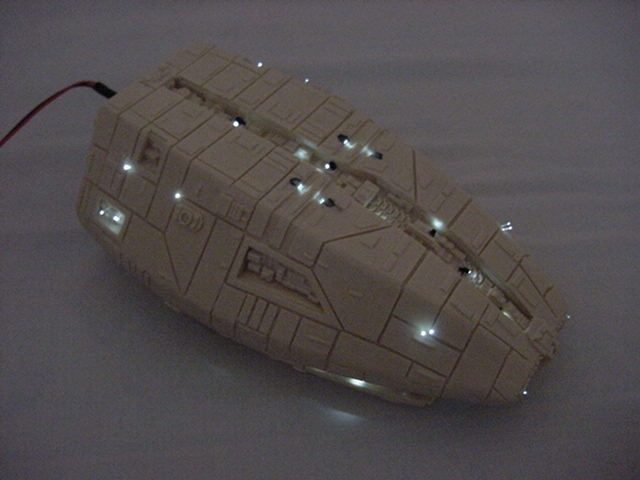
Well none too shabby there, not perfect but then
perfect and me have never really seen eye to eye.
Especially where resin kits are concerned.
Well that's all for now, engine finishing and landing bays up for the next updates.
Another pile of lighting laugh riots will go on there I can assure you!
Untill next time then, you merry mob take care of yaselves and go easy out there now.
Page Number