
Polar lights USS Enterprise NCC-1701
Star Trek The Motion Picture Refit
1/350th Scale


 Page Number
Sort of the middling part.
Saucer Lighting Shinnanegans...Part 2...Oh Lordy!
And welcome to the aforementioned next page...
Well now the top is sort of tackled, on to the bottom saucer spot lighting.
Now when we left it, the poor ole thing looked summat like this.

So then, plan is to have the front/rear spotlights
operate independent from the left/right.
That said, a divider of some description was needed.
So with some 2mm clear styrene,
a bit of strip on the top and some foil tape...


Now then me merry lads and lasses,
normally it would be a case of foil removal and backlighting ala top saucer spot lights.
Well thing is that when that kinds deal is done it looks ok
but you can't have the bottom saucer windows lit up
without the spotlights being on.
Summat that's always irritated me to a degree.
So then, after using that nice mirror plastic on the Silverstone diorama debacle,
I thought why not try it on this.
Thing being is that mucho light needs to be thrown
out of tiny holes and they just aren't big enough to get more than a couple
of 3mm LED's shining out of.
I had tried this and just was not happy with the effect.
A bloody nuisance so using the mirror plastic cut in a
strip and inserted at an angle with LED's shining on it and
directing it out said holes.
This way, each one is loaded with 3 to 4 LED's per light emitter.
So, four LED's to the front (2x5mm and 2x3mm) And at the rear, 3 x 3mm.
Much 'in the dark' faffing about followed...


Front one okedoke, rear too much.
So the rear one had the LED's re-positioned and the foil
removed and edges airbrushed with silver for the backlighting thing.
Sometimes it's a compromise but there ya have it.
So the rest of the lighting for left/right was built in the
same way and four diffused white 3mm LED's were added,
one for each so they would light up dim to begin with.
Read on and it will become clear...honest...
Much soldering, hot melt gluing and foil backed
card also used but the lot eventually closed in.


Sorted there, now to the window lighting.
Light box playtime ensued here, foil tape backed card,
white to the inside and this would be fed
with two 3mm diffuse LED's each, three light boxes in total.
So card scribed, cut, folded and glued with holes each end for the said LED's.
Windows filled with clear epoxy glue.
Then the boxes placed in position, taped down, LED's fitted and wired up.


Sorted and sealed, outer surfaces all sanded smooth,
time for the all important test.
Now i'm running these with just 9v batteries so the lights are
a bit dimmer than they will be running from a 12v 2.5amp
switched power supply which will serve as the main power for this beastie!
So first with lights off, then window/low level lights,
then front/rear spots and finally all on.


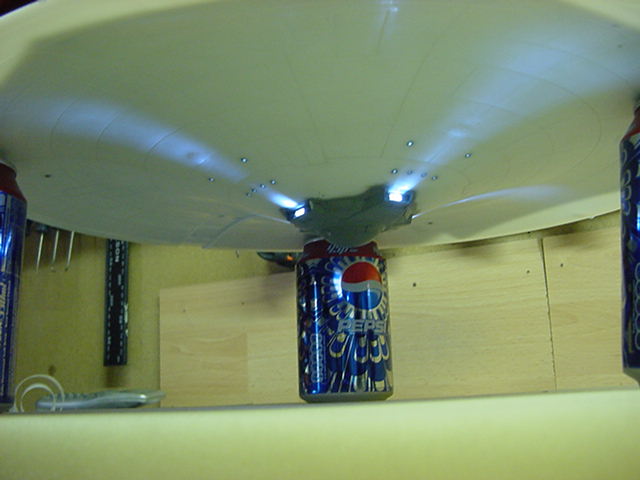

OK, now we gettin' somewhere.
So now that's the most difficult part of the lighting done,
the rest will be it's usual only slightly annoying solder encrusted self.
And that's all for this one at present, i'll be going all out on this untill
it's done so expect another update fairly soon.
Go easy troops and troopettes!
Page Number