
Polar lights USS Enterprise NCC-1701
Star Trek The Motion Picture Refit
1/350th Scale


 Page Number
Stuff to fiddle with.
Bits And Bobs Bashing Time
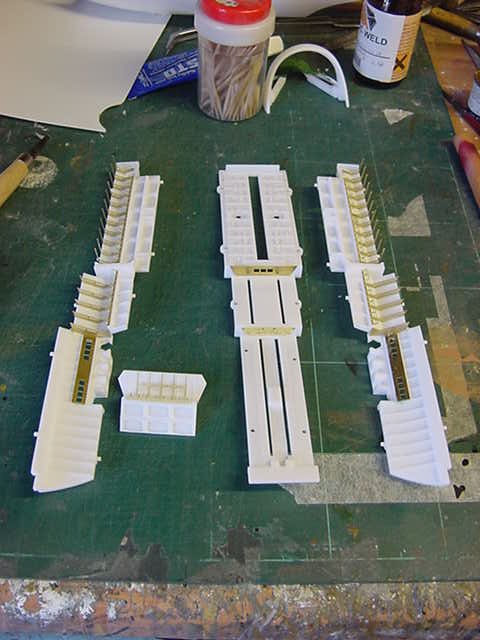
Ok then people,
here we are going to be doing summat with that rather nice
photo etch sheet and the hangar/cargo bay parts.
Well going by the destruction sheet with the photo etch,
some hacking and drilling is required so parts selected and off we go...

After a good look at said photo etch sheet,
the said parts were given a light rubdown with some 800 grit wet and dry,
a wee bit of cutting and duly removed from the sheet,
given a wash in alcohol and with trusty super glue in hand
it's time to get to it.


Kinda smart looking wouldn't you say?
All the parts such as the framing, hand rails and internal wall parts
were attached and things started to come together.
One thing here, the handrails are of course flat on the sheet
but each was bent inward slightly after attachment as that's how
they appear in the matte paintings during the SFX shots first movie.
Good enough for them so good enough for me.


And of course, there had to be the dry fit and good looksee about it didn't there...
well that's my excuse and i'm sticking to it.


Ok then, not too shabby at this point, more later when we get to the paintwork stage.
Which will have it's own fun times as I discovered it's
not completely white all over as the PL kit instructions say it is.
Never really occurred to me to look into this as this is the
first refit i've done with the cargo bay in it...
so I do learn something new every day.
It seems to be off white in the area at the rear where the shuttles land/take off
and where the workbee stations are but the main cargo part
and the entire roof appears to be a sort of grey/green colour.
For pics and the like to back up the research,
I don't think you can't get more correct than looking
at the pics of the matte painting used in the
SFX shots on the website of one Mr. Andrew Probert.
Which incidentally, the said page you will find by clicking right about here.
It will open a new window by the way.
A Curvature Correction Here Methinks!
While all that lot was doing the glue cure thing,
time to take a look at the fantail bit. Here is said bit...


Nice part but the top where you have the control room windows just don't cut it to me.
Here's how that bit should look...


The kit part seems to suffer from a lack of depth front to rear,
the top area too steep in angle and
the forward angle on the lower windows too shallow
at least to my peepers.
So out with some plasticard and put a fairly substantial lip on said part.

The lip is somewhat larger than the final shape will be but
that's a wee bit of insurance against possible mistakes during the
eventual carving and sanding that will most certainly happen.
Before proceeding I decided on a quick dry fit to
check how this part matched up to the shuttle/cargo bay floor
part and the secondary hull bottom part.

A bit of a gap thing going on here and for the
light hiding thing that is due along later and to make sure
it's all as flush as is possible,
a couple of strips of plasticard were brought into play and glued
around the end of the interior deck to get the gap closed
so I wouldn't have to use loads of filler later.

The dry fit says it be better so onward.
Last bit of faffing about was to apply mucho putty to
the top of the fantail part.


Messy but good once cured, then the fun really starts!
Well that's all for now from my end o' things,
you lot go easy and i'll catch thee at the next update.
Take care all!
Page Number